

Staining and sealing for protection from the elements
By Matt Weber
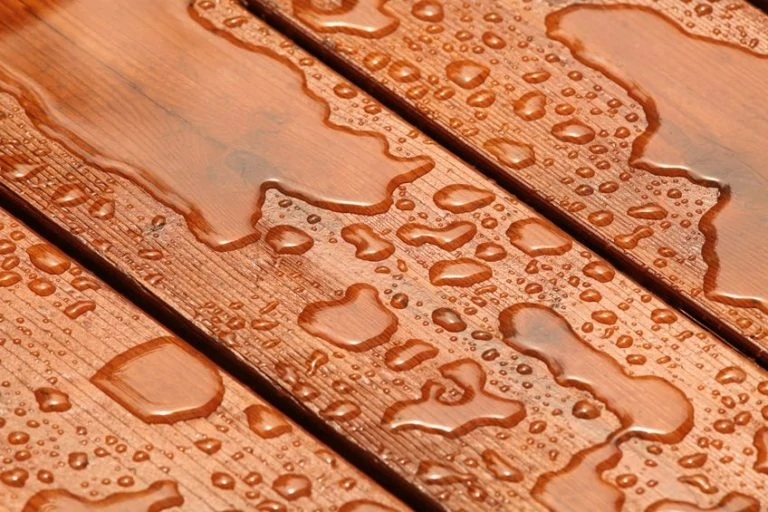
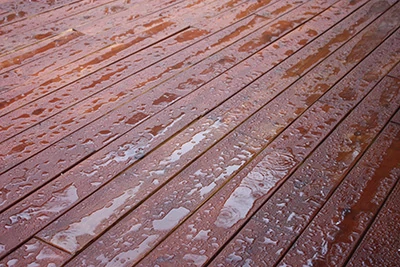
The best way to protect the look and performance of outdoor wood is to coat it with preservative. No matter what type of wood you have, whether it’s pressure-treated lumber, cedar, cypress, redwood or even a high-end exotic hardwood, staining and sealing outdoor wood is the best way to protect it from the elements

Coating Types
The most common outdoor wood coating is an exterior-grade penetrating stain. These water-repellent preservatives include a mildewcide, and some products contain ultraviolet light absorbers that protect from sun exposure. Available in both oil- and water-based formulations, the resins penetrate wood pores to provide pigment and block out the damaging effects of weather exposure while allowing the natural woodgrain and texture to shine through. The wood will look different after application but will feel the same to the touch.
The second category is a film-forming sealant that bonds to the surface of the wood like paint or shellac. Pigments are added to change the wood color and add UV protection. When applied to sanded surfaces, these products can provide a high-gloss furniture look, while still allowing the natural grain to show through. Available in oil- or water-based finishes, they form a durable beautiful, satin surface with a smooth-to-the-touch finish. However, they can only be maintained with another coat of the same film-forming sealant. If you want to switch to a penetrating stain, the old film-forming sealant will first have to be sanded off. Film-forming sealants should be avoided in areas exposed to foot traffic, because the abrasion can wear through the film coating.
Outdoor wood coatings are typically formulated with either water or oil. Most water-based stain/sealants have tiny particles of pigment and resin that adhere to each other very tightly as the finish dries, similar to a patchwork quilt. With oil-based finishes, the tiny particles actually fuse together chemically into one large sheet-like substance, which achieves a harder finish and is less likely to develop an amber color tone. Examine the product’s label for clues to the coating’s quality, looking for any reference to “non-yellowing” properties.
Water-based finishes are generally heralded for their ease of use. Compared to oil-based formulas, they’re easier to clean up, have a lower odor and are often less expensive. However, most water-based coatings require more coats and still don’t last as long as their oil-based or “alkyd” counterparts, which generally provide more long-term, wood-preserving durability.
New Wood
Allow new wood to dry before staining or sealing. Drying the wood is particularly important for pressure-treated lumber because the waterborne preservative leaves moisture in the wood.
This is why fresh PT lumber often arrives wet from the supplier, and the moisture can impede the penetration of stains and paints. For best performance of paint and stain coatings, allow the treated wood to dry for 2 to 4 weeks prior to application. Estimating exactly how long treated wood will take to dry is difficult, and a lot depends on how much time has elapsed since the treatment, the lumber’s exposure to the sun, ambient weather, etc.
Wood with natural preservatives, such as Western Red Cedar, cypress and redwood, do not require as much drying time because the wood was never pressure-treated with a preservative.
Contrary to popular belief, new wood still needs to be cleaned to remove any “mill scale”, which is a compression of the grain during the milling process that can cause the stain to float or run off without absorption. Clean the surface with an oxygenated bleach.
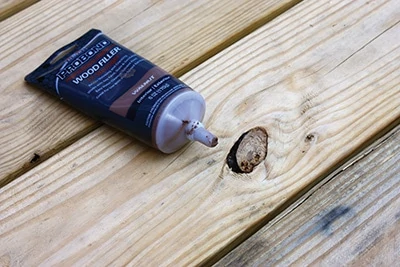
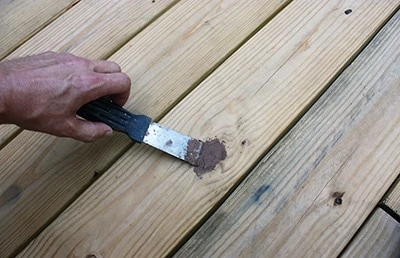
Here’s another tip for new wood used for horizontal surfaces like decking and handrails: Fill any knots and imperfections with exterior wood filler. A low spot such as a porous black knot in a pine deck board makes a prime place for water to accumulate with no drainage. These are the weak spots in the armor of your wood protectant where pools of moisture will have the most time to seep into the grain and work its damaging magic. So, patch these areas with a putty knife and non-shrinking exterior wood filler for a flush board surface with better drainage. Most home centers will have tinted wood filler to closely match your wood stain of choice.
Weathered Wood
When wood is exposed to the sunlight, the ultraviolet rays can damage the wood fibers over time, causing the surface to turn gray, and this holds true for any wood species. The most direct way to renew the appearance is to sand or pressure-wash the surface. However, sanding can be very difficult and time-consuming, and pressure-washing can remove the gray but cause the surface to fuzz or splinter, posing a “touch” hazard for areas such as deck surfaces where people may walk barefoot. When using a power-washer, limit your pressure to no more than 1,000 or 1,200 PSI.
Some individual boards may be heavily weathered. Replace them completely, clean the existing boards, then stain them all to match.
Wood with Old Stain
In general it’s best to remove old stain before applying new stain, especially if changing products or colors. Old stain will usually show through the new stain, leaving blotchy spots in the finish. “Film-forming” stains must be completely removed before applying a penetrating stain. However, if you plan to stick with the same color and type of stain (and your deck is in decent condition) then you can probably get by with a thorough cleaning and a fresh maintenance coat. As always, refer to the manufacturer’s recommendations for best practices.
If there is a buildup of old stains on the deck, then you may need to remove it with something stronger than an oxygen bleach cleaner. Stain strippers are more caustic, but they remove most weathered stains in a single application. Small, stubborn spots of stain can then be removed with a hand sander once the deck has dried.
Conditioning
An often-overlooked step for outdoor staining projects is the application of a wood brightener. These chemical agents open the woodgrain to improve penetration of the stain and help restore the appearance of weathered wood to a like-new condition.
The product can simply be sprayed onto the wood surface, given a few minutes to work its “magic” and then rinsed off, requiring very little labor.
After using any chemical treatment to clean and prepare the wood, use plenty of water to completely remove all traces of the products—and then allow it to dry prior to stain or sealer application.
Application
Always thoroughly mix the stain to evenly blend the solids and ensure a consistent color tone throughout the project.

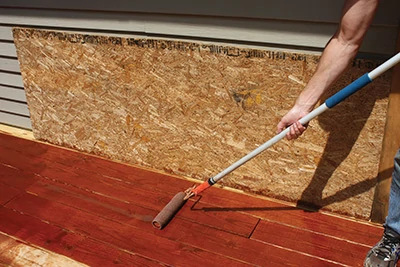
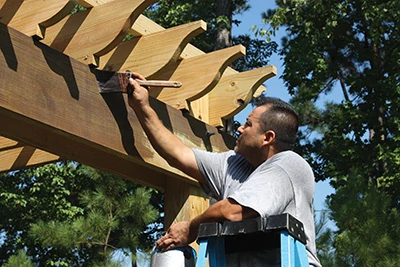
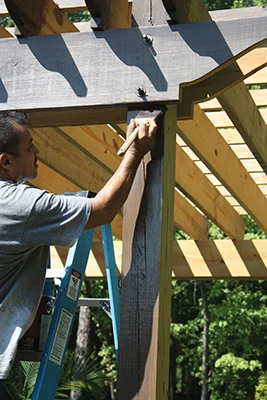
For both horizontal and vertical structures, brushing is the best method for stain/sealer application because the bristles push the product evenly into the woodgrain to increase absorption. Using a sprayer or roller can apply the stain more quickly, but both of these methods leave much of the stain on the surface without adequate penetration into the pores. If the product doesn’t adhere well it can wear away unevenly, so you should still back-brush it into the woodgrain for the most consistent appearance and best protection.

Finally, here’s a quick note on the use of staining pads. I love the idea in theory: apply the stain in an upright position using an extension pole while simultaneously working the stain into the woodgrain. The trouble is that I’ve experienced a lot of trouble keeping the sponge pad on the applicator, almost as if the oils in the wood stain were dissolving the glue on the pad. After the pads have detached, I’ve even tried to reattach them to the applicators using zip-ties, but that just leads to a lot of cursing and aggravation and simply does not work. So, I don’t personally use staining pads because I can’t find one that lasts. But I’d like to be proven wrong. If there’s a manufacturer out there who makes a better staining pad, then please send one to the Extreme How-To staff and set us straight.
