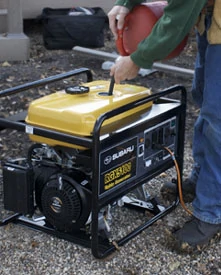
Use care when refueling to prevent dust and dirt from entering the tank.
As spring arrives, the weather gets nicer, the sun is up longer, and homeowners everywhere are eagerly anticipating the best part of the season – DIY projects. Time to get outside and build a new bookshelf, cut tiles for the kitchen backsplash and finally get around to building that pergola you’ve been dreaming about all winter. Considering all the power tools involved for most DIY projects, a little help from a portable generator is typically a requirement on most home worksites. And just like all other tools, a generator needs basic care to keep it in prime operating condition. Following these 10 simple maintenance tips will ensure the generator is ready to power every project for the rest of the season.

1. Don’t Be Foiled by Oil
Check the oil before each use. If the generator is new, the oil must be changed after the first 20 hours of use to remove assembly lube and metallic particles created during the break-in period. Thereafter, change the oil every 100 hours.
2. Prevent Filthy Fuel
Dirty fuel is a result of improper storage or refilling tanks in dusty conditions. To prevent this problem, store fuel in an OSHA-approved receptacle and keep out of high traffic areas. Also, avoid refilling in windy conditions where dust is more prevalent.

3. Clear the Air
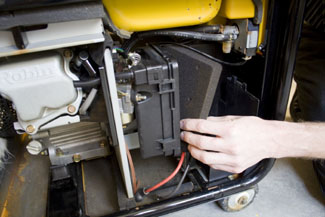
Check the condition of the air filter daily. Always clean the filter every 100 hours and change it monthly.
4. Keep it Clean
Cleaning the engine removes potentially harmful dirt and gives the operator a chance to spot service concerns. Never use a pressure washer as it could cause more harm than good. Instead, use warm water at a low pressure to rinse the engine and dry the outside immediately afterward.
5. On the Lookout for Leaks
When the equipment is clean and dry, check for any signs of fuel leakage. If a leak is spotted, tighten the parts causing the leak or replace them immediately.
6. Hang Tight
A clean engine will also reveal any obvious damage and loose parts. Take time to tighten loose parts that could vibrate and potentially harm nearby components.

7. Don’t Lose that Spark
Inspect the spark plugs every 50 hours for damage, dirt and excessive carbon build-up. If necessary, clean with a wire brush or spark plug cleaner. Immediately replace any plugs with cracked porcelain.
8. Avoid Strainer Strain
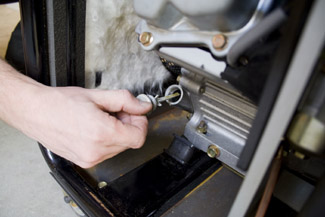
Clean and inspect the fuel strainer and fuel filter every month. If there is sediment in the fuel strainer, shut off the fuel-line valve before cleaning. Then, remove, empty and clean the sediment bowl and clean the filter screen. If sediment has made its way into the tank, all fuel will need to be removed. Clean the residue from the sediment reservoir, which is the lowest point in the tank. Use a clean rag to wipe sediment from the filter element and the sides of the tank before refilling.
9. Annual Inspection
On an annual basis, take the time to conduct a general inspection of the generator. Look for any dirty, broken or misaligned parts. Check the fuel hose each year and replace if there are cracks present.
10. Don’t Let It Sit
If the generator needs to be stored for an extended period of time, be sure to exercise it every two to three months. Start the generator and let it run for at least 10 minutes while carrying a load.
Regular maintenance will ensure the generator is in prime condition to keep the power flowing today and throughout the rest of the season’s home improvement projects. Now if only it could build that pergola too.


