By Larry Walton
One of my favorite home projects is building a new concrete walkway. It could be because I grew up on the west side of the Coast Range in Oregon where rainfall can reach 200 inches in a year. With conditions like these, it doesn’t take many foot falls for sod to become mud. Whether you are walking around the garage to roll the trash bins out to the street or you’re headed out to the green house, you’ll have an appreciation for a new concrete walkway.
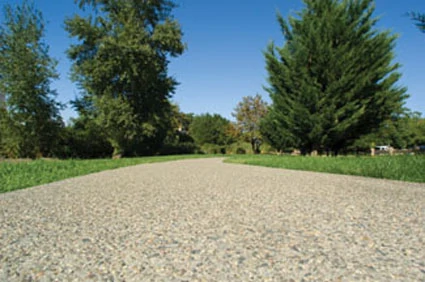
Anytime you do concrete work you have the privilege of choosing the type of finish the new concrete will have. Exposed aggregate can be a good choice, especially if you are matching existing concrete or making a purposeful contrast to another finished surface.
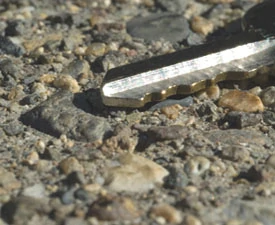
Aggregate is the sand and gravel part of the concrete mix. It’s what the cement bonds to, and it gives the concrete substance and strength. Smooth, stamped or broomed concrete hides the larger pieces of gravel below the surface. The exposed aggregate method removes the top fine layer so individual gravel pieces are visible on the surface.
With the exception of the concrete mix you order, the setup for exposed aggregate is the same as with other finishes. “There’s nothing in particular you have to do, whether it’s broomed, stamped or exposed,” says Matt Villers of Washington-based Concrete Specialties Inc. (CSI). All of the standard concrete walkway steps apply.
Concrete Basics
Anytime you are building a walkway, consider the lay of the land and how water will run off. For proper drainage you’ll need a 1/4 inch of fall for every foot of walkway. For example, one side of a 4-foot wide walk should be 1 inch lower than the other side in the direction that carries water away from any structures. Most of the time water will drain into a lawn, flower bed or driveway.
Unless code requirements dictate otherwise, walkways should have 3-1/2 inches of compacted rock base under 3-1/2 inches of concrete. This thickness means you can use 2-by-4s for form boards. You may wish to use 2-by-6 form boards to produce a 5-1/2-inch thick walkway section for areas that will be driven on, such as where the walkway intersects a driveway.
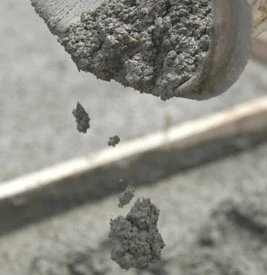
Keep back-fill behind the forms at a minimum because you’ll strip the forms early. You also need to make provision for cement-laden water to drain away from the walkway as the aggregate is being exposed by washing.
The Pour
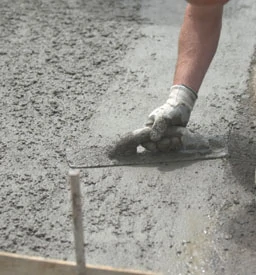
As with any concrete pour, make sure you have everything ready before the truck arrives. Forms should be complete. You’ll need rubber boots, shovels, wheelbarrow, screed rod, bull float, mag float, edge trowel and joint trowel. You’ll also need a water hose with good pressure and a spray nozzle that shoots a tight pattern without dripping. I don’t do enough concrete work to own a bull float so I rent one.
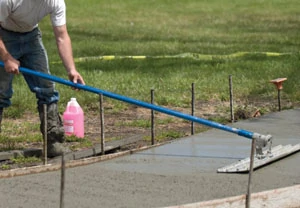
When you call the ready-mix company to order the concrete, be sure to tell them you want an exposed aggregate mix. They should offer some options in terms of aggregate size. Availability varies but you will probably at least have a choice between pea gravel and 3/4-inch, or a mix of the two. The ready-mix company probably has samples you can look at. They’ll tell you what they recommend and why.
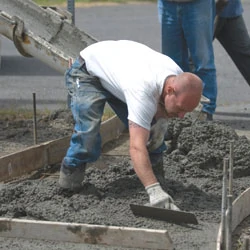
Once you start pouring, make sure you and your crew are consistent in how you lay down the cement. The aggregate is not exposed until you expose it, which means it’s there, but you can’t see it until the job is nearly complete. Treating all regions the same ensures consistent results in the finished product.
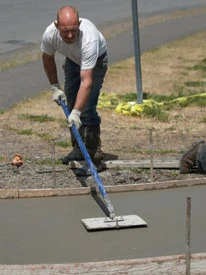
The aggregate is both gravel and sand, but the concrete mix you ordered for your exposed aggregate job was chosen for the size and shape of the gravel pieces, which, to the naked eye, is the part that will be exposed. How you work the concrete mix when it gets between your form boards may determine how consistent the gravel pattern will be, and to some degree how flat the finished job will be.
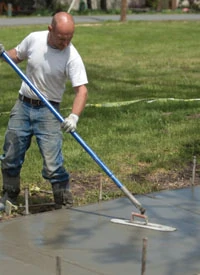
As you “rod” the concrete, or in other words, level it with a screed rod (I just use a 2-by-4) as it is being poured, the gravel near the top is being pushed down. This pushing down of the gravel continues during the bull-float process and the mag-float part of the finishing job. As the gravel goes down, the “fines” or “cream” rises, which means you are creating a layer of concrete at the top with sand only as the aggregate. This is a good thing for smooth- and broom-finish jobs, but not so good for exposed because you have to cut deeper to get to the gravel.
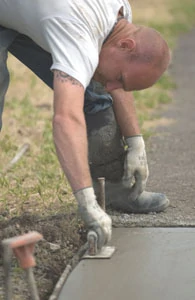
As you can imagine, inconsistency in rodding, bull-floating and magging can cause unseen differences in the gravel level within the pour. Unseen, that is, until you start washing the surface.
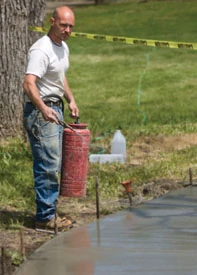
Therefore, consistency is one of the keys to a good finish job in exposed aggregate. Rod it the same way throughout the pour. Bull-float the entire job in the same direction, with the same number of passes and with just about the same pressure. If you have a low spot, sprinkle in more whole concrete mix, don’t just rake in some fine material from the top. Try to be consistent throughout with the mag-float, edgers and jointers.
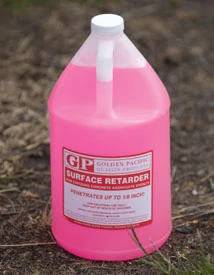
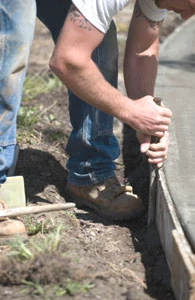
Once the entire job is smooth, edged and jointed, you are ready to apply some releasing agent. Commercial chemicals are available, but some old school guys use a mix of molasses and water.
Exposure
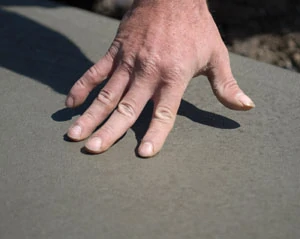
Next, test for washing. My friend Shawn Joslin pushes on the surface with his finger tips. If he doesn’t feel movement in the gravel underneath, he knows it’s ready. Villers teaches his guys that it’s never too early to start spraying, which is his way of saying “don’t be late!”
There is such a thing as too late when it comes to exposing aggregate, and often the difference is how much you want to work. Start it too late and you’ll be bringing stiff-bristled brushes to the game to help the hose. Get the timing right, and it’s almost as easy as washing the driveway.
Test the area where you started pouring and see what it looks like. If you can’t avoid blasting gravel out of the walkway, then it’s a bit too early. When you can proceed without rolling gravel down the walkway, it’s time.
Carefully strip the forms and go for it. Systematically move to the adjacent area as gravel in the impact zone is exposed but not removed. Handle your spray in a way that doesn’t create a streaking pattern. Go over the entire project once, and while it is still wet see if you need to feather in any sand spots or clean up cloudy areas.
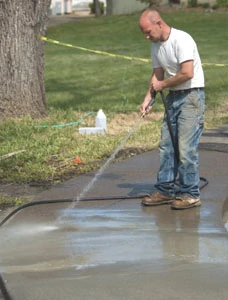
After it’s washed and everything looks consistent, spray on a sealer or curing compound. This is particularly important for exposed aggregate finishes because the washing process can weaken the surface. Villers recommends a good water-based product with low sheen, which has the advantage of being less slippery when wet. Follow the timing and application techniques for the product you select.
As with any concrete project, put up barriers or caution tape to keep traffic off until the walkway has cured for a few days. Exposed aggregate appears to be ready for use right away, so don’t expect kids and critters to recognize that it’s fresh.
Side Note 1
Recycled Concrete Base
Matt Villers of CSI recommends recycled crushed concrete as a base for exposed aggregate walkways. “When you hose it and wack it, it’s almost like you’re walking on pavement,” says Villers. Translation: When properly applied with water and compacted, recycled concrete makes a very stable sub-base for concrete walkways.
“It’s usually 25 to 50 percent less than the cost of crushed rock. Plus, people like to recycle,” says Villers.
Ask your ready-mix or sand and gravel company about recycled crushed concrete. Save money while saving the planet.
Side Note 2
Rules and Regs
Check on permit and code requirements before beginning your walkway project. If your project is a sidewalk along a public street, there are probably very detailed requirements in width, slope and finishes. Most municipalities specify the angle at which a sidewalk meets a driveway to avoid steep climbs for neighbors with disabilities. Plans must be approved, and often an inspection is required before you pour the concrete.
Community covenants may also be specific about the type of concrete finishes you can use in the areas in front of the house. Often these rules require the use of exposed aggregate for walkways or for driveway borders and bands.
Side Note 3
Rethinking Repairs
If you’ve done much concrete finishing you’ve probably dealt with fixing a foot print, dropped tool mark or some wayward dog prints before the concrete has set. Normally you just take some extra fines off of the tail of the trowel or from the edges of a form board and fill in the depression—not a good idea for exposed aggregate. If your repair material contains only fine sand and no larger aggregate, the depression will reappear during the washing process. Any fill-ins or repairs must include rocks in order to blend in with the rest of the pour after the aggregate is exposed.
Side Note 4
Landscaping and Other Hazards
Green (uncured) concrete is susceptible to staining. Be careful not to get mud or landscaping supplies on the new walk. Stains at this point may never come out. Wait 10 days or so before landscaping around your new walkway.
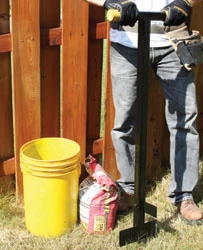
Mortrex Portable Concrete Mixing Tool
The Mortrex Concrete Mixer is a portable tool to mix concrete for all sorts of indoor and outdoor projects. This manual mixing tool is designed to replace the need for big, messy wheelbarrows that are cumbersome to maneuver across rough terrain and are impossible to transport up and down stairs. The patent-pending Mortrex tool, when used with a 5-gallon bucket, allows a single person to mix concrete in less than half a minute and easily carry it to where you need to go. Simply rinse off your bucket and tool when you’re finished. No matter where you take it, you will not need electricity or batteries to power it. Visit www.mortrex.com.
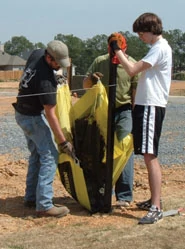
Cretesheet Concrete Mixer
If mixing your own small concrete pours, say for setting posts or building a shed foundation a CreteSheet can be used to mix pre-mixed concrete. Touted as “the world’s simplest concrete mixer,” the CreteSheet is basically a wide, thick plastic sheet with four handles. To use, simply pour in the concrete mix and add water according to the mix instructions, then grab the sheet by two of the handles, and have a helper grab the other two. Roll the mix back and forth until it achieves a cookie-dough consistency. It easily and quickly mixes an entire 80-pound bag per use. Visit www.cretesheet.com.


