


Pocket doors have long been popular because they “disappear” into a wall, so there’s no swinging door in either adjoining room. The “disappearing” aspect of the doors presents a neat aesthetic option to a home, and for certain floor plans this feature is critical to avoid doors that interfere with the natural flow of foot traffic. The space-saving design of a pocket door can be a handy solution for small living areas, such as bathrooms, where a hinged door might occupy too much floor place.
A pocket door slides into a frame of metal and wood that is installed when the wall is constructed. In place of solid studs, the pocket-door frame utilizes “split studs”—one on each side of the door—which the door slides between to open and close.
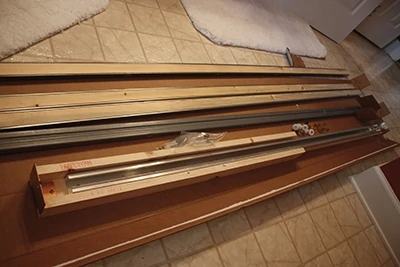
Today’s pocket-door kits include all the framing components and hardware necessary to complete the installation. For this project, we used the 1500 Series Pocket Door Frame from Johnson Hardware.
Design Options
These days, pocket door hardware is sold in kits with all the components you need for installation. You can buy a kit that includes the door, but the hardware will typically work on any door— solid or hollow core or flat or paneled—that is slim enough to fit between the split studs. Pocket door hardware kits are usually available for doors 1-1/8 inches to 1-3/4 inches thick by 6 feet, 8 inches high. Look for a high-quality pocket door frame with durable hardware.
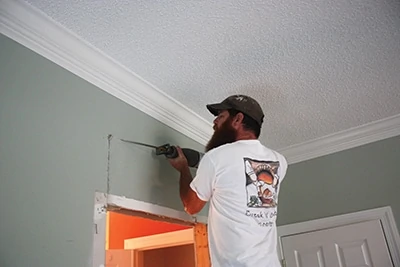
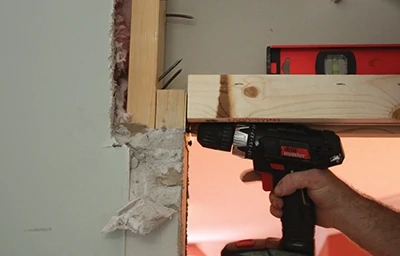
For a retrofit, cut away the wallboard in an orderly fashion that minimizes airborne dust and the related mess.
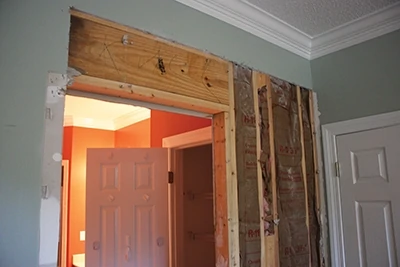
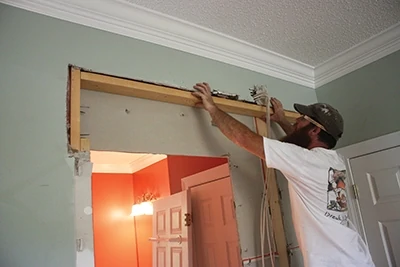
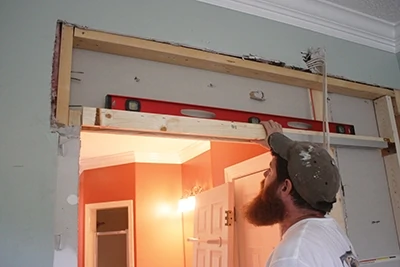
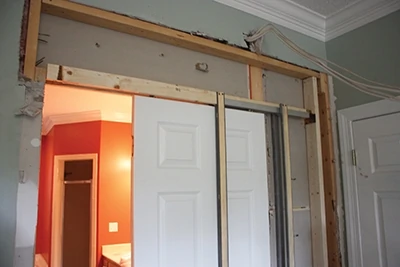
Shown is the existing wall frame that must be removed and rebuilt to the rough-opening dimensions specified by the pocket-door kit.
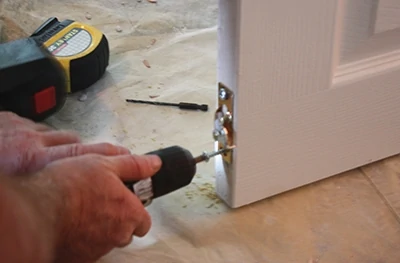
If you’d like to repurpose an existing door as a pocket door—no problem. You can remove the door knob and replace it with a recessed handle in a wide array of styles and finishes. The recessed handles fold flat against the door to fit between the split studs. Instead of a door latch, you can remove the lock mechanism and replace it with a flip-out metal pull, so you’ll have a handle to tug the door closed when it’s fully recessed in the open position. You’ll also find options such as “soft close” actuators as well as kits that hide the door-guide hardware.
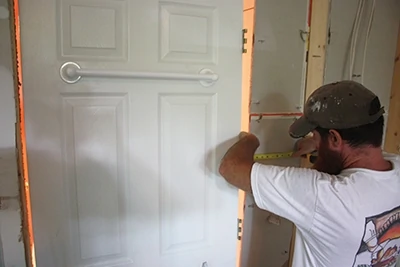
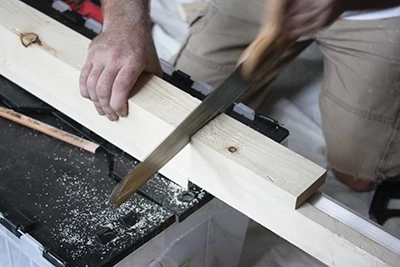
The plan for this project was to reuse the existing paneled door as the pocket door, which provided a baseline for measuring the pocket-door frame.
To order a single pocket door, first determine your door size (door width, door height and door thickness). Next, select a frame kit that accommodates your door size. Keep in mind that if you don’t see your exact door size, the frames can be cut down to accommodate a smaller size door. Just order the next larger frame size for your door and follow the instructions.
Remove the floor plate for the rough opening and construct a new door frame according to the kit’s instructions.
Although pocket doors are usually built when the wall is framed, you can always open a wall and reframe it for a pocket door, as shown throughout this article. When planning the project, keep in mind the various application options, particularly if installing two doors. For example: Will two doors butt together in the middle of the opening? Or will they be built as bypass doors that slide past each other on separate tracks? Your answer will determine the frame kit you need.
Single-Door Installation
Generally speaking, pocket doors all install in the same way, but there might be discrepancies between the kits of various manufacturers, so read the instructions before beginning. It is critical for proper door operation, however, that the frame is always installed square, level and plumb to the wall studs.
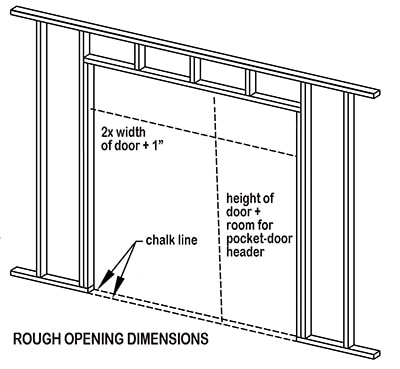
First install the header of the rough opening, which must allow for the height of the door plus room for the pocket-door header that contains the door track.
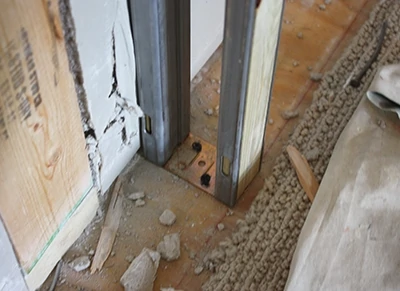
For a retrofit project, you first must demolish the existing wall in an orderly fashion. If it’s covered in drywall, expect to generate a lot of dust, so protect the surrounding living area. Rather than bashing the drywall with a hammer, cut it out in large sections to reduce airborne dust. You’ll need to remove all the existing studs, plates and sills, as well as any electrical and plumbing.
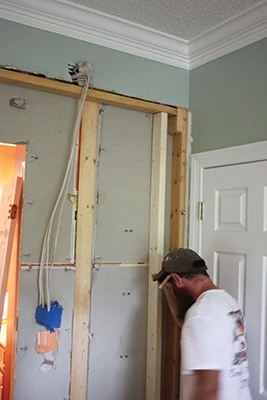
New studs form the side jambs of the opening.
Using 2×4 studs, frame a new rough opening to fit the dimensions for the door jamb indicated by the manufacturer of the pocket-door kit. Note that any load-bearing wall will need the ceiling above it to be adequately supported during remodeling, and a new load-bearing 2x header must be constructed above the rough opening.
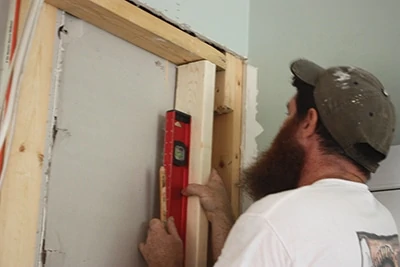
Make sure the opening is square and plumb.
Cut the pocket-door header to size according to the door size. The kit instructions will explain this in more detail.
To help guide installation of the frame, snap a couple of chalk lines on the floor even with the side jambs.
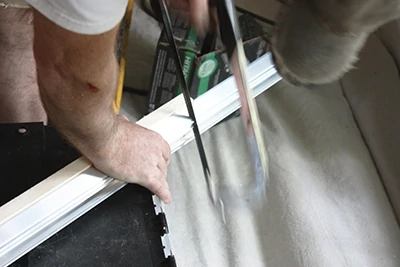
Because the pocket-door header contains a metal channel, we cut the metal separately using a hacksaw.
Reattach the metal end-brackets to the cut side of the pocket-door header.
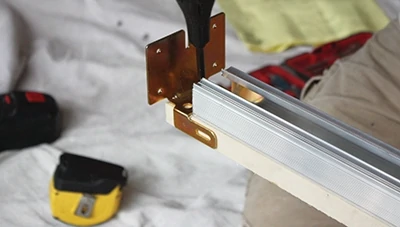
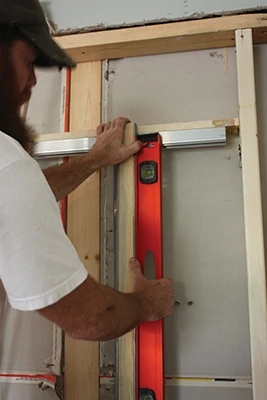
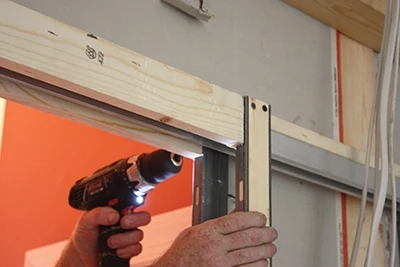
Next, install the pocket-door header (with track assembly) to the jamb of the rough opening by screwing the supplied end-brackets to the wall studs. As mentioned already, this may require you to cut an oversized kit header to length, then reattach the bracket on one end. Carefully level the header before fastening to the brackets to the studs.
Make sure the header is perfectly level and square to the studs.
Screw the end-brackets securely to the jamb.
The split studs attach to each side of the pocket-door header at the top; at the bottom, they’re mounted to the floor with a metal bracket that maintains the correct spacing for the door to pass through. Each stud comes wrapped in heavy-gauge steel for extra strength and rigidity. Carefully plumb the split studs and screw them to the header and to the floor. Your kit will contain at least two pairs of split studs. One pair should be located at the edge of (what will be) the door opening, and the second pair should be located halfway between the first split studs and the jamb of the doorframe.
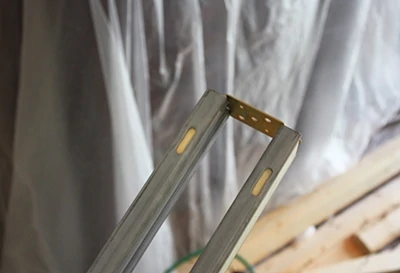
The metal-encased split studs allow the door to pass through them. Attach the metal floor bracket at the bottom of a pair of studs. The bracket will hold the studs the correct distance apart for proper door passage, plus it will serve as a mounting plate to the floor.
With the studs in place, you can slide the wheel hangers into the metal track that’s inside the header. The solid nylon wheels attach to hanging hardware mounted on top of the door, so it rolls smoothly across the overhead track. Adjust the hangers until the door is plumb.
Install the two pairs on split studs on either side of the header channel and make sure they’re plumb.
Note that if your door is not already finished, you will need to paint or stain all edges and faces to prevent it from warping.
One pair of the studs must be located at the edge of the door opening. Screw them to the into the header.
A warped door won’t open and close properly inside the wall pocket.
Test the door to make sure it opens and closes smoothly, then remove it and install wallboard over the door pocket.
Screw the split studs to the floor through the floor plate.
Use construction adhesive and 1-inch drywall screws. (If the screws are too long, it will interfere with the door’s operation.) Finish the wall to match the surrounding room.
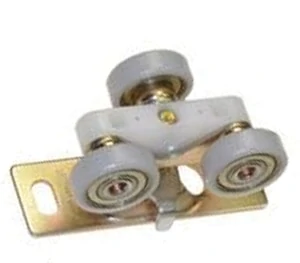
Solid nylon wheel hangers allow a pocket door to open and close.
Finally, re-hang the door and then install the door guides on the inside and outside of the door at the mouth of the pocket. The adjustable guides center the door in the opening with enough clearance for it to slide smoothly.
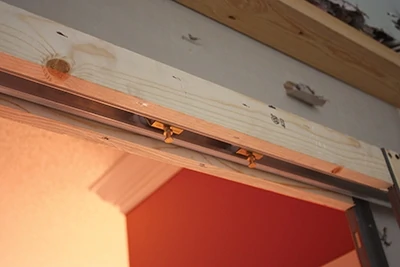
Slot the wheel hangers into the metal header track.
Install door casing to the jamb and split studs, and add a full-width strike jamb on the opposite side.
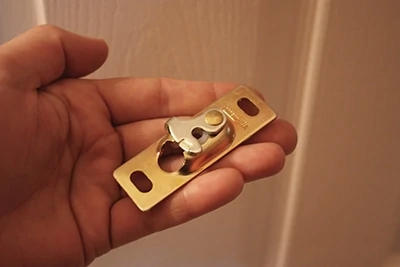
Metal lock tabs are mounted to the top of the door will connect to the hangers.
Screw the lock tabs to the door 2″ from each edge.
Complete the job by attaching any hardware accessories to the door, such as fold-down handles or decorative pulls.
Rehang the door and test its operation. Once satisfied, add the door guides at the bottom. This essentially completes the functional aspect of the project. Everything else is cosmetic: wallboard, trimwork, paint and details. The installer will need to repair the hinge mortises, install a recessed handle and add an edge-pull to the old door to give it new life as a door that “disappears.”
Editor’s Note: Special thanks to professional remodeler Ritchie Hamilton for help with this project.
