

How To Build A Horizontal Style Wood Fence
By Mark Clement
Every so often I run across a project I love so much that while I’m building it, I find myself saying: If there was one project I’d like to do over and over, it’d be this one. This happens to me with decks and playsets, because people use them, and I’m literally building fun.
It’s not usually my experience with fences, but this one has many design and installation elements of both, so I suppose it’s no surprise. Also, I absolutely love the way this fence looks. It is ridiculously robust and its simple, solid design gets reactions.
The materials for this fence are not some flimsy, light-reflecting ode to other materials’ ironic impermanence. Built from two main components—6-in. pressure-treated round poles and treated 2x6x10—this fence has uber detail and texture. It has two good sides, so neighbors are happy. As Robert Frost wrote: “Good fences make good neighbors” is the stuff of poetry, but also real life.
So is pulling string lines, digging holes, and cutting boards, so let’s leave the poetry to the poets and rattle this thing together. Here we go:
Design and Permits
If you’re a DIY’er, don’t be afraid of applying for a building permit. Sure, you can skate under the radar for lots of stuff, but if you blow a fence or a neighbor is unhappy, you just poked a hole in a keg of problems that are a hundred times worse than the permit. A permit is an insurance policy.
You’ll need a “platt” of your property, which shows the property lines. You draw a line on that indicating where the fence goes. The building official will tell you that it (usually) can’t be taller than 6-feet, that there has to be a gap at the bottom for trimming grass, and that, at a certain distance from a driveway or side-walk, it has to taper down to 3-feet so you can see people as you pull out of the driveway.
Property Line—I’ve always been lucky enough to find the steel rod marking property lines, but you have to look for it. If you build a fence 6 inches on your neighbor’s yard, you just built them a fence. Once I find the property line, I set my fence 2 inches inside it. Better safe than sorry.
Design—This fence draws from my love of the substance and organicness (is that a word?) of wood, especially when I get to use round poles (aka, pilings).
I once used them to build a play-set and I have loved them ever since. This fence is simple like Hemingway’s prose, but not simplistic, also like Hemingway’s prose.
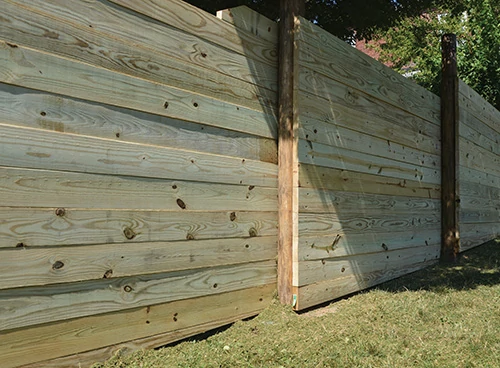
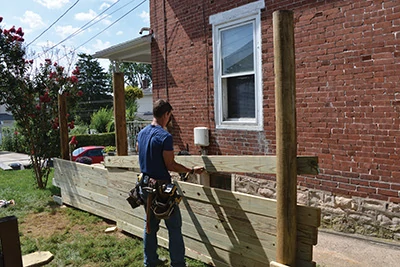
I set the posts on the line, then ran the horizontal planking front to back. The 2×6 waned and gapped and delivered a wonderfully nuanced feature rather than a wall. For a no-gap, straight up look—which I’d also love—use a V-joint tongue and groove. It’d be drool-worthy to any wood lover.
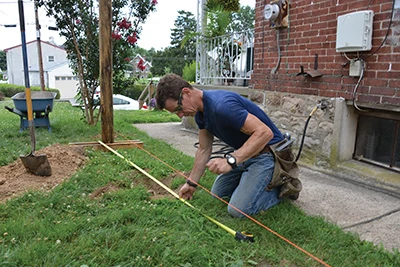
Straight-line Layout
String, pulled tight, is straight. Just ask the Egyptians.
Getting a string straight for a fence job is hard. Most dudes make some kind of 2×4 stake and bash it into the ground to mark their lines. This is difficult, inaccurate and weak.
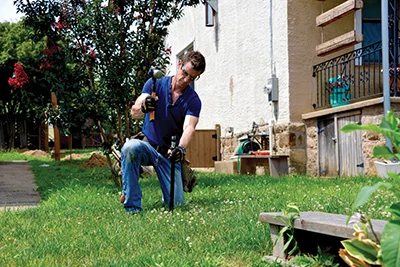
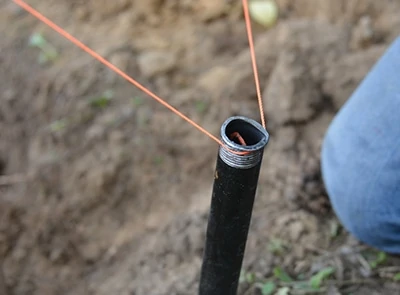
Instead, I use gas pipe cut to a point with an angle grinder. I drive two into the ground like a nail to a 22-degree-ish angle and pull my string between it. To get the string tight, I wrap it around the threads of the pipe and cinch it with a knot called a trucker’s hitch. The knot is easy to tie and is so powerful you should be careful not to break the string.

Post Position
My love affair with this fence starts with the posts.
Using the string, I mark the post locations 9-feet on center. If I’m off a hair, who cares? We’ll get to this in a minute.
Then, I dig my post holes.
While frost matters where I live (Philadelphia) it may not matter where you live. I say that because the post depth isn’t determined entirely because of frost. It’s also because wind blows and children climb. Any post needs ballast from the earth to stand strong.

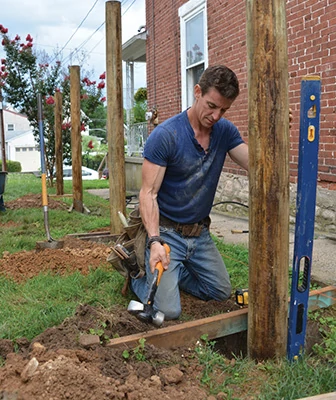
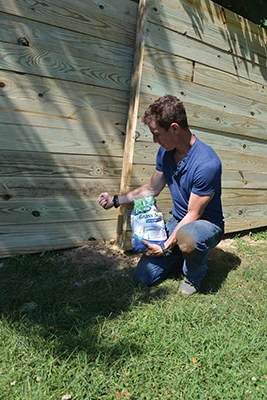
At the bottom of the hole, I drop a few inches of 1/2-in. pea gravel. Next, I drop the posts. The string is my guide.
To hold them in place before pouring concrete, I use what I call “stretchers” to bridge the hole. And, I wish I thought of this 20-years ago: A 2-pound sledge is ideal for tapping them into soft earth and nudging the post around in the hole.
I plumb them in both directions and trap them with a bridge-block. My preference is to pour concrete, so I do that. An 80-pound bag makes these things near sky-scraper permanent.
Slats—This lot sloped, so I cut the first course of slats lengthwise to match the slope. Essentially, it required ripping a 2×6 in half. Every site will be different, so judgment calls should be made. The goal is to match the ground while keeping the gap your inspector wants, and getting the top of that first board level.
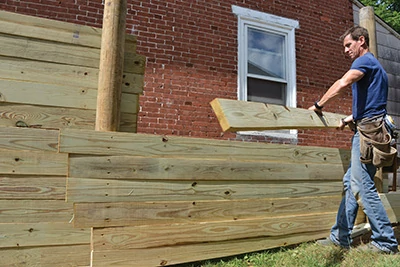
For the first and second full courses cut the boards to your desired length. For the rest, run them long.
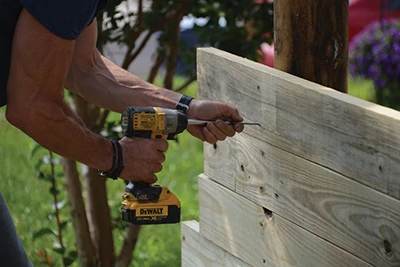
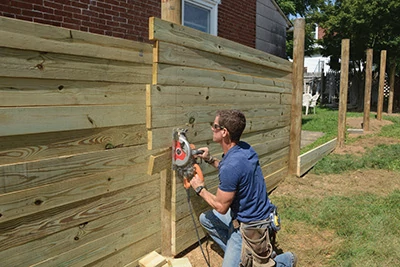
I used #10 x 3-inch Spax HCRx coated screws to fasten the boards. For reasons too innumerable to mention, I love them. And I could have gun-nailed this to be sure. But as I thought about it, it would have saved me little to no time. Maybe this is just opinion, but there is time lost in hose-dragging and going from one side of the fence to the other that is made up by simply walking around the other side with a cordless impact driver and whaling in the screws.
Cut ‘em—With all the slats installed up the 6-foot limit. Use a level, mark a plumb-line, then (like a deck boards) strike a line and cut all the pieces at once. And, if you follow MyFixitUpLife on Facebook and have seen the keyboard warriors who know more than I do about everything, then you know it‘s unequivocally easier to cut from the bottom up rather than top down.
Transitions—Where the grade dipped, and I didn’t like how much the transition varied from panel to panel, I added a chamfered transition piece at the top of the lower panel.
Lawn—Grass won’t grow back magically from where the holes have been dug. And it’ll take a beating from all the walking and digging. Whether it’s a house I’m flipping or a customer’s house, I advise letting the lawn grow for a few weeks before the fence job. It’ll better be able to handle the piles of dirt thrown on it and recover from the digging and other activity.
In my book, there is no better mulch for grass seed than grass clippings. So, after the fence is in, I sow seed over exposed dirt, then I mow the long grass with a side-discharge mower (remember those?) and shoot the clippings at the base of the fence.
This traps the seed and holds the water—daily watering is required for grass seed to take.
Take No A-Fence
And there you have it, a fence that could keep elephants in. Or out. Maybe. I never tested it for that. But of all the fences I’ve built, this one rules them all. Want one?
Editor’s Note: Mark Clement’s YouTube channel is www.YouTube.com/MyFixitUpLife
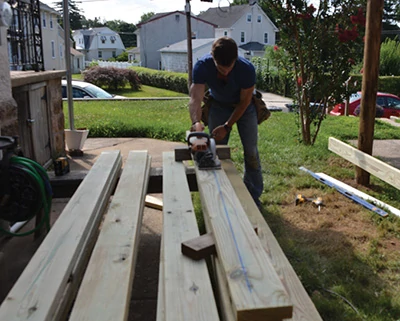
Side Note
A Few Odds and Ends to Make Life Easier
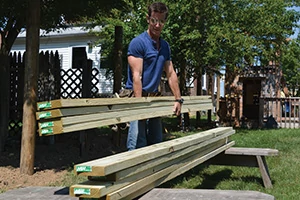
Wood and materials storage is a challenge. Since a fence like this one has hundreds of parts, storing them at the optimal height and location helps. This is true for any home-improvement project, but some bear this out more than others. For projects like this I build timber bunks. They’re about 16-inches high, made with 2×10 and you can park a dump truck on them. They’re the ideal height for putting down and picking up the many treated 2×6 slats on this job.
I can’t be happier with how setting the slats front-to-back makes me. I enjoy looking at this fence from all angles. It has received many comments on our social media pages (MyFixitUpLife) and, as I said in the intro, I’d build this again in a heartbeat.
