

Installing a Basement Perimeter Drain
By Mark Clement
The basement in my century-old house—like most century old houses I’d guess—was damp. Downright wet at times. It smelled and there was mega-mold. We kept stuff down there because we had no other choice, but it was gross. Dusty too. And when the dust got wet, it was kind of like cat litter. For a room with a higher population of spiders than people, it was a net-generator of general disgustingness for the whole house.
So the first step in the overall rescue renovation of the space was taking a big bite, jumping off the top rope, mixing some more metaphors to smash, grab and dig in a perimeter drain.
What is a Perimeter Draining?
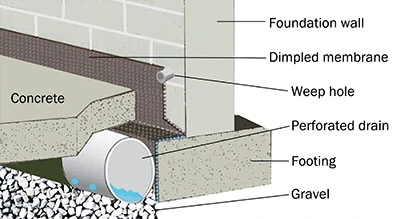
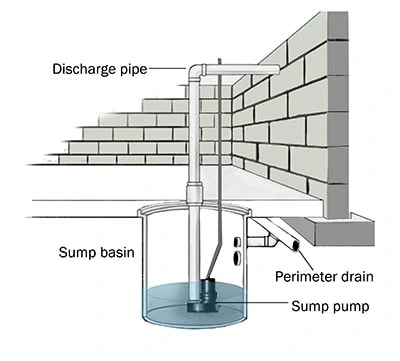
A perimeter drain, aka “French drain” and “drain tile”, is basically a trench around the outside of the basement floor. The water conduit is a 3-inch perforated pipe surrounded by landscape fabric and packed in rocks. The pipe pitches, ideally 1/4-in. per foot, and is covered with concrete. It also has a weeping membrane between it and the wall, so water can drip down the wall and escape into the drain system. The whole thing daylights into a sump pit in the lowest corner of the basement where water collects and is removed by a sump pump.
Strong Back, Weak Mind
This job is a LOT of work.
In theory, a perimeter drain is a reasonably easy landscape project. Problem is, it’s inside your house. So, there’s still a lot to think about and organize to keep the genie in the jar.
Stuff. If your basement is occupied with all the stuff most basements are occupied with, the first step is to protect the storage items and appliances. Once dirt starts coming out, it takes up all kinds of space fast. And dirt is dirty, so drape your stuff.
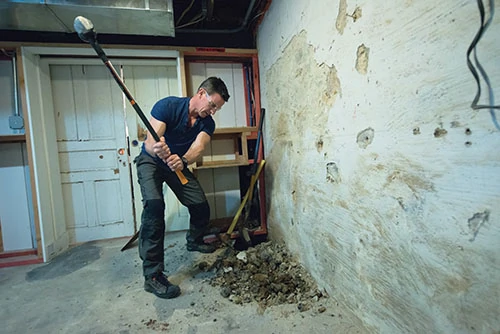
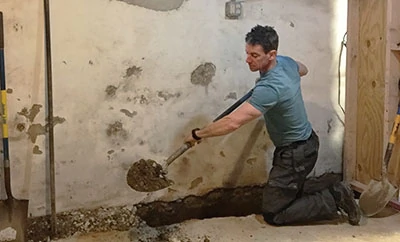
Sluggo. While it seems ridiculous to see me using a sledgehammer for this, it was better than a jackhammer for the slab I encountered, which was thin. While a smaller breaker hammer might’ve been the key, a full-tilt jackhammer would likely spend more time stuck in the ‘crete or the compacted soil beneath it, and I’d be wrestling it out. They’re too heavy to wrestle for long periods of time, so I just smashed it. And yes, I wore eye protection.
I used a Fiskars sledge for this. It has one typical flat face and one wedge-shaped face. That wedge shaped face pulverized this slab. All my sledgehammers are nicknamed Sluggo.
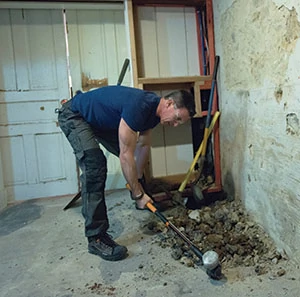
Mattock. Next up in the cavalcade of indoor landscaping, the best dirt loosener is a mattock, AKA grub hoe. It pierced the thin membrane of concrete reasonably well and got me into the dirt below.
Dig In, Out, Up, and Carry Out
It’s around now—during all the digging and dirt work—that you might begin to question your sanity. I did.
But what I focused on was the thousands upon thousands of dollars I was saving instead of the hundreds I was spending.
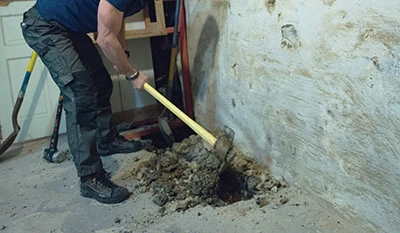
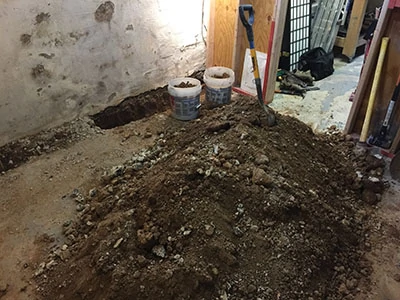
I hauled 10-Gallons at a time. Until someone invents a better dirt hauler than two 5-gallon buckets, it’s bucket brigade all the way.
I found that a short-handled shovel was best for filling the bucket from a big pile and that a flat-edged shovel was best for scooping up from the concrete floor once the pile got smaller.
I tried to keep the work in chunks. Dig for a while (drink gallon of coffee … from the pot if needed), then haul for a while.
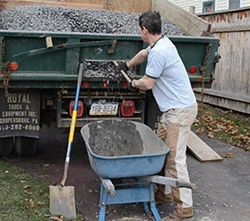
Where it goes. I used three approaches for this job to get the dirt managed. First approach was a dumpster. Dumpster guys don’t like dirt and rock loaded in their cans, so you either have to pay extra for it, use a smaller box, or they won’t take the job. The second approach, which I liked best, was that a friend with a dump truck did me a solid and getting rid of that load was cheap. Third approach was my utility trailer and a land-reclamation site in my town (they’re filling in a quarry). This was the cheapest (50 bucks per load I think) but also the most work, because I then had to shovel the dirt back off the trailer, making that the fourth and final time I handled it.
Installation
Stone. The first thing that goes back in the hole—I literally nearly passed out from the irony of it—is clean gravel or rubble of some sort. I fill about half the trench up with it, then I lay in the drain pipe.
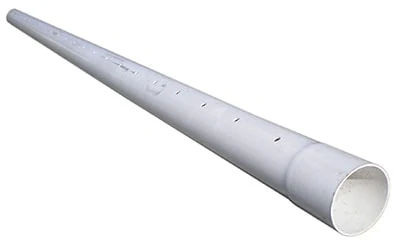
This pipe is not a typical big box product. I had to get 3-inch pipe and weeping membrane at a masonry supply house. It connects end-to-end so you can make a continuous tube around the room. It’s also pretty important that the holes are positioned to sides, not up and down. Until they’re trapped in stone, the pipes are pretty easy to move. Especially if your skull is thick.
Fabric. I wrapped my drainpipe in landscape fabric. It probably wasn’t entirely necessary, but I had visions of it filling with silt at some point in the future and since it will be buried in concrete, I figured an extra step was easier now than later.
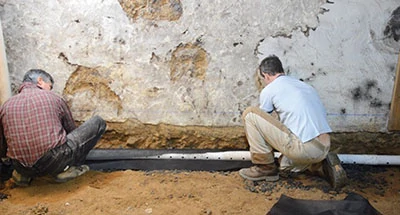
Membrane, Concrete and Pit
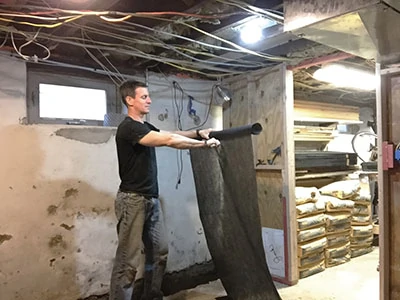
Membrane. The last step before concrete is a dimpled membrane that crawls up the wall above the new slab line and goes past the concrete into the gravel field. I run mine straight down the wall.
Wet basements typically mean wet walls. Pressure from outside the house is greater than the pressure inside, and water can weep down the walls.
If there’s no way for it to get into the drain system, that’s a problem. The dimpled membrane creates a pathway for the water to pass.
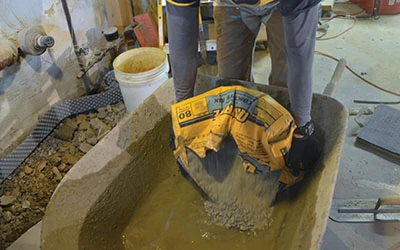
Concrete. Bags of concrete are laborious. However, I did this job in sections that made hauling and mixing bags a little easier—and, again, way less expensive—than managing a concrete truck, chutes and yards of concrete flying into my basement.
So if you mix, you need space for a wheelbarrow and buckets for water.
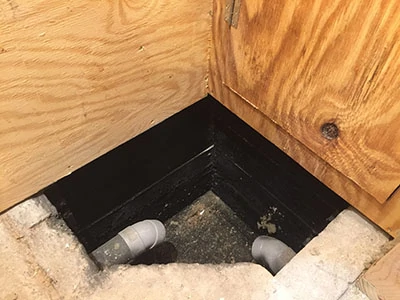
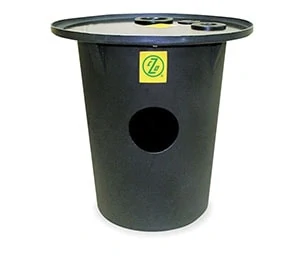
Pit. You can buy plastic barrel sump pits and drop them in your hole, then run the pipes to them. That would be faster and easier than what I did. But, they can cost a couple hundred bucks. Mine cost maybe twenty. It took a little while, but I built some forms out of some scrap lumber and poured concrete walls for the pit. You could argue it was a waste of time.
One other thing: Although this project typically functions with a sump pump, I waited to install my pump because I was doing a million other jobs once the drain was installed like framing walls, scheduling the electrician, etc. As time passed, I noticed something: The only thing in the hole was dust.
I expected water to at least be seeping in there—that would happen for sure in other ground-water scenarios—but for the ground water we have here, just installing the drain system created enough of a relief valve that the ground water stays outside the building envelope.
I don’t need a sump pump to pass inspection either, so basically I have a giant hole in my floor. I can cover it up and regain part of a closet that otherwise would have no floor and a pipe running up the wall.
Side Note One
Dirty Dirt
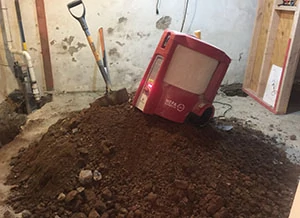
I had to run an air cleaner on this job. This unit, called BuildClean, is a high-end professional deal with HEPA filtration (it is awesome if you are a pro). I’m not sure HEPA was necessary, but the dirt I dug up was musty and had who-knows-what in it. We literally got colds. The air filter saved the day.
Side Note Two
 Wave Moisture Control for Basements
 Wave Moisture Control for Basements
Odors, mold growth and dampness in a basement or crawl space are indications of stagnant excess moisture that creates an unhealthy environment for the whole house. In addition, these areas have high levels of combustion gases, radon and toxins. Wave Home Solutions has a developed a computerized sensor control ventilation unit that will automatically monitor conditions, lower relative humidity and expel harmful indoor air pollutants. Unlike a dehumidifier, this has no maintenance, no buckets or filters, operates 24/7, and uses only about $3/month of electricity as opposed to $60-90 for a dehumidifier. It’s a sensible approach to dealing with everyday living conditions, transforming the worst air mass in the house from a damp, odorous, polluted air into a dry, fresh, healthy environment.
Controlling moisture sources from the outside and combining it with Wave ventilation will provide a total solution for everyday living conditions. Wave ventilation expels the entire air mass at the lowest level so it will not be pulled upwards into the living area and will create a healthy air exchange for the entire house. It increases HVAC efficiency for the entire house by keeping it drier, and provides additional comfort for the living area. Check out www.wavehomesolutions.com or call them at 800-293-9577.
Side Note Three
Ordering and organizing
 This is where the strong back, weak mind thing kind of breaks down. There’s a lot to think about when doing a job like this because it happens all over the yard and house.
Outside, it’s important to think about where things will be stored and how you’ll order them: In bags or in bulk. If you have a dumpster, is there room to get by it with stone or concrete or other supplies? I live in town, so there’s no spacious double-wide driveways for me. This stuff is always on the top of my mind. It’s good practice for being generally efficient too.
