HVAC Systems Failure Prevention
By Mark Clement
How many of us really think about our HVAC system and its optimum performance? I mean really think about it. Sure, we change the filters, although not as often as we should, but as long as the air comes out, we’re comfy, and the utility bill is less than outrageous, then we focus on our crown molding, decks, landscapes and cabinets. Those are the things we can see, touch, cut and care for.
But the reality is we all have to think about it at some point. Lots of people have to think about it during an “oh crap!” moment, when the weather is snowing or searing, and there is no air coming out. That happens all the time. With a system so important, panic is not the proper ingredient for making good decisions. Stuff will go wrong.
What’s more, the “oh crap!” moment is usually followed with an “it costs how much?!” moment. That’s why this isn’t one of those seasonal “save money on your energy bills” articles.
Nope. This article is a check-down of how to prevent that aforementioned—and usually unbudgeted—moment. The payoff is that in the process, you’ll be able to see the signals and plan ahead. Oh, and I love this one: You can find out how much money your old system has been burning and sending up the chimney.
Lifespan
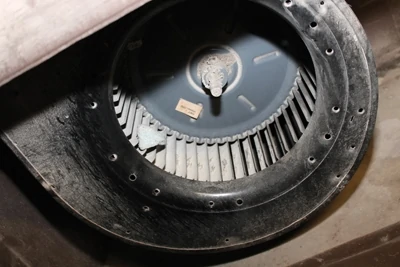
The heart of the HVAC system is the furnace or air-handler which, where we live, is typically in the basement. Its burners provide the heat and its blower motor pushes and pulls the air (hot or cold) through the house’s circulatory system.
Like any person’s heart, this unit—which should be 80,000-100,000 BTUS for a typical 2,500 square foot home—has a lifespan, which is somewhere around a quarter century.
You can check, or at least try to check, the age of your system by removing the cover plate and looking at the labels. There may be an indication of an installation date or a service call that can guide you. If there’s no labeling or the ink has faded, you can probably bet that when this unit was being installed in your basement you were in high school, going on your first date, or learning to ride a bike.
One way to equip yourself with some data—labels or not—about your system is to check the heat exchanger, right above the burners. With the faceplate removed, shine a flashlight and look for rust. Rust is a sign of age and decay.
Most of the action in the heat exchanger happens right above the burner, so this is a big wear area. And since the unit can be rusting from the inside out—and the outside in—don’t be fooled by “a little rust” on a three-decade old system.
Efficiency
A unit that’s 20, 30, or if you’re very lucky, 40 years old was designed to deliver at best 70-percent efficiency. That means for every dollar of natural gas you purchase to power it, 30 percent goes up the chimney—under perfect conditions.
Problem is the science of air movement, never mind building codes, government regulation and developments in technology, those conditions are rarely ideal. So assuming the unit is Goldilocks-end (not too big, not too small, but just right for the house), under-sized ducting could be throwing away even more energy, taking a 70-percent efficiency unit down to 50 percent. Not only does this shorten the life span of the unit, but you’re literally burning 50 cents of every dollar you spend heating and cooling.
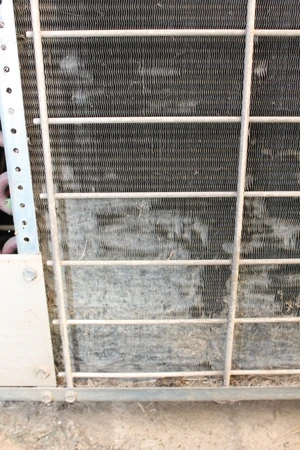
Here’s the situation. Ducts can only hold so much air. But that won’t stop the unit from trying to meet the demand of the thermostat, and it’ll run as hard as it can until the thermostat shuts it off.
In other words, when a duct is undersized it’s like trying to blow out a candle through your kid’s juice box straw. You blow until your head’s about to burst and you’ve turned fire engine red, but only so much air passes. Just like your furnace’s blower motor, you’re working way harder than necessary for flickering results.
Properly sized ducting means your furnace has a better chance for working at peak efficiency.
For example, on our recent HVAC upgrade, our 8-by-12-in. ducting was grossly undersized for the 2,500 square foot home it services. It should start at 8-by-24 inches, and the return should be equally sized as well.
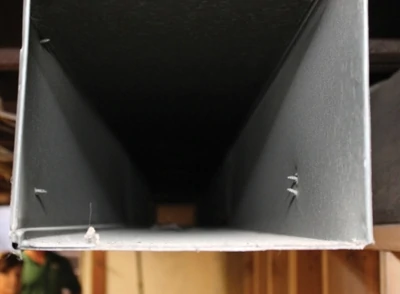
Under-sized ducts are a common problem in both old and new construction. A quality HVAC contractor will spot this from a mile away and be able to recommend ways to save your furnace and save you some cash. This is typically not bogus up-selling. The dude to worry about is the one who doesn’t see it.
The Right Contractor
Unlike a carpentry project where most non-experts can see expert workmanship just by looking at the finished project or operating it—the door swings like it’s supposed, the deck doesn’t wobble, etc.—a primo HVAC installation is much harder to detect, if it’s even possible. Your best leverage for getting a quality installation is to choose the right contractor in the first place.
Numbers Game. Remodeling contractors, plumbers and electricians who try to impress me (or homeowners) with jargon-talk are lame. Sorry. Mrs. Jones doesn’t care about “street bends” and “hanger brackets” or “sistering joists”, and all this talk just separates the contractor from the client. The jargon is not impressive unless it’s necessary, or if they’re hanging out with their contractor buddies.
However, when talking with an HVAC professional about investing $15,000 on a system that moves the invisible, all I want to hear is jargon. Numbers capture the invisible. I want this information because that’s how I know an HVAC mechanic understands what he’s designing for my home.
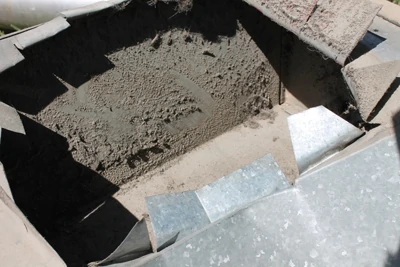
To put a fine point on it, they don’t all understand. Lots of plumbers go to HVAC School, but really, they’re plumbers who sort of know how to do HVAC. HVAC is a specialty. A job that will serve you and your family for decades should be done by a specialist.
Terms. You want to hear your contractor talking about doing a “heat-load calculation” and to examine the size and shape of the ducting, even if the ducting is fine. You want them to talk with you—in a way that makes sense—about the efficiency of the unit they’re installing and why they chose this type of unit for the type of building you’re in. And when it comes to cooling, you want to hear them mention “tonnage”. Tonnage is the amount of energy required to melt 1-ton of ice (buildings used to be cooled with ice). If the contractor doesn’t pull the faceplate off the unit, look inside and give you an opinion, then run the other way.
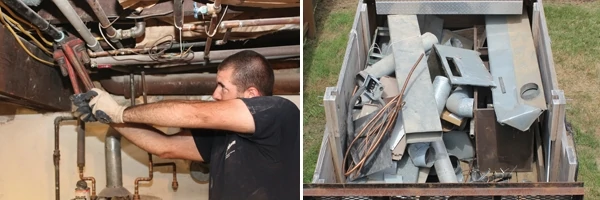
Condenser
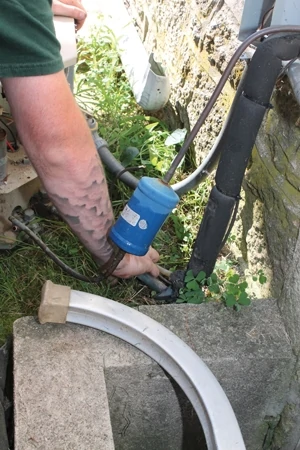
A lot of mistakes get made with condensing units outside the house. Namely, they get placed too close to the home or an obstruction, or their supply lines get installed at ground level making them fresh meat for landscape equipment. In some cases, they get blocked by shrubs and fences that make it impossible to run a trimmer in there without tripping on stuff and risking bending the fins on the condenser. Since this unit is essentially a radiator, it needs to breathe. A properly installed unit will be about 1 foot from the sidewall of the house with a minimum of 24-inches between it and any other obstruction. This provides air flow and room to pull weeds. I even like to give it more than the minimum because 24 inches really isn’t ample room for someone to work on it if it requires service for any reason. It also doesn’t provide enough room to easily access with a string trimmer.
Work Neatly
Like any project, there are a million-and-one ways to make a good job a pain in the neck.
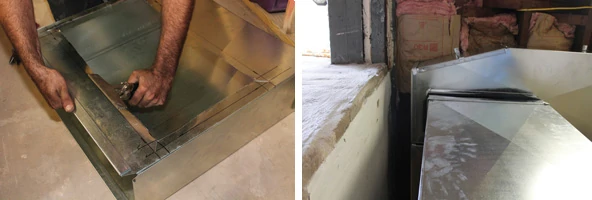
On this project, a new duct encroached on a door. Instead of leaving a sharp corner and saying nothing about it, the mechanic installing the unit alerted me to the situation and together we worked out a way to ease the edge. By chamfering the duct, it cleared egress to the door opening so that neither the duct nor someone’s head will get smashed when passing by.
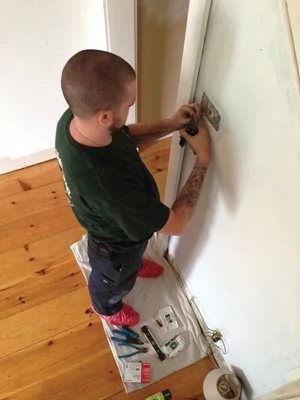
When working in the finished living space, a dropped screwdriver or cordless drill can result in an expensive floor repair. Think ahead and lay out a drop cloth for the installer to solve this problem before it happens.
A well-designed and professionally installed HVAC system is hard to see. But you’ll know when something is wrong, and then it’s too late. Conducting a little routine maintenance and choosing a responsible, conscientious contractor will keep the air from escaping the balloon.
Editor’s Note: Mark and Theresa Clement host MyFixitUpLife.
Side Note 1
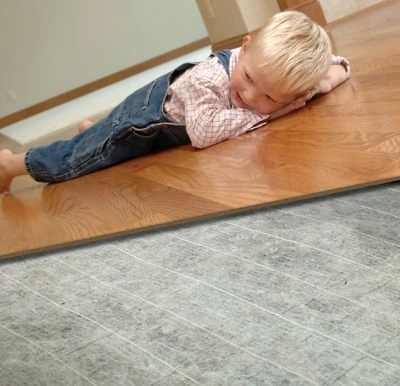
A popular alternative to central heating is electric radiant floor heat. QuietWarmth, from MP Global products, is a system of low-profile, electric underlayments for installation beneath finished flooring. Extreme How-To’s editor-in-chief installed this system in his kitchen a few years ago, and his family still enjoys the pleasant underfoot feel of warmed porcelain tile every winter. The wire-embedded underlayment mats line the subfloor and are butted at the seams to function like a hidden electric blanket beneath the finished surface. The mats replace typical floating floor underlayments, making the total overall thickness from subfloor to floor surface only around 3/8 inch. QuietWarmth not only deadens impact sound from the hard surface flooring, but it also makes the surface warm enough for bare feet and does a great job heating the entire room. Learn more at www.quietwarmth.com.
Side Note 2
Touch ‘N Foam Pro Spray Foam Kits
Attention “extreme” do-it-yourselfers and contractors: An effective method for keeping your house warm this winter is the flash and batt technique for wall cavity fills using Touch ‘n Foam Professional two-component polyurethane spray foam kits in conjunction with fiberglass battings.
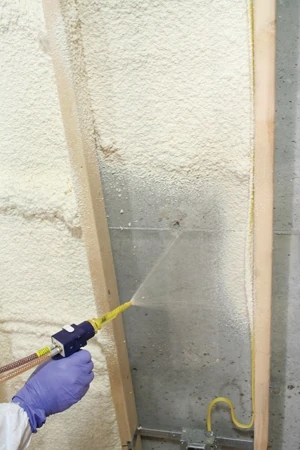
Touch ‘n Foam’s Pro line offers portable and disposable kits in 15, 200 and 600 board feet options. Each kit comes with conical and fan nozzles, pre-attached hoses, an ergo-nomic foam applicator, disposable gloves, safety glasses and detailed instructions. Be sure to read these instructions before using the kits and wear proper protective clothing and eye protection. touch-n-foam.com
Side Note 3
Filters
There are a lot of variables when it comes to recommended filter changes for your HVAC system, including the presence of pets in the house, number of people, heating/cooling days, and if there are allergies to consider. So I’m not going to tell you when to change your filters, except to say this:
We change them before and after every dust-creating remodeling project, whether it’s in our home or a client’s. New filters catch more dust than dirty ones, and if we create a lot of dust, we swap it out after the job is done.
Some filters catch so much dust that they restrict airflow on the HVAC unit. So if you don’t need a super long-lasting filter to be healthy, they might not be worth it.
We’ve had great luck with woven nylon filters. Not only can we clean them with a hose, but when nailed to a piece of plywood, they make the best jobsite doormat ever. –M.C.
Side Note 4
Properly Sized System
Many homeowners believe that bigger is better when buying new heating and cooling equipment, but your system should be a custom fit for your home. An air conditioner close to your needed size does not have to overwork to meet your demands nor does it constantly switch on and off and waste extra energy. A knowledgeable contractor will follow a standard industry procedure to ensure your HVAC equipment is properly sized and that its duct system is properly sealed and balanced.
The HVAC professional should determine the square footage of the area the central unit will have to condition. The recommended air-conditioning BTU rating is then estimated using industry standards. For example, if the home is was 1,200 square feet you would need 22,500 BTU unit. To further calculate the required BTU’s to condition the space the contractor makes adjustments according to the interior’s exposure to sunlight and shade, amount of insulation, proximity to kitchens and boilers, number of occupants in the home, and other similar factors.


