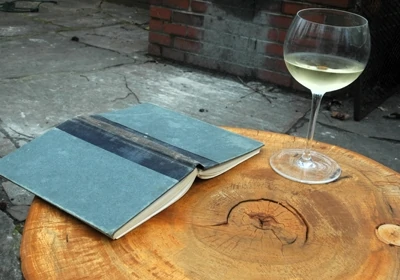
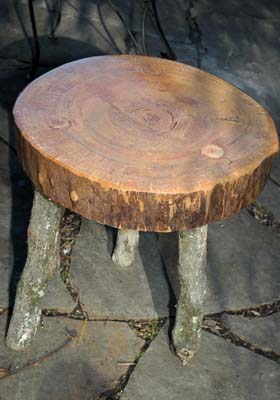
(Author’s update: When I built the two pieces, I had two different styles of tables. The first I mortised holes for the table legs through the table top and the second I mortised only 75% through, leaving the top of the legs covered by the table top. Use the second method. The protected legs last longer. Also I had to refinish the original finish with Polyurethane after one year.)
About a year ago, I felled a large tree in our suburban backyard. I learned two things that day; one never ever cut a tree that is hollow on the side towards the house when that tree is even close to the height that might reach the house. After taking the usual precautions, notching the tree, attaching a come along on the notched side and putting a strain to pull the tree in that direction, I began my felling cut. At that point things went bad and went bad fast. The tree fell in the direction of the hollow, which by itself was not a bad thing. I hadn’t planned on the top 30 feet of the tree separating upon hitting another tree limb and flying through the air as if some hand from heaven had reached down grabbed the tree and thrown it just far enough to add a new skylight to our bedroom. The second thing I learned was that wives are not very understanding of skylight additions that haven’t been previously discussed.
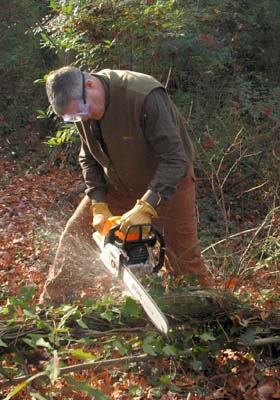
Fast forward a year, and most of that tree ended up in our outdoor fireplace as split logs, but the largest section still remained since it was too large to fit into the log splitter. I was able to cut a few pieces off the end, but when it takes two cuts with my 20” bar to make it through the log, I stopped after the third slice was finished. If you have a friend at a lumber yard, I suggest you contact them for some free slabs or drop ends. I decided to try my hand at making rustic furniture from the end cuts, using the 24” diameter log ends as tops for my tables and I also wanted to make a rustic slab bench that would look at home at a lake house or at a log cabin nestled in the mountains.
Tools used in the Outdoor Log Furniture Project
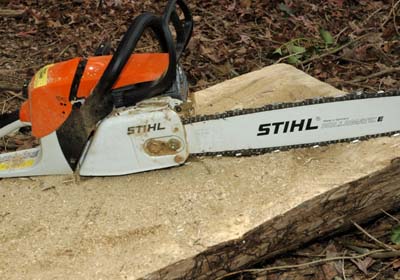
Cutting logs, I used a Stihl 280 with a 20”bar for large cuts, and a Prazi Beam Cutter attached to a Milwaukee Worm Drive Saw for smaller cuts and for cutting a slab to make a bench that will be featured in a later article.
Tenon Cutters
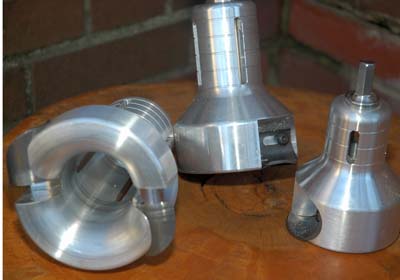
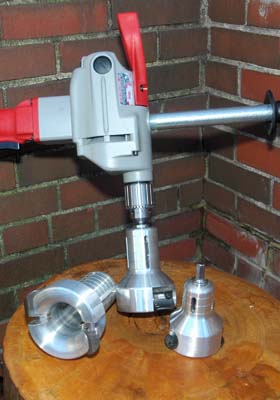
I used Lumberjack Tools Professional Series Tenon Cutters in a 1”diameter for small tenons, 1.5” for making tenons for the sturdy legs for the outdoor tables and 2” cutters for making large tenons used in making bed rails.
Mortise Bits
I used 1”, 1 3/8” for the undersize joints, 1.5”, 1 7/8” and 2” Forstner bits from Porter Cable. Spade bits will work for the smaller diameters also.
Powerheads
I used the Milwaukee Compact Drill model 1620 and the Bosch 36 volt lithium cordless drill.
Sanders
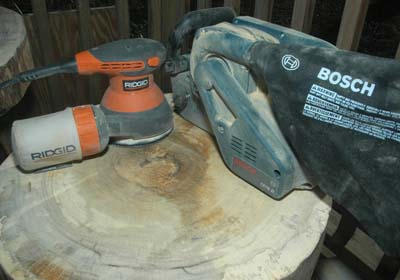
I used 4 x24 belt sanders by Bosch for the36 grit and Milwaukee with 80 grit for rough sanding and a 5”random orbit sander by Ridgid for finish sanding using the medium metal sanding disc by Microplane for the first pass and 220 grit for between finish coat sandings.
Finish
Weatherall UV Protector and UVII Protector, two step process to achieve maximum weather protection.
Why Outdoor Log Furniture?
The reason I was attracted to this project was a lifelong appreciation for wood and the simpler times when craftsmen hewed logs into log cabins and also to log cabin furniture. With a few simple tools, they made what they needed with what they had. Today’s rustic cabin furniture has come a long way. Many of today’s log furniture craftsmen are truly artisans and I appreciate their craft, but I am new to this and so I started out with a few simple projects, instead of artistic expressions. My first project involved taking the cut ends from a large tree that I had felled the previous year and simply adding legs to those to make two tables to be used as outdoor furniture. My goal was simple, build two tables for use on our patio that could withstand the weather, the kids and a couple of retrievers, and finish them enough so that my wife could not unknowingly say she mistook them for firewood. In our house things that don’t gibe with Mrs. Jones’ taste have a bad habit of disappearing or meeting an unfortunate end? With these objectives in mind, I set off on my first attempt at creating log furniture.
Selecting the Wood for Rustic Furniture
The first step in making rustic log furniture is selecting the appropriate logs for your project. As mentioned earlier I was blessed with a large tree cascading through my bedroom ceiling maybe that was my sign from God to do this project. This tree was standing dead for one year, and had been on the ground for another, it supplied slabs for the bench and the tops of my tables were simple end cuts from the log.
The end cuts were approximately 24” wide and were taken some 50 feet up the old tree. I used my Stihl chainsaw with a 20” bar for felling two small trees, also in our yard, of similar diameters and of the same species. From these trees, I chose my small logs that would be used as legs and took into consideration the opening size of the Lumberjack Tenon Cutter. This allowed me to merely lock the log into my vise and begin cutting the tenon. Depending on the tree, you may be able to use straight limbs for these pieces.
Leave additional length on these legs, I will explain why later. Now in an effort to maximize the wood of the two trees, I cut two headboard pieces for my rustic log bed, and two footboard pieces as these would be the longest and straightest pieces I needed. A note here about choice of lumber to be used in rustic furniture, you can use whatever you like, I think the large tree I used was nothing more than a Sweet Gum tree that had succumbed to old ages and a hollow trunk. Scott from Lumberjack Tools tells me that people in different areas of the country use different woods, basically what is easy to come by. For the legs I chose Red Oak, it grows like a weed in our region and I have to thin them out anyway as they take nutrients away from the old growth trees that are so desirable. But you can use all of the common species, pine, poplar, cedar, redwood, hickory and when I get better I will build out of Dogwood, a species I have always thought had the prettiest coloration and grain. Use whatever wood is available that is just part of what makes rustic furniture unique. Like all wood projects, seasoned wood is better but not necessary, but know that green wood will shrink and you can research different species shrink rates if you are interested at several sites related to wood.
Making the Log Furniture
I inserted the tenon cutter into my Milwaukee compact drill as recommended by Scott at Lumberjack Tools.
I then clamped a piece of scrap log in the vise and practiced turning a tenon. I was surprised at how easily the cutter went through the hardwood, truly a quality product that Lumberjack produces. After turning several tenons, I changed to a Bosch 36 volt cordless drill and frankly, it turned the cutter with no problems either. So, if there are occasions when you don’t have 110 volt supply, a beefy cordless drill like the Bosch or Milwaukee will suffice. The Lumberjack tenon cutter has depth marks etched into its base to help determine the length of the tenon without removing the tool. I found applying a black marker to these made them easier to see when the cutter was in use.
After cutting the tenons to the proper length, I also chose to leave extra length on the first legs I cut in case of mistakes, but even though I didn’t make any, I was still glad I had the extra length, as I will explain later. Once completed cutting the tenons you will drill a mortise to receive each leg for the table.
I took the end pieces of the log and drilled the corresponding mortises to receive the tenoned ends, if you use four legs, four mortises drilled equidistant apart, three legs, then drill three mortises. I did these two ways, on the first table, cutting the mortise the same diameter as the tenon and second I cut the other table’s mortises to be 1/8” smaller than the tenon for a force fit. Also on the first table, I did a through cut with my Forstner bit so that the end of the tenon was exposed on the top side of the table. On the second table, the mortise joint is concealed and I left two inches space between the top of the table and the mortise end. To accomplish this, I marked my bit so that the length of the hole equaled the length of the tenon. I then turned the table tops so that the bottom side of the table was facing up so that I could insert the legs. Remember, I left extra length on the legs in the earlier step, here is why. Once I inserted the legs into their final position, I could cut them to length and not have to worry about irregularities in the thickness of the endpiece. I used a laser level, and the Prazi Beam Cutter to cut the legs to length. You could use a level and get the same result. But like the ancient craftsmen I used what I had available and this method worked like a charm. From here it was a simple glue up using an exterior glue, I used Elmer’s exterior wood glue. I feel more confident that my blind joint used on the second table will hold up better in the weather as the joint is not exposed on the top, but time will tell.
Finishing your Rustic Log Furniture
Once the glue dried I could begin the process of finishing the pieces. Now with rustic furniture you could stop here and not do any finish and that is often done. However I was using a wood that I haven’t used before and wanted to do away with some chainsaw marks and level up the top of the tables somewhat. By no means I am saying that I exacted perfectly level tops and did final sanding with 600 grit, but I did use my belt sander with 36 grit to remove some stock, and followed that with 80 grit on the belt sander, and finished with a medium metal sanding disc by Microplane.
You can use wood putty to fill any cracks or holes,but if the furniture is to be left outside be sure and use exterior putty. However in my case, and keeping in mind what I said earlier about if she didn’t like it, where my tables would end up, I decided to add a finish as extra insurance.
For my finish I chose Weatherall UV and UVII finishes, these products have a higher solids content and are manufactured for the log home industry. I spoke with Jim, founder of Weatherall and former NASA engineer, and he advised me on the product choice. My thoughts are if a rocket scientist says that is the way to go, well that is the way I am going. Jim sent over UV with an amber tint to it, and for the final finish Clear UVII.
The finishes were applied according to the manufacturer’s directions and I have kept the tables inside during this process as the weather has been unusually cold here in Alabama and I wanted the finishes to remain above freezing for the first week and also to aid in curing.
Post’log’ue
I must admit, I have had more fun working on this project. Making outdoor log furniture is the closest I have come to instant gratification in a furniture project. Within an hour or two you can make these tables, less if you have the logs lying around. It doesn’t take but seconds to cut the tenons when using Lumberjack’s tenon cutters. Drill a few holes into whatever lumber you have to accept the legs, insert the legs, apply some glue and voila, you have just finished your first rustic furniture piece. Its projects like this one that keep frustrated craftsmen like me out of therapy, it’s simple, fast and looks great when you’re finished. To obtain the tenon cutters and any other materials related to making rustic furniture check out http://www.lumberjacktools.com.
Tool Suppliers:
Lumberjack Tools
lumberjacktools.com
Bosch Power Tools
boschtools.com
Weatherall Company


