

Keeping water where you want it.
By Rob Robillard
When remodeling a shower, most people are more concerned with the aesthetic aspects—tile color, fixture selection, glass door style—and pay little attention to construction methods. They assume that the contractor will do things right. However, a lack of waterproofing measures is clearly evident in the many showers I remodel every year. Some contractors waterproof correctly, but most don’t.
When folks get excited about choices in aesthetics, they often overlook how the contractor deals with water infiltration as well as the other hidden details needed to ensure a long-lasting and quality job.
Over the past 20 years the tile industry has shown great advances in waterproofing tile-related products, especially with methods of constructing tile showers. Paint-on liquid waterproofing products now enable contractors and DIY’ers to waterproof a shower easily and efficiently. These paint-on systems, when combined with a copper shower pan and proper substrates, all work as a system to keep water in the shower and out of the wall cavity.
Liquid Waterproofing
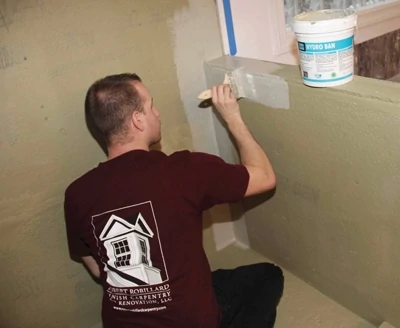
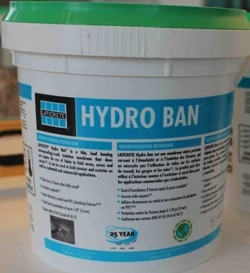
In my neck of the woods there are several liquid-based, “paint on” waterproofing products available. Some of the more popular brands are Laticrete Hydo Ban, Custom RedGard and MAPEI AquaDefense.
My local tile store sells Hydro Ban, which comes in a gallon bucket and is applied with a paint roller or brush. Hydro Ban can be used over cement board, fiber-cement board, concrete, mud work, and other areas where you would be installing tile. It’s a two-coat system and costs nearly $100 a gallon, with 5-gal. containers being better priced.
Hydro Ban is a thin, load-bearing waterproofing/crack-isolation membrane that does not require the use of fabric in the shower wall field, coves or corners. The product is a single-component, self-curing liquid rubber polymer that forms a flexible, seamless waterproofing membrane and bonds directly to a wide variety of substrates. It also has an anti-fracture protection of up to 1/8 in. over shrinkage and other non-structural cracks.
Where TO Use It
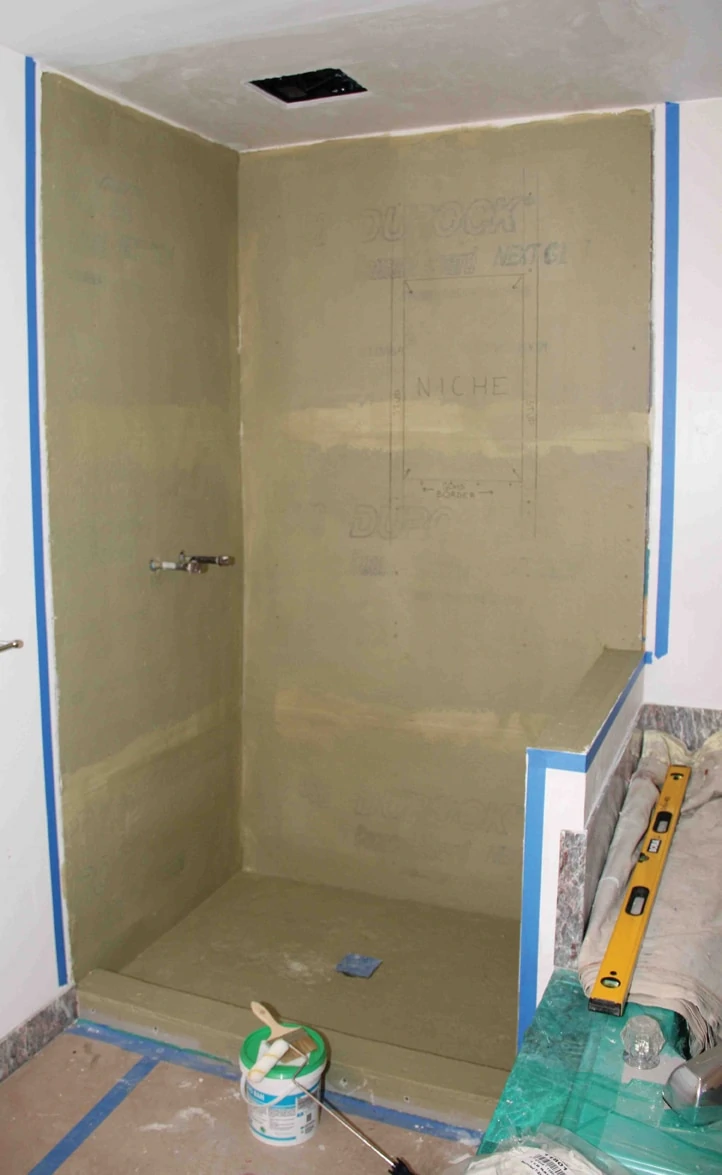
Liquid waterproofing should be applied to all surfaces in the shower area that meet water or moisture. I basically paint all of the surfaces that will receive tile in the shower, including horizontal areas exposed to moisture such as shower benches, shelving, half-walls, niches and especially the shower floor.
When installing horizontal surfaces in a shower such as shelves, half walls and niches, ensure that these surfaces all have a slight pitch to the drain in addition to applying waterproofing. These surfaces are extremely susceptible to leakage, and the pitch ensures positive drainage while the liquid waterproofing prevents moisture from getting past the tile and grout.
Liquid waterproofing is an outstanding redundancy barrier to the tile installation and allows you to skip the plastic sheeting behind your substrate. (Note: I still recommend installing a vapor barrier behind the substrate, and if you plan on installing a steam generator, you will definitely need a vapor barrier.)
Application
Most of us hate reading instructions, but I highly suggest that you follow the manufacturer’s instructions for the brand and type of waterproofing that you are using. With some waterproofing, the companies will want you to use a special fabric, along with the liquid, over the whole surface. Some will require the fabric to be used in all corners, while some don’t require it at all.
You also need to pay attention to how many coats of the product are required and how thick those coats should be applied. Some products require three coats and some only two. (Hydro Ban is a two-coat system.)
Other manufacturers want their proprietary product to be applied to 30 mils thick when wet, and some only 20 mils. A wet film gauge comes in handy for measuring this if you choose that route.
Shower/Bath Requirements
You will need to insulate all exterior walls, and consider installing pipe insulation to prevent the water pipes from sweating.
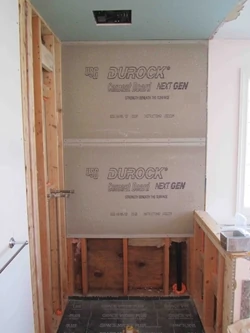
The substrate should be tile backer-board and recommended corrosion-resistant fasteners
(typically 1-5/8-in. minimum).
You will also need:
• Alkali-resistant mesh tape
• Copper, galvanized, membrane or other appropriate shower pan
• Thinset mortar
• Waterproofing material, enough for two coats
• 3-in. throwaway brush for cutting in edges and corners
• Paint roller / tray
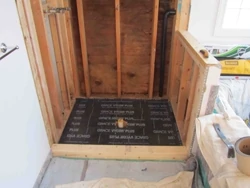
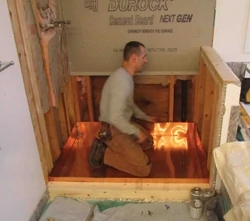
The Shower Pan
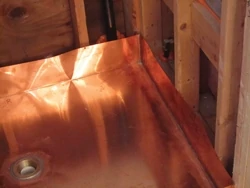
A well-constructed shower starts with a shower pan. There are all types of shower pans from acrylic to galvanized, rubberized membrane and copper. I use a local sheet-metal fabricating company to create the pan.
I prefer to use copper pans and a pitched mud job for the floor in all showers that receive tile. Prior to installing the shower pan I cover the subfloor with Ice and Water Shield to separate and protect the copper from the wood. I also wrap 4 to 6 inches up the walls to protect the pan sides.
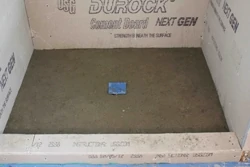
Mud Floor or Deck Mud
To create a shower floor from scratch, I recommend using what is commonly referred to as “dry pack mortar” or “deck mud”. Deck mud contains three ingredients: regular Portland cement, sand and water. That’s it. A properly mixed and installed deck mud will create a shower floor that will last for years and years.
The ratio is very important to achieve the correct consistency and stability. You want 5 parts sand to 1 part cement. You want just enough water to dampen the mixture.
The easiest and most convenient way to get your mixture correct is to buy the Sand and Topping premixed bags which come already mixed at a 3:1 ratio. For a 60-lb. bag you need only add 30 lbs. of sand to get to the proper ratio.
Drains and Wall Penetrations
On mud floors the concrete covers all areas. Allow for a minimum 1/4-in. space between drains, pipes, lights or other penetrations and surrounding ceramic tile, stone or brick. To fill that gap, use a waterproof sealant and foam backer-rod to seal the space. Do not use grout, joint filler or thinset mortar as it will not last with expansion and contraction movements around the pipe.
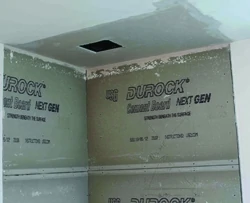
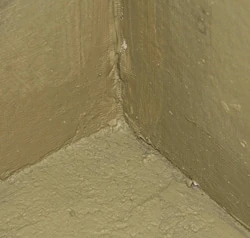
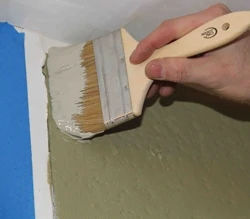
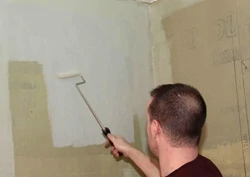
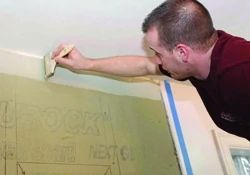
Applying the Waterproofer
Apply mesh tape to all corners and seams and then apply a coat of modified latex thinset mortar over them. The mesh tape strengthens the joints and bonds to the thinset.
Allow the thinset to dry completely.
Apply the liquid waterproofing material with a 1/2- or 3/4-in. nap roller or brush. Thoroughly brush the corners to ensure complete coverage. Coat the walls completely. Then, coat floor to keep water out of the copper pan.
As I mentioned earlier I use the Hydro Ban product, and the first coat dries in 45 minutes. The second coat can be added after the first dries. One gallon covers 50 square feet for two coats.
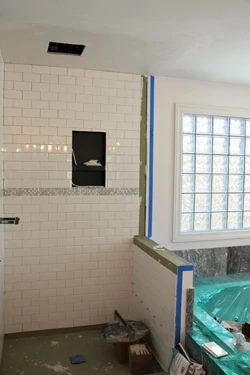
Applying Tile
Once the waterproofing membrane has dried to the touch, ceramic tile, stone or brick may be installed with thinset.
Allow the waterproofing membrane to cure for two hours at 70°F (21°C) and 50-percent relative humidity before covering with concrete, thick bed mortar, etc.
Note: Do not use solvent-based adhesives directly on membrane, as it will dissolve the coating.
Keeping Water in the Shower
In the future, whenever you remodel a shower, make sure to take a few extra steps to waterproof your shower.
If you use a paint-on system, you can do 100 sq. ft. yourself for $150 worth of materials and two hours of your time.
If you’re paying a contractor, expect to pay $150 plus a minimum of four hours of their time to purchase the materials, coordination into the project schedule, labor expense, overhead and profit.
Editor’s Note: Robert Robillard is editor of A Concord Carpenter. Visit www.aconcordcarpenter.com.
Side Note
WaterProfing Membranes Vs. Vapor Barriers: Water vapor . . . What’s that?
Water vapor is water in a gas form. In a shower situation you recognize it as steam. Steam stays in a gas form until it cools down or hits a barrier such as a shower door, tile, ceiling or a mirror.
Water vapor that gets behind walls or travels up through light fixtures or HVAC grilles into an attic will turn back into water when it cools off. Over time, this will present itself as unhealthy mold and rot.
One very important feature to any shower is a ventilation fan with a timer switch. This ventilation fan should be sized according to the size of the bathroom and installed to vent to the outside of the house. There is a right and wrong way to vent a bathroom, and care should be taken when choosing a CFM fan size as well as to make sure you are venting all moist air outdoors.
Waterproofing does not stop water vapor. This can be a tough concept to grasp. Waterproofing seals a surface so water doesn’t pass through it but it does not always stop water vapor from passing through. Waterproofing a shower stops water in liquid form, and vapor barriers stop water in gas (steam) form.
In the case of water vapor you will want to consider installing a vapor barrier. Basically, any material rated at less than 1 perm is considered a vapor barrier/retarder. A perm rating is a standard measure of the water-vapor permeability of a material. The higher the number, the more readily water vapor can diffuse through the material.
Examples of different wall coating products and their perm ratings:
• 6-mil plastic: 0.3 perms
• 15-lb. tar paper: 5 perms
• Laticrete Hydroban liquid waterproofing: 1.247 perms
(2 coats, each 15-22 mils thick)
• Schluter Kerdi Waterproofing fabric: 0.75 perms
• Schluter Kerdi-board 1/2″: 0.48 perms
• Noble Wall Seal sheet membrane: 0.22 perms
It’s essential to take into account all forms of moisture when constructing a shower. For example, if you’re planning a steam shower, waterproofing alone is not enough and you need a vapor barrier.
