

Support Solution
By Rob Robillard
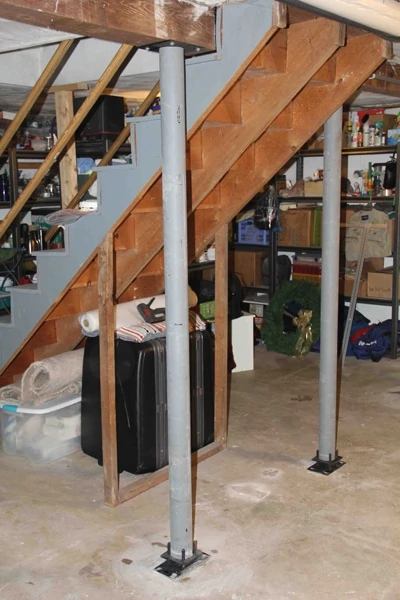
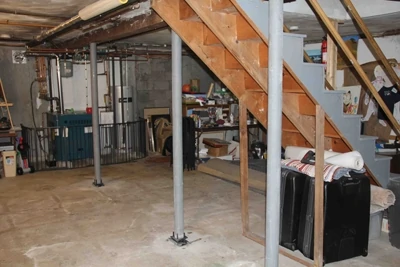
I recently had a project where I had to cut and replace existing steel structural columns supporting a home’s main girder. After boring the inspection holes we determined that there were adequate footings under the existing columns so we did not need to break up the basement floor to dig and pour footings. This meant the only issue was to figure out how to get a new column installed without jacking the whole house up 1/2 in. to do it. Both the kitchen and bathroom above had a fairly new tile floor, and we were sure it would crack if we jacked up the house.
Innovative Solution
Luckily I had the opportunity to install the Lally Lock System in my own home a few years back. The Lally Lock is a fairly new and innovative type of structural column made by Dean Column Co., Inc. A standard lally column is the round thin-walled structural steel columns that provide support to beams or timbers stretching over long spans. The columns are filled with concrete to prevent buckling. Dean Column Co. has taken an old product and made it stronger, easier to use and code-compliant. The patented Lally Lock System is a complete column fastening system. Best of all, no welding is required.
In fact, the Lally Lock System is the only code-compliant column that does not require welding.
Typically, lally columns are installed on top of a footing, and the basement floor is later poured to encapsulate the column. With my situation I already had existing footings, and the floor was in great shape. I only needed new permanent support columns.
The Lally Lock System consists of three components, the Lally Lock column, the Cap plate and a Base plate.
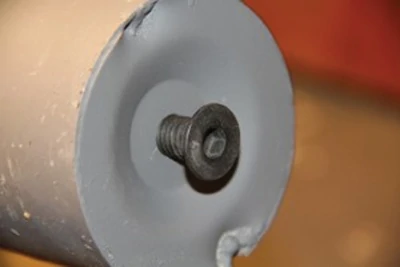
The Lally Lock structural column is a concrete-filled column made from 16-gauge tubular steel (available in 3-1/2 and 4 in. diameter) with an embedded fastening unit in the top of the column. The fastening unit is made from a 6-in. anchoring bolt threaded into a 1-1/4-in. coupling nut and steel disc with a 9/16-in. hole that is welded to the inside of the steel tube.
The steel tubing is manufactured in the United States from low-carbon steel complying with ASTM A513 standards and has a yield strength of 32,000 psi / ultimate strength of 45,000 psi. Galvanized columns are also available.
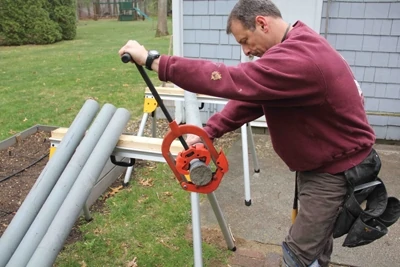
The Lally Lock structural column is available in lengths from 6 to 14 feet. Longer or shorter lengths are available upon request, or you can cut them onsite.
The columns are made in 3-in. increments, and the Base plate is adjustable by 3 inches, so when measuring you don’t have to worry about getting your columns super tight or jacking up your structure to get them to fit.
TOP PLATES
The Lally Lock system features 3 different types of top plates: Lally Lock Beam plate, Lally Lock Saddle plate, and Lally Lock Cap plate. The different plates allow you to custom fit solid sawn lumber and LVL beam sizes. (Laminated veneer lumber is a material that uses multiple layers of thin wood assembled with adhesives. It’s typically used for headers, beams, rimboard and edge-forming material.)
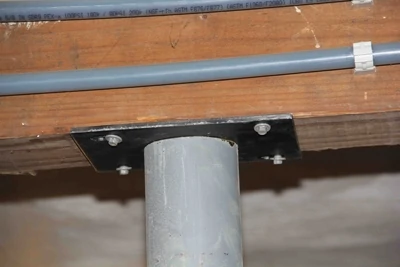
I used the Lally Lock Beam plate, which is made from 1/4-in. low carbon steel with exclusively designed keyholes. The key holes allow one person to install the column by slipping the keyholes over pre-installed fasteners and temporarily hanging the column off the beam before permanently installing the fasteners. The procedure works well.
The top plate also has two 3/8-in. holes and two smaller holes for fastening to the beam. The center of the plate has a 19/32-in. countersunk hole to connect the plate into the embedded fastening unit in the top of the Lally Lock structural column with a 1/2-in. bolt.
Lally Lock Beam Plate Sizes Available:
3 -1/8” x 8” x 1/4” for (2) 2x’s
3- 5/8” x 8” x 1/4” for (2) LVL
4- 5/8” x 8” x 1/4” for (3) 2x’s
5- 3/8” x 8” x 1/4” for (3) LVL
6- 1/8” x 8” x 1/4” for (4) 2x’s
7- 1/8” x 8” x 1/4” for (4) LVL
Bottom Plates
Three styles of bottom plates are available (Adjustable Base Set, End plate and Lally Lock Base plate). I used the Adjustable Base Set for my installation. The bottom adjustable plate measures 4-7/8-by-4-7/8-by-3/8-in. with four 1/2-in. threaded holes and two 5/16-in. countersunk holes for securing the plate to the bottom of the column with concrete screws. Below this adjustable plate, a second bearing plate measuring 4-7/8-by-9-by-1/4-in. is installed. This plate has four keyholes for concrete screws, two 5/8-in. dimples and two 1/2-in. threaded holes that receive four 1/2-by-3-1/2-in. adjustment screws. These adjustment screws are rated for 55,000 pounds!
Old Column Removal
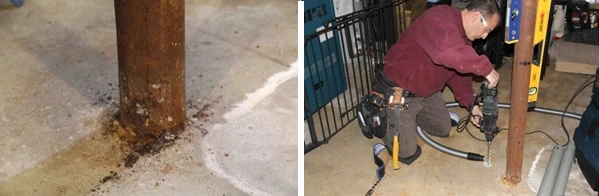
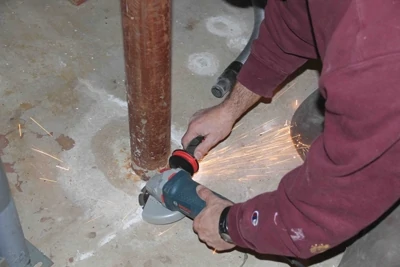
For my situation I needed to temporarily support the house beam while I removed the existing columns. To do this I used temporary screw jack supports, placing one on each side of the column to be removed.
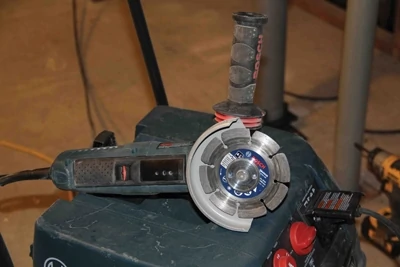
Using a grinder with a diamond blade I cut the column’s metal casing and into the concrete core as deep as I could. A few solid raps with a sledgehammer were all I needed to break the column. After removing the columns I used the grinder and sledge hammer to flatten out the portion of the columns still embedded in the floor.
Lally Lock Installation
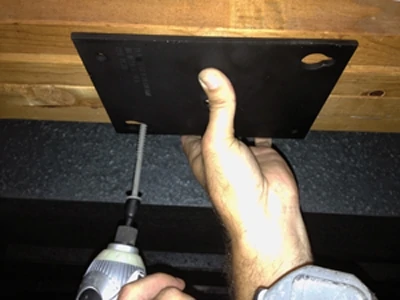
To install, place the beam plate in the location where the column is to be installed. Two screws mount in the small portion of the keyholes, leaving a 1/16-in. gap between the plate and screw head.

Slide the plate off the two screws and screw the plate onto the embedded fastening unit in the column.

Next, Screw in the four 3-1/2-in. adjustment screws 3/8 of an inch into the 3/8-in. adjustment plate. The adjustment plate mounts to the bottom end of the column, with countersunk holes facing outward.
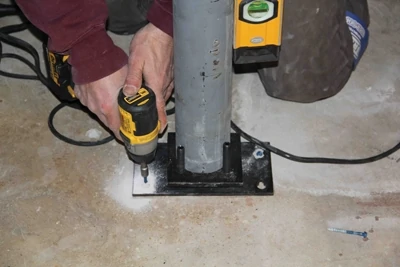
Align the beam and adjustment plates so they are square. Using a 3/16-in. concrete drill bit, drill two holes 2-1/4-in. deep in the center of the two countersunk holes on the bottom side of the adjustment plate. The supplied Phillips head screws fasten into the two holes.
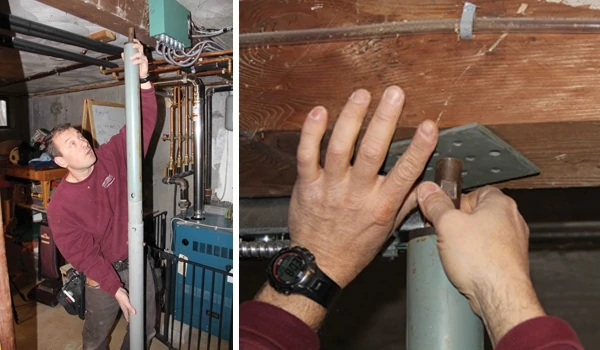
Use a pry bar as a lever to lift the column up to the beam where the first two screws were fastened.
The screws fit into in the large portion of the keyholes. Slide the column over to lock the plate into place. Tighten the two screws and then fasten the last two screws in the round holes of the plate.

Adjustable Base
Place the 1/4-in. bearing plate on the footing under the column. Loosely tighten the two adjustment screws into the 5/8-in. dimples.
Use a level to plumb the column.
Once the column is plumb, use a 3/16-in. concrete drill bit and drill four 2-1/4-in. deep holes in each of the small sections of the keyholes. Fasten with the four hex head screws.
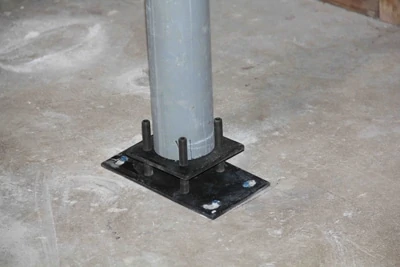
Firmly tighten the adjustment screws in the 5/8-in. dimples. Then, screw the last two into the threaded holes. Thread these screws down until you feel them hit the footing. Do not over tighten these screws.
This procedure leaves a gap between the bottom of the adjustment plate and bearing plate. If you are installing the Lally Lock columns for new construction, the 4-in. slab concrete will fill the gap when poured. If you are using this for a remodel, box out the plates with concrete forms and fill with grout or concrete.
Overall Impression
I was impressed by the Lally Lock structural column and how easy it was to install, and especially grateful that I did not need to jack up the house to get the column in. After I got the learning curve out of the way I was able to install the columns quickly and efficiently.
