By Matt Weber
By installing stock kitchen cabinets, DIY’ers and pro remodelers can get stylish, high-quality cabinets on a tight timeline. Styles and materials vary, but many stock cabinets are made of solid wood with a beautiful finish, and they’re available for in-store pickup or delivery within a week. You’ll find a number of options at your local big box store, as well as a wide range of choices online.
Do It Yourself
Once your cabinets arrive, inspect them for any damage and confirm you’ve received what you ordered. Double-check your kitchen measurements to make sure your cabinet design will work for the room.
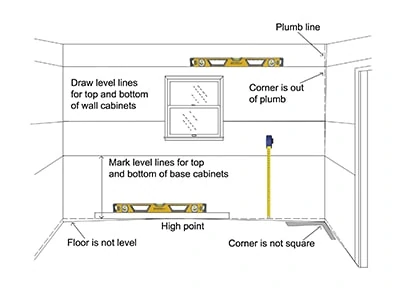
To install the cabinets yourself, first remove any baseboards or other objects on the wall area where the cabinets will be installed. Use a straight edge and a level to find the high point in the floor along the cabinet wall. From the high point, mark a level horizontal line on each wall where the cabinets will be attached. These lines represent the bottom of the base cabinets. From those lines measure upward and draw new level parallel lines to mark the top of your base cabinet. Draw additional parallel lines to mark the location of the top and bottom of your wall cabinets.
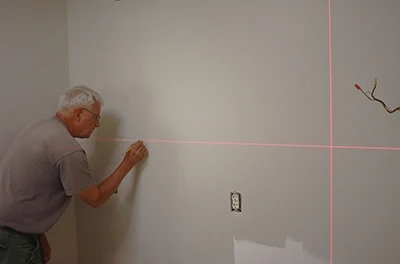
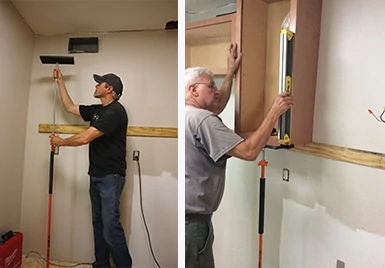
The traditional tools for marking cabinet layout are a straight edge, hand level, measuring tape and pencil, but these days I prefer using a Laser Line Generator instead. These cool self-leveling laser tools project bright red plumb and level laser lines in a crosshair configuration on the wall, giving a quick, accurate visual display of your layout lines. The model we used for this project is made by Bosch and mounts to a standard camera tripod.
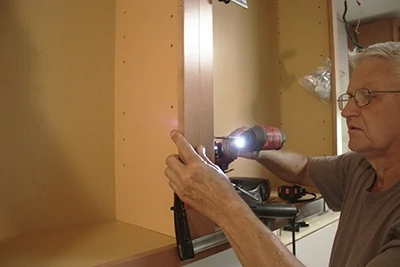
Mark the studs to show where the cabinets will be installed. Don’t assume all the studs are on 16-in. centers; use a stud finder to confirm their location.
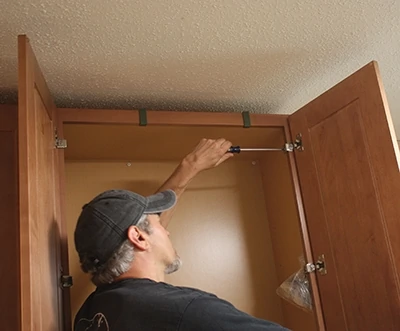
Before installing the cabinets, remove all the doors and drawers from the cabinets. Note: Whenever removing a door, unscrew the bottom hinge first and then remove the top hinge. This will prevent the door from falling away from the cabinet and potentially tearing the screws out of the bottom hinge.
Hang ‘Em High
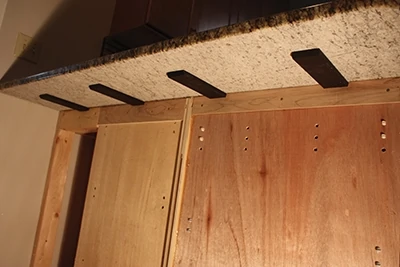
Start hanging the wall cabinets in the corner along the reference line you marked. The cabinets are heavy, so use an assistant or a cabinet jack to help you handle the weight. We used a T-Jak, which has a threaded shaft to make easy height adjustments when hanging a cabinet. You can also make your own T-brace from scrap 2x4s and 1×4—just place a piece of scrap carpeting over the 1×4 to protect the cabinet. Alternatively, you can screw a temporary ledger board to the wall and use it to support the cabinet bottom.
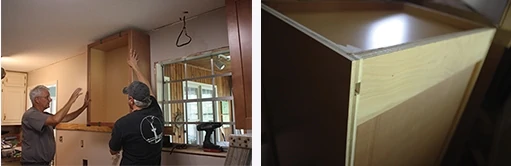
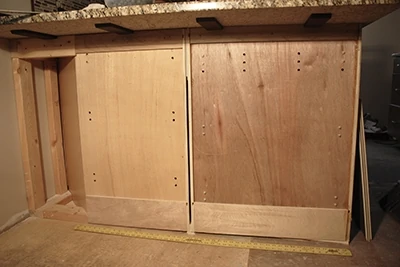
To install the cabinets, measure from the corner to the first wall stud you marked. Transfer this measurement to the inside of the wall cabinet and mark the stud location. Either use self-tapping cabinet screws, or drill pilot holes through the wall cabinet back into the studs with a 3/32-in. diameter drill bit, approximately 2 inches deep.
Note: The fastener holes should be positioned 3/4 inch from the inside top and bottom of the cabinet but should come no closer than 2 inches to any inside vertical edge of the cabinet. This is because stock cabinets generally have reinforced fastening strips along the top and bottom edges that have wood blocking for a strong, secure hold. These strips should be the only areas where you place fasteners, since the cabinet backs are usually made of thin plywood insufficient to hold the cabinets to the wall, meaning the cabinets could tear away from the fasteners if driven into the wrong spots.
Screwing Up
When mounting into wood studs, we recommend hanging cabinets with #10 x 2-1/2-in. screws. Choose a screw with a washer-head to press against the cabinet surface for the best holding power. We used cabinet screws from GRK Fasteners, which have a Zip-Tip to eliminate the need to predrill pilot holes.
Mounting cabinets in cement, block, brick or tile walls will require toggle bolts or anchors for the screws.
Insert the screws into the holes until they are nearly tight (but not fully). Don’t tighten the screws until you’ve finished all final leveling and shimming. Check the front, sides and bottoms of all wall cabinets with a level. Use wood shims wherever needed between the cabinet and the wall to stabilize the cabinet in position. After the cabinet is level and plumb, tighten the installation screws.
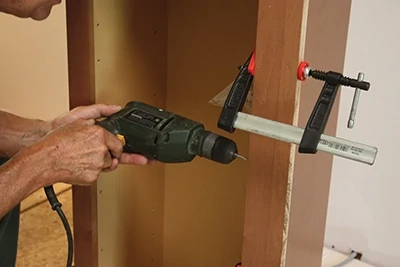
Continue by placing the next cabinet on the wall along the reference line. Use clamps to hold the cabinet face frames together firmly. Be careful to line up the bottom horizontal edges, and make sure the seam between them is flush. With a 3/32-in. bit, drill starter holes through the face frames near the top and bottom. Insert #8×2-1/2-in. trim head screws, that will leave only a small hole to fill.

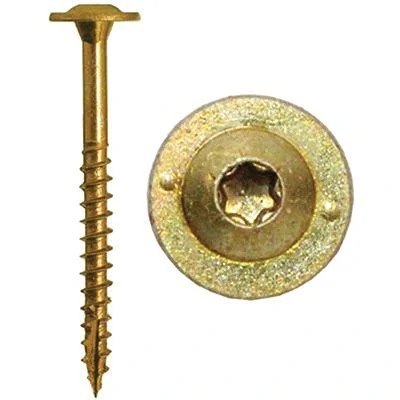
feature a self-drilling Zip-Tip that eliminates the need to drill pilot holes.
Check the cabinet with a level on the cabinet front, sides, and bottom. Shim where necessary. Once the cabinet is level and plumb, tighten all the installation screws and remove the clamps. Continue installing the rest of your wall cabinets in the same manner.
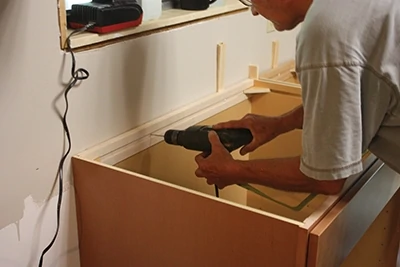
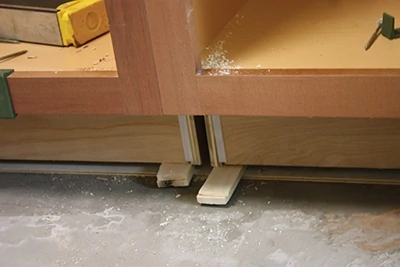
Start installing the base cabinets in the corner. Using clamps, align and join the cabinets together at the face frames. Make sure that the face frames align both on the face and vertically. You might have to use shims beneath the cabinets at low spots in the floor. Remember, the cabinets must be level even if the floor is not. Shims placed along the floor or wall can be concealed later with molding. Make sure the cabinet is plumb and level before tightening the mounting screws.
Doors, Drawers and Details
When the base cabinets are securely installed to the walls, reinstall all the doors and drawers. Always attach the doors by screwing on the top hinges first and the bottom hinges last.
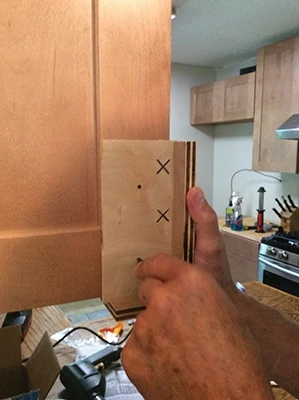
On rail-and-stile doors, the handles are typically installed in the center of the vertical stile opposite the hinge side of the door (a couple inches from the bottom). The most important aspect of installing the door handles is to maintain a consistent position from door to door. Rather than taking repetitive measurements for every handle (which can lead to mistakes), make a simple jig for the corner of the doors. We used scrap wood to cobble together a simple L-shaped bracket that fit over the door corner with predrilled holes at the locations for the door screws. We then made a pencil mark at each screw location to maintain consistency among the handles. The jig also saves lots of time compared to measuring each handle. Drill pilot holes for the handle screws, then attach the hardware.
projection beyond the edge of the cabinet.
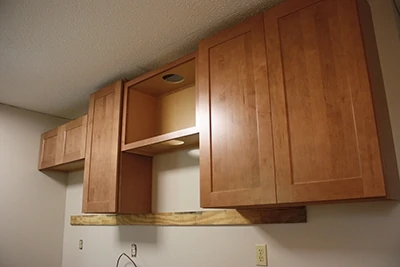
Add a finished touch to your new cabinets with trim details. Cabinet manufactures typically offer matching crown molding for the tops of the wall cabinets, as well as matching floor molding for the base units. In some cases, the new cabinets might not fill the entire void left by the old cabinets. But filler strips are usually available from the cabinet makers, which can be cut to a custom size to fill any gaps with a matching color and finish.
With careful design and smart installation, you can install a new set of stock cabinets with a custom-built look, and do so in less time while saving money.