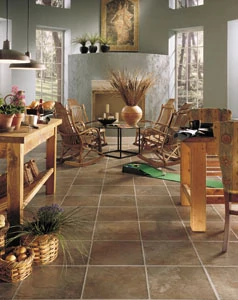
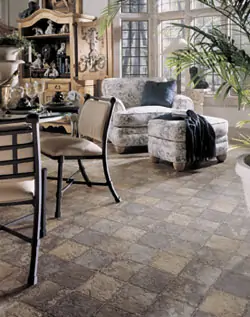
The beauty of a slate floor comes from the striking stone texture and earthy color tones of the tiles, which are cut from natural rock. The many variations in color, pattern and surface profile of slate provides a classic and dramatic décor to the living space. Slate is available in a wide variety of light and dark shades, such as black, gray, red, rust, brown, beige—even blue, green and purple. Choose from single-color slate or from multi-colored tiles with warm reds and golds over a darker background.
Plus, slate is an extremely durable flooring material that requires very little maintenance and does a nice job of disguising dirt. Just sweep or vacuum a slate floor regularly. Mop the surface clean with a bucket of water and household detergent. Tough spots can be scrubbed away with a nylon brush (not metal, which may scar the surface). And slate is usually waterproof, making it suitable for areas often exposed to moisture. Thanks to its waterproof qualities, slate can be used for floors in basements, bathrooms, kitchens or verandahs. Although being waterproof means the floor does not require sealing, homeowners may want to apply a finish to add extra luster to slate’s naturally wet sheen. Simply reapply the finish about once a year to maintain the new, shiny appearance.
Although this high-quality natural stone can be expensive, slate is less costly than marble or granite. The fine texture of slate is actually rather smooth to the touch with no coarse crystals or sand grains. Slate tiles are available with a natural cleft surface, often called “riven” or “split” tiles. The natural surface of a riven tile has the rugged topography of broken stone and provides slip resistance. On the other hand, some slate tiles come smoothly pre-cut featuring a flat, uniform surface — but may be slippery, especially in high-moisture areas. Slate can also be sanded or honed.
Slate tiles are available in several thicknesses. The thickness options are very similar to ceramic floor tiles, with 1/4-inch being quite popular.
Slate tiles are also available in a wide range of shapes. Select from rectangular, square, octagonal or randomly cut. Size varies as well, from large flagstones to small inset tiles. Use neatly cut square tiles for an almost groutless uniform appearance with a contemporary feel, or set variously sized tiles in wider grout lines for an old-fashioned, country appearance. Large slabs of slate are available for stair treads or fireplace surrounds. And some DIY packages sold at home stores consist of about six differently sized pieces that interlock into a random pattern. This “random” pattern actually repeats over and over throughout the slate floor but achieves the overall effect of having randomly placed tiles throughout the room. The pattern is typically printed on the manufacturer’s package to use as a guide.
Planning the Floor
Before beginning installation, remove any existing floor coverings and baseboard trim. Make any necessary repairs, such as renailing any loose boards that might squeak. Slate tile can be installed over a cement or wood floor that is structurally sound and dry. For concrete floors, use a leveling compound to ensure the subfloor is all in the same plane.
Wood subfloors should be a minimum of 1-1/4-inch thick. In new home construction where traditional 3/4-inch plywood is used as a subfloor, use additional sheets of 1/2- or 5/8-inch cement board or plywood to ensure rigidity beneath the tiles. Fasten the reinforcing sheets to the subfloor, spacing screws every 8 inches on center. For plywood subfloors, apply a thin coat of water-based polyurethane to prevent the water from soaking into the wood and causing it to swell beneath the slate.
Sketch a floorplan to calculate how many tiles you require, including any special border features or decorative patterns. Keep in mind that thick grout lines between joints will impact how many tiles will fit on the floor.
Once you’ve calculated how much tile you require, then purchase all your materials at the same time to guarantee consistency and availability. It’s a good idea to order about 5 percent more tile than your calculations require, and be sure to speak to your supplier about any recommendations they have for your particular project.
For more detailed analysis on laying out tile floors, check out EHT‘s online article “Professional Tile Layout.”
Prepping the Tiles
As mentioned earlier, cleft or riven tiles can vary in thickness, so sort them accordingly before laying the floor. Tiles that are notably thicker can pose a tripping hazard if the edges stick up above the normal plane of the finished surface. When installing it is smart to start with the thickest slates and use adhesive to build up the thinner tiles.
Also, check for surface damage. Set aside any chipped pieces of tile to cut for edge pieces. And color varies as well, so sort the tiles according to the color pattern you want, and stack them around the room strategically so they’ll be within reach during the installation.
With the tiles sorted, the next step toward a new floor is to lay out the tiles in a dry run. First snap two chalk lines at true 90-degree angles, forming an “X” on the floor with the intersection of the two lines located on the center point of the room. Lay rows of tiles (or blocks of pattern) along each line, starting at the center point and running them all the way to the edge of each wall.
Use tile spacers if you prefer visibly distinct grout joints. Insert the small “+” shaped spacers so they stand up between the tiles like a tiny handle. These maintain uniform joint spacing during layout and installation. Simply remove them in the grouting phase. Or, you may opt to butt the tiles against each other and grout the resulting fine joint line between them, using no spacers.
Typically, at this point the dry run reveals that the last tile against the wall will not fit in the space provided. Here you will need to adjust your original chalk lines so the border tiles of opposite walls will be the same size, resulting in a symmetrical tile layout. Adjust the chalk lines, then once again lay a dry run of tiles to make sure the layout will be symmetrical using the new chalk lines as a guide. Lay tiles dry, filling the four quadrants created by the chalk lines until the whole floor, apart from the edges, is laid out. Make sure the layout is square and symmetrical and correct any errors before installing with mortar. There should be no border space along the edge of the walls of less than a half tile in width.
With the layout in place, cut tiles to fit around the room’s edges, allowing at least 1/8 inch grout joint along the walls. Slate tiles can be cut with a grinder or a standard hacksaw with an abrasive blade. However, a diamond-blade wet saw does the best job and can be rented at most home centers and rental outlets. To drill holes in slate, use a masonry bit and smooth the hole with a half-round file.
Installation
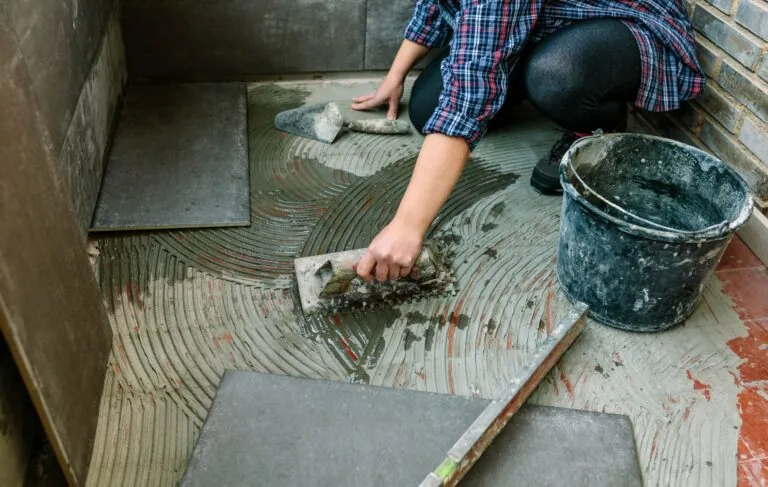
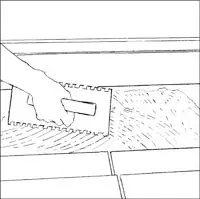
With the dry tiles in place, lift about nine tiles in the corner of the room furthest from the door. While Slate Floor Tile Adhesive can be used to anchor the floor, some pros recommend using a latex-Portland cement mortar (thinset) mixed with acrylic instead of water. Using a trowel with 1/4-inch notches, spread a bed of mortar evenly over a 2-by-3-foot area. Then reposition the tiles from the walls inward. Reinsert spacers, if required.
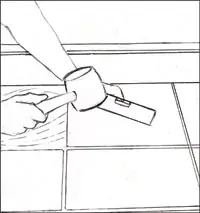
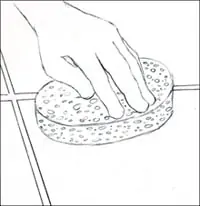
Press each tile down firmly or tap with a rubber mallet. As you progress, use a carpenter’s level to ensure the floor surface is even and flush. As mentioned earlier, thinner tiles may need to be built up with mortar. Use a damp sponge to immediately remove any mortar from the face of the tiles. Continue working outward from the walls nine tiles at a time, progressing toward the room’s exit and taking care not to upset the newly mortared tiles.
When the floor is completely mortared, allow the slate to set for at least 24 hours. Then remove any spacers and fill the joints with sanded grout. Do so by spreading approximately 1 pint of grout over the tiles at a time, working it into the joints with a sponge float. The sponge float features a dense foam pad on the base. Use the float tilted at a 45-degree angle to work the grout back and forth over the slate to cover all joints. Wipe the excess grout off with a damp sponge as you go. Rinse the sponge frequently.
Once the floor is fully grouted, you can shape the joints by running a dowel or grouting tool over the grout lines.
Seal the Slate
While not absolutely necessary, some homeowners prefer to seal anew slate floor to help protect it from staining. Do not apply sealer over wet or waxed slate. Allow the floor to cure for 30 days prior to sealing. Sweep up and dust loose particles. Apply a low-sheen, water-based, oil- and stain-resistant slate sealer over the entire floor with a paint brush, pad applicator or large, clean cloth. Apply the sealer in a thin coat, following the grain of the slate. Let it dry for two hours and apply a second coat. Stay off the floor for 24 hours while the sealer cures to avoid foot marks on the new floor.
If you prefer the natural beauty of the slate rather than finish with a sealer, it is still a good idea to seal the grout lines with tile sealant. Work the sealant over the grout lines with a small, 1/2-inch paintbrush. Remove any excess sealant and allow it to dry for at least four hours.
For areas where water and moisture are common, such as kitchens and bathrooms, it is advisable to seal any gaps between the walls and the tile with caulk. Allow the caulk to dry for 24 hours and then enjoy the striking decorative appearance of your new slate floor.
Tools
Chalk line, Angle grinder and/or Diamond-blade wet saw, Notched trowel, Grouting float, Carpenter’s level, Clean sponge, Masonry bit, Half-round file, Dowel, Caulk gun, Broom, Tile spacers (optional)
Materials
Slate tiles, Thinset mortar or Slate floor tile adhesive, Grout, Caulking, Tile sealant


