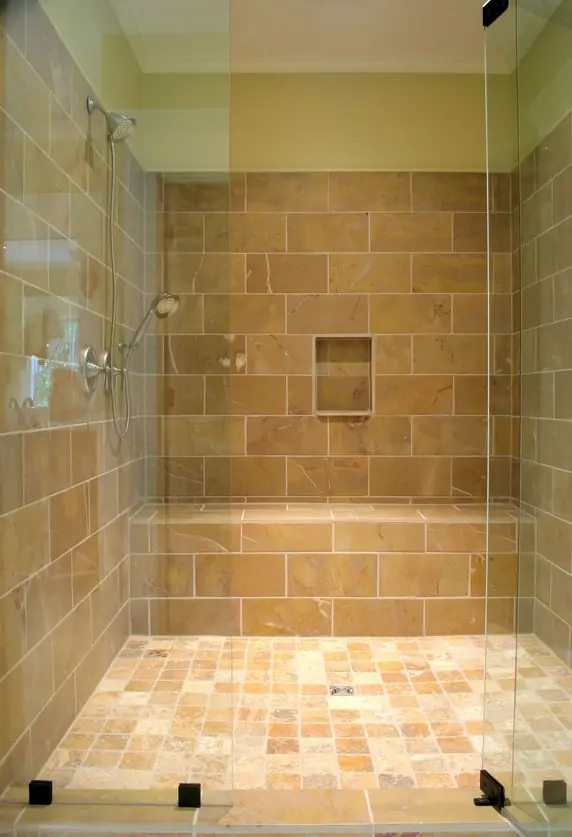
Although showers laden with ceramic tile look great, leaks are an inevitable fact of life. You can’t assume your shower floor is waterproof just because you see no visible signs of tile or grout damage. Ceramic tile showers are not waterproof; they are water-repellent. Under the tiled floor surface lies about 2 inches of cement mortar. When using the shower, this mortar becomes saturated with water. Small “weep holes” at the base of the drain fixture allow the water to move down the drain pipe. Still, over time the water infiltration can cause damage to the grout, causing loose tiles and crumbling grout lines. Shower liners beneath the mortar are what protect the subfloor from deteriorating in the same way.
Most modern shower floors incorporate a flexible liner as a waterproof membrane beneath the tile and mortar. These liners are made of polyvinyl chloride (PVC) or chlorinated polyethylene (CPE). The membranes are used in lieu of the outdated lead shower pans that were used years ago (and would ultimately fail over time). The flexible liners, available at plumbing wholesale stores and ceramic tile shops, are made of a rubber-like material that is impervious to water and resistant to the many chemicals found in a home. In fact, the stuff is probably an environmentalist’s nightmare—it never seems to deteriorate.
The flexible liners conform to the various contours of the wood framing, bending upward at the walls and folding into corners. PVC liners tend to be stiffer and more difficult to work with than CPE liners, so a CPE liner might be a smart way to go for any first-time DIY’ers tackling the job. The drawback to CPE is that the material can be almost three times as expensive per square foot as the PVC product.
Line it Yourself
Installing a flexible shower pan liner is not beyond the ability of a smart do-it-yourselfer, but there are a few guidelines to help ease the procedure. This article will assume the subfloor of the shower is constructed of plywood, although the same principles apply to concrete flooring where the sloped mortar bed is applied beneath the pan liner. The installation method is the same for CPE and PVC liners, with the exception of the bonding adhesive used for seaming.
For a typical plywood subfloor, begin by cutting a hole in the center of the shower floor for the drain assembly. Start with a small hole; you can always cut away more material with a utility knife, but you don’t want the drain hole to be too big. Then lay the drain base in the opening. Make sure the liner doesn’t interfere with the drain’s weep holes. Once you have made a good fit, use adhesive silicone caulk on both sides of the liner where it contacts the drain. Plastic plumbing drains usually have a 1/8-inch flange lip that project’s above the subfloor. In some cases this may stop some of the water from easily flowing into the drain. One solution to this is to route a channel that allows the top of the drain flange to be flush with the subfloor. Then solvent-weld the drain base to the drain pipe using the appropriate solvent cement.

To prevent the small weep holes in the drain from getting clogged with cement or debris, place washed pea gravel over the holes. It may help to cover the drain base opening with duct tape to keep out debris until you’re ready to add the finished drain.
Many tile shower drains have threaded, adjustable finished drains that allow you to adjust them to a wide range of finished floor thicknesses. The flexible liners attach to the drain like a rubber washer pinched between a nut and bolt. Once the adjustable finished drain is tightened, all the water in the shower will flow toward the drain.

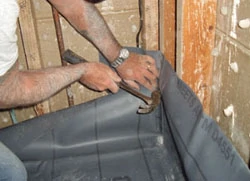
The pre-measured liner needs to lap up the sides of the shower walls at least 9 inches. It is nailed to the framing studs of the shower near the top of the lapped edge. If it is necessary to seam together two pieces of material, a special solvent can be used to glue them together to form a single waterproof liner.
Spread the liner material from the drain body outward, toward the side framing and the curb so it lays flat on the floor. Fold the corners and nail or staple the liner to the sidewall framing or wall studs. Fasten 1/2 inch below the upper edge of the material. Work your way around the perimeter of the liner, fastening it into the framing. Lap the edge of the liner completely over the shower curb and nail it to the outside edge of the curb.
Tip: Are you also building the framing of the shower? If you can adjust the rough framing slightly, installing the liner can be a much easier job. When framing a shower, leave 1/4 inch of additional space at the end of each corner. This means the total wall length is 1/2 inch shorter than the opening. The gap provides a good place to store the extra CPE membrane material that bunches up as you round the corner. If you don’t have the option of adjusting the framing, then just keep the corner folds as flat and tight as possible.
Test the installation by plugging the drain pipe and filling the shower basin with water just below the top of the curb, and then let it sit for four hours. Check for leaks and repair as necessary. Retest the liner until you’re sure the installation is leak-free. Completely drain the water and dry the shower before moving on with construction.
Above the Liner – Composite Marble Pan
One popular alternative to a tiled shower floor is a composite — or ‘solid surface’ — shower pan. Whereas the walls can still be tiled, this single-piece composite material will last virtually forever without any problems of water penetration. Virtually all new tiled shower installations develop cracks in certain grout joints within the first five years. However, using a composite pan eliminates the grout joints in the floor and, in turn, eliminates the leaks. All you’ll have to worry about is the grout joints at the wall/floor transition.
The composite pan shown in the photos is considerably more expensive than a tile floor, but it is easier to install and will ensure you don’t have to re-tile the floor as long as you own the home. These pans are custom made, poured into a form according to the exact measurements you provide to the supplier, so make sure the dimensions you specify are correct for your shower framing. The molded piece of composite also features a pre-sloped surface to send water straight to the drain.
This single-piece flooring rests on a bed of sand that conforms to the shape of the bottom side of the flooring and provides an adjustable, cushioning barrier between the floor and the liner. Make sure sand does not get into the drain and clog the weep holes. Spread the sand evenly over the liner surface.

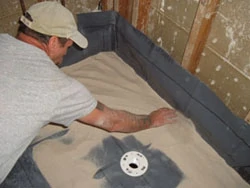

Next, place the pan on the sand. Use a carpenter’s level to make sure the floor is level. Use a dowel or paint stick to adjust the bed of sand so the floor sits level. Do your best to ensure the bed of sand has even contact with the underside of the composite floor. You’ll need help placing the pan because the composite material is very heavy.
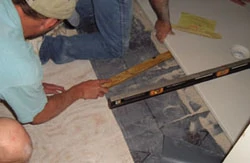
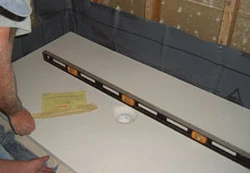
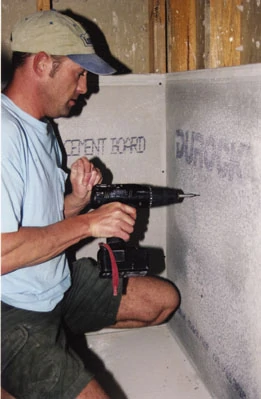
With the pan in place and level, install the cement board walls to the side framing. In this case, the bottom of the cement board should rest snugly on top of the composite floor, pinching it in place. Then finish the walls with thinset and tiles, grouting the joints between the walls and the floor.
Where Can You Find a Shower Floor Like the One Shown Above? We at EHT get this question all the time. You should look up “Marble-Cultured” in your Yellow Pages, as most of these companies operate at a local level. Look for a company that offers “customized cultured marble products.”
Above the Liner – Tile Floors
For the more traditional tiled shower floors, installation differs. Since you’re not using a pan with a prefabricated slope, you have to create the slope. The slope in the floor allows all the moisture to drain, eliminating the cause of fungus, mold and odor. Plumbing codes require a slope of 1/4 inch per foot, and the Tile Council of America & ANSI standards recommend using “slope under waterproofing membrane.”
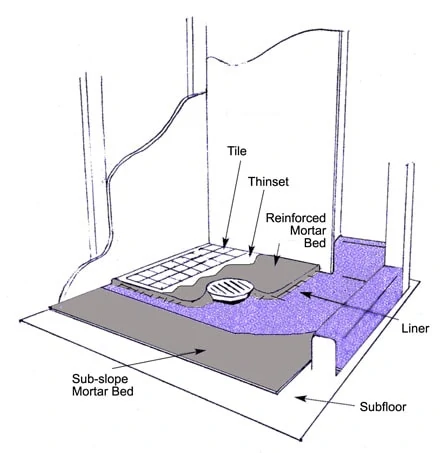
There are three primary ways to create the slope. The floor framing can be pitched to form the slope. You can also use a special manufactured product that creates the required slope for you (see Side Note below). Or, you can lay a bed of latex-modified mortar and trowel the slope onto the surface.
After the mortar bed has fully cured (or the slope is otherwise created), then install the liner over the sub-slope, in the manner shown above. Then install a second mortar bed, reinforced with wire mesh and floated to the floor’s final slope. After the second mortar bed has hardened, apply the tiles with thinset. Make sure the thinset is smooth with no hills or bumps to keep the tile floor even and beautiful. Allow the thinset to cure at least 24 hours before grouting.
Note: Before installing the shower floor, install the waterproof wallboard, positioning the bottom edge of the panels 1/4 inch above what will be the finished height of the tile floor to allow room for a control joint, later to be filled with backer rod and sealant. And when installing the wall panels, don’t nail through the cement board and pierce the liner where it laps up the wall framing; place fasteners above the liner instead.
Extra Project Tip from reader P.W. Ferraro:
Especially if you intend to install tile in the shower, you should install black craft paper behind the cement board to prevent the studs from rotting out. The cement board won’t rot when it gets wet, but it is not water-tight and the spacing on the cement board fasteners is 6 to 8 inches. I also suggest using dry-pack grout rather than sand to prevent the sand from going down the sub drain.


