By Rob Robillard
Hardwoods floors offer an unrivaled sense of quality that survives home building trends and decorating fads. Hardwood flooring includes many species of wood and finishes, ranging from traditional classics such as oak and ash to contemporary styles like maple and the unusual patterns of exotic hardwoods like Brazilian Tigerwood or African Sapele.
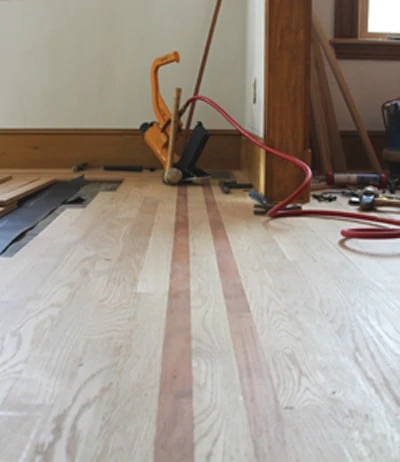
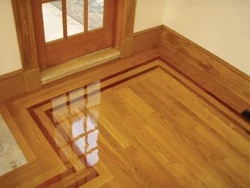
If your personal style is more cozy and rustic, you might want to consider hickory or cherry hardwoods. Add a hardwood border and feature strip to any hardwood flooring installation and you’re talking high-end curb appeal. A border usually consists of 8 to 12 inches of similar flooring material running along the wall. A feature strip is an accent that highlights and shows off the decorative borders as well as enhances the hardwood flooring installation.
Why Use a Border and Feature Strip?
Adding a border and feature strip to your next hardwood floor installation is a great way to show off your artistic side and create a floor that either follows a classic design or showcases your artistic flair.
When I see a border and feature strip installed in a hardwood floor I immediately think “high-end and quality.”
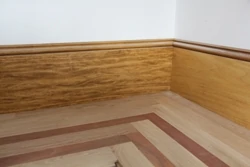
Border and feature strips are becoming more popular these days and are mostly seen or associated with expensive homes and remodels. Borders are typically done in the same material as the rest of the floor or “field”. A border frames the “field” of the flooring much like a picture frame, enclosing the ends of the rows with flooring that runs perpendicular to the rows, so the rows do not terminate into a wall.
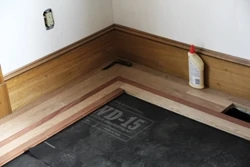
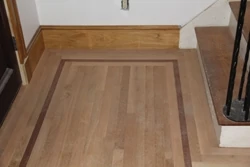
A feature strip, which can highlight the border, is usually darker and can be made from many different materials, shades or sizes. Walnut and mahogany seem to be the most popular in my neck of the woods, probably because they’re offered in many shades. (This project shows Santos Mahogany.)
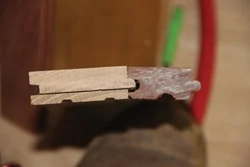
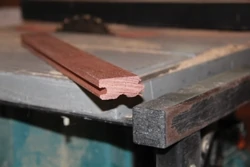
When considering installing a feature strip in your hardwood floor, the best time to do it is when the floor is being installed. The cost of installing a feature strip is mostly labor since the amount of materials used is minimal.
People often ask where a feature strip should be placed. That’s a personal choice but many if not most features strips run along the borders of walls, typically 6 to 12 inches off the wall but not so far that it disappears under the outer perimeter of an area rug.
One rule of thumb that I follow is to use one strip in smaller areas and double strips in actual rooms or larger spaces. Typically I use standard width boards for blind-nailing purposes. Thinner strips can also be used by milling down strip flooring and installing face nails.
Adding a border is usually a separate labor charge, and the feature strip can add anywhere from $1.50 to $10.00 per lineal foot depending on the material cost.
Designing a Border and Feature Strip
When deciding on a border and feature strip, make sure to research and choose a material with a density similar to your flooring so it will wear evenly. If you choose different density materials you may be unhappy in a few years when they wear at different rates.
Layout is also important. The border and feature strip planning and measuring must be done before a single board is laid. One small mistake can grow exponentially into an installation disaster later.
Use a combination of 3-4-5 triangle measurements, large squares and parallel measurements to determine the layout of your border and feature strip.
There is an old carpentry rule that a small error in the foundation can compound itself and become a big error by the time you build the roof. This is also true for hardwood flooring.
Be sure to allow a minimum expansion gap of 3/4 inch around all vertical obstructions.
Color, Shade and Joints
Hardwood flooring comes in boxes and often you might receive different cuts or “lots” of wood from a flooring manufacturer. Take the time to open and install the flooring from several cartons at the same time to ensure a good mix of color and shade.
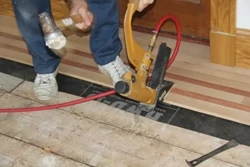
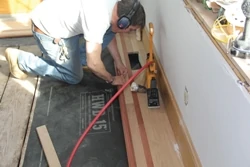
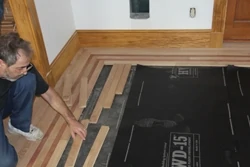
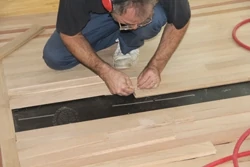
Where the field rows terminate into the exposed tongue of the border, carefully mark the length of the final boards.
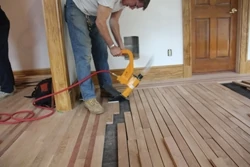
The layout of your flooring is important. Be attentive to joint spacing and staggering the ends of floor boards at least 4 to 6 inches, between adjacent rows. This small detail will make a big difference once the entire floor is in. By installing the floor with random joist spacing you will achieve an overall nicer looking installation.
Installing a Border and Feature Strip
As with any hardwood floor installation, take the time to orient or, if needed, cut and scribe the first border boards to ensure the row is parallel to the opposite wall. Check and double-check this before starting the installation.
Contrary to popular belief, there is no need to “square” your border around the walls of the room. Borders don’t look right if not running parallel to the walls.
Use the same flooring material on the borders as in the middle “field” boards.
When installing the border and feature strip, use a consistent and overlapping pattern in the corners. This pattern, not unlike a herringbone pattern, is a pleasing finish detail.
Generally you will follow the walls with your feature strip and avoid going into small nooks with it, which makes it look too busy. In these situations, fill in the nook with a larger border (“field” boards).
When installing the feature strip you can either install a full width board and blind-nail the board or rip it smaller to a desired width and face-nail it in place. Since the feature strip is highlighted in the floor I prefer to hide the nails.
For a good finish, it helps to sandwich the feature strip between two similar direction border boards. This keeps all the end joints of the field boards off the feature strip.
Filling in the Field
Complete the entire border and feature strip on at least three if not all four walls prior to filling in the middle “field” boards.
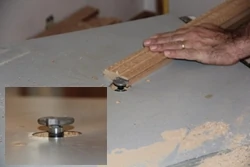
When you reach the opposite end of the room, use a tongue-and-groove router bit to rout the ends of the field boards so they fit onto the border tongue and lock in place. When doing this, hold the last two boards slightly off the floor at their joint. Slowly lower the two boards down and then slide the boards into place over the previously installed board tongue.

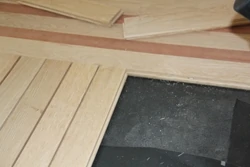
Routing the last board is better than gluing and nailing it in place. Routing this board provides a much better joint and allows for natural and seasonal movement without breaking apart. If a glue bond fails, then you will end up with gaps.
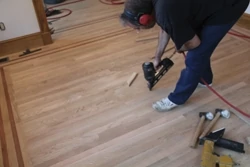
One method that works well is to install both sides of the field at the same time and work toward the middle. Working to the middle ensures that the outer edges are consistent and leaves the last board in the center. This ensures that you do not install the last, and most likely thinner, board next to the highly visible feature strip.
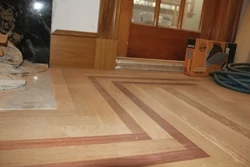
When you get closer to the middle, instead of finishing the field with one really thin narrow strip, you can always rip a little material off several boards and re-groove them to finish the floor without bringing attention to a much narrower strip.
Usually, however, a slightly narrower board will not be picked up in the middle of the floor and is usually hidden under an area rug.
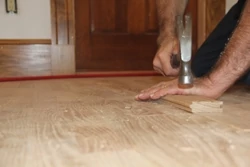
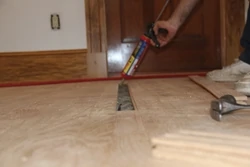
For the last piece: On a table saw, rip the tongue off the second to last piece and install it. Then rip the last piece to the necessary width and install it using construction adhesive and face nails. Many times you will need the assistance of a wood block to “persuade” this final piece into place.
Editor’s Note: Robert Robillard is a remodeling contractor based in Concord, MA. He is also the editor of a www.AConcordCarpenter.com. Visit his website to learn practical solutions to your home improvement problems.


