By Larry Walton
Photos by Mark Walton
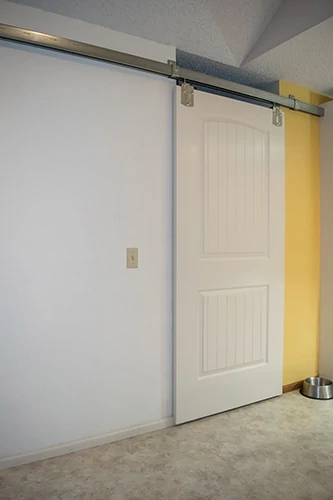
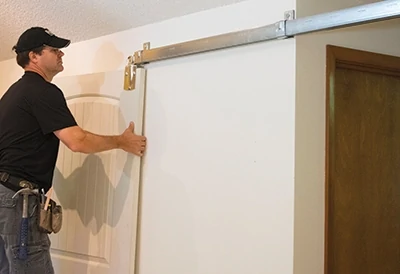
I’ve installed several doors using barn door style hardware recently, which is why I knew it would be a quick and easy solution to keep our new puppy from destroying the furniture in our living room.
Some of the custom home builders we work with use this type of door design to make very cool and different looking door setups. It has several of the advantages of a pocket door without some of the hassles.
It can be parked out of the way by sliding it open behind wall tables, easy chairs or sofas staged with backs to the wall.
Unlike pocket doors, it can be easily installed as an afterthought, change of plans or upgrade. It has the advantage of being quite forgiving in specifications because it overlaps the opening and does not need to be sized or aligned perfectly.
It is easy to adjust. Plus, you can get to the entire door for touchup or repair.
A barn-style door can be installed in lots of remodel situations as a single door or in pairs. The requirements are few: enough room to park the doors when open, and sufficient anchor points for the rail brackets.
This project can be very easily reversed, which makes it ideal for a temporary solution such as saving furniture and carpet while you are training a new puppy. Because the hardware on this project requires only three lag screws penetrating the wall, if we decide to remove it the only repairs would be filling the three holes and adding a little touchup paint.
When it comes to doors, you have a number of options including building your own doors to fit, which can be done in a true “barn” fashion. But the simplest approach is to buy an off-the-shelf door blank or two from your home-improvement center. You can match existing doors in the house or, as in our case, match some nearby cabinet doors.
Our lab-mix Buddy figured out how to roll the door open right way, so we put a simple hook latch on the door and a corresponding eye on the wall.
The installation is pretty straightforward, but there are some tips that make the job go smoothly and help the doors operate and adjust easily. The Stanley hardware we used for our project was designed for very large, heavy doors, so spanning a hallway opening with hollow-core doors was no problem. We started the project by noting that a 3’0″ x 6’8″ door would work well to keep dogs from invading the no-dog zone of our house. You can use any one or combination of two doors commonly found in interior applications.
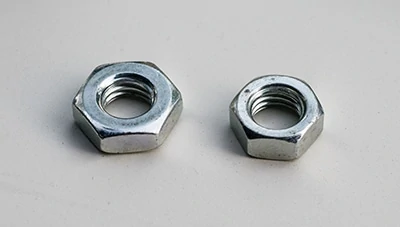
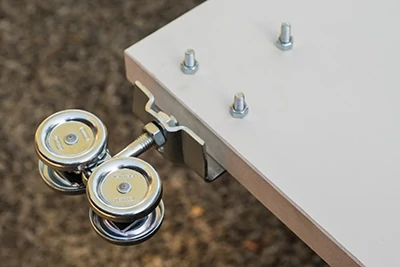
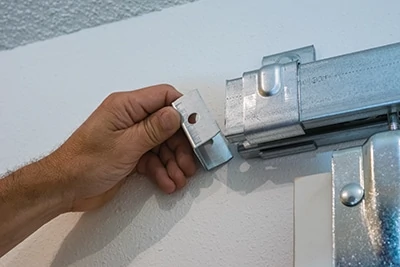
There are a few details to note when assembling the hardware for the doors. One is the difference between these two nuts with the same inside diameter and thread pitch/count but different outside dimensions. The larger one goes on last and fits in the channel of the door bracket. Not only is it kept from spinning by the shape of the bracket, the additional surface area of the nut helps carry the weight of the doors.
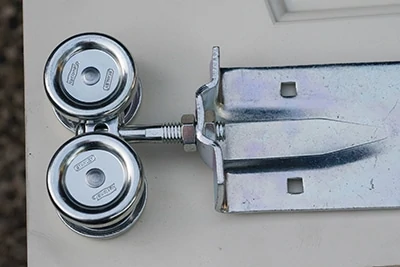
Note that the hanger (or trolley) has a stamp indicating the bottom. This is important to get the hanger bolt into the proper position.
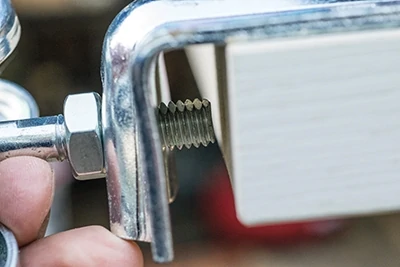
With the large nut in the channel, the flat areas on the hanger bolt allows the door to be adjusted for height and level while holding the weight of the doors.
Notice how the shoulder of the door bracket must be held off the door top enough to allow for adjustment to the hanger bolt, which needs room to extend toward the door.
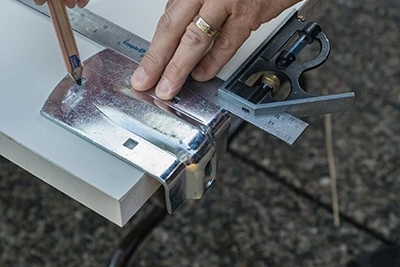
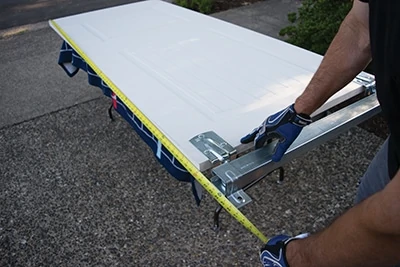
With the door bracket centered on the door stile and allowing for adjustment, I used a combo square to align it and then marked the carriage-bolt locations.
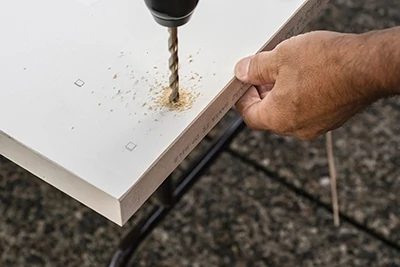
I drilled through the door for each of the carriage bolts.
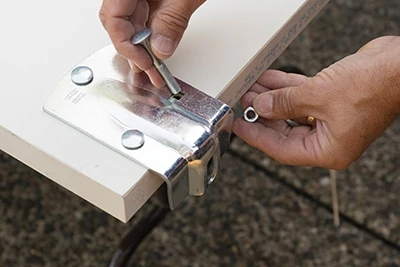
I placed each of the carriage bolts and started a nut on the underside before turning the door over to tighten the nuts.
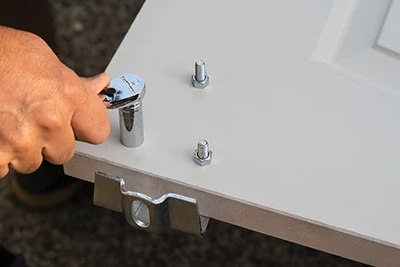
When securing the nuts, be careful not to overtighten, which could dent or even break the face of the hollow-core door.
With the door brackets mounted, I Installed the hanger and cut off the carriage bolts just outside of the nuts with a reciprocating saw equipped with a metal cutting blade.
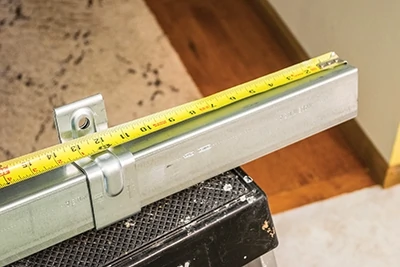
I put the box rail in position over the hanger wheels so I could measure from the bottom of the door to the lag screw hole on the box rail mounting bracket. I added one inch to this measurement to allow clearance between the bottom of the door and the floor.
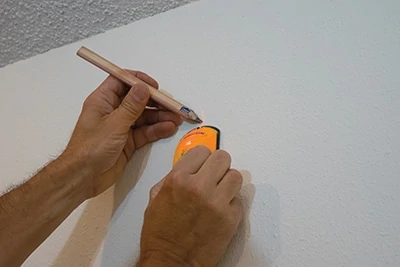
I used a stud finder to locate the center of the studs for the rail brackets. It’s critical on this installation that the lag screws are mounted solidly into framing.
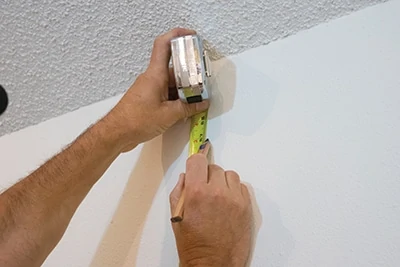
At one of the stud locations, I measured from the floor to mark the box rail bracket’s lag screw location.
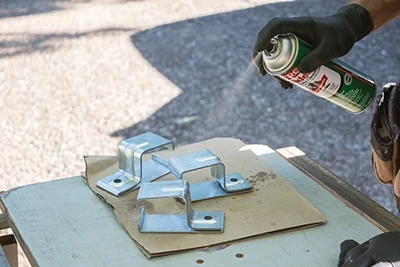
Brake Kleen and a rag will help clean the protective oil off the box rail brackets.
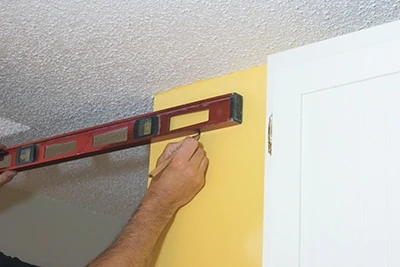
I transferred the floor-to-lag-screw measurement to the other stud locations with a level.
The lag screw locations should be predrilled to a diameter just under the minor diameter of the lag screw threads. I use the largest drill bit that cannot be seen when lined up behind the screw threads.
I pre-positioned the box rail brackets at the lag screw locations on the box rail.
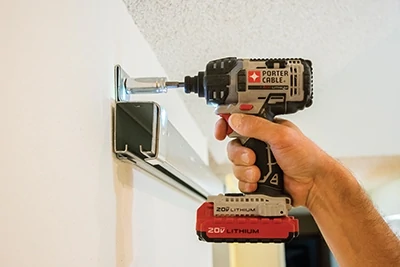
Starting with the center bracket, I attached all of the box rail brackets to the wall with the lag screws that came in the kit.
A socket attachment on an impact driver works well for this job.
I then rolled the wheels of the hangers into the open end of the box rail.
The end cap for the box rail fits inside and can be driven flush with a hammer. It keeps the hanger wheels from exiting the box rail.
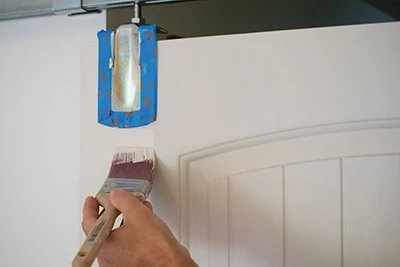
If the door isn’t already finished with paint or stain, seal and/or prime all sides and edges to prevent it from warping.
The new door works great for everyone but Buddy.
 Side Note
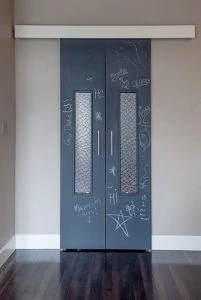
There are lots of door combinations and mounting methods to this type of sliding door setup. A pocket-door track is hidden behind a valance on this set of custom double doors.




 Side Note