By Matt Weber
Mosaic tile is a combination of tiny colored tiles called “tesserae” that can be used to create a pictorial or geometrical design to decorate a home’s interior. A single color can be used for a plain design, two complementary colors are a more popular option, or use many colors for a complex pattern. With the many small tiles the installer can play the role of artist, using the individual units like blocks of color in a painting. With enough time, work and patience, tile professionals can use a wide variety of colors to create an intricate floor or wall that rivals the craftsmanship of Roman times, when mosaic tile was a favored medium for historic murals.
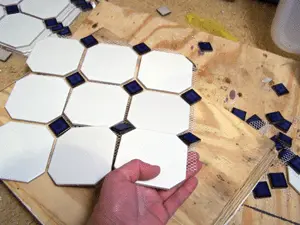
However, the painstaking chore of assembling mosaic tile piece by piece is a task best left to the pros. For the do-it-yourselfer, a faster and easier method is to use larger tiles that consist of many individual tesserae attached to a scrim backing in a prearranged pattern. The scrim backing can be cut to size with shears and allows the tiles to easily adhere to the floor. The repeated patterns of tesserae can be used over large areas to achieve the look of a complex design. The tesserae are usually made of glazed ceramic, which makes them water-resistant and a preferred material for areas such as bathroom floors, as shown in this article.
Prep and Plan
The first step in installation is to remove any existing floor covering and ensure the subfloor is clean, smooth and flat. If necessary, level concrete floors with a leveling compound.
On the project in the photos, professional remodeler, Jeff Davis, opted to cover the bathroom subfloor with precut HardiBacker cement board. HardieBacker is both mold and moisture resistant, which is ideal for tile installation in wet areas. Davis fastened the cement board to the plywood subfloor with deck screws every 8 inches in the designated screw holes that are printed on the face of the HardiBacker.

Next, map out a floor plan to determine how many tiles you’ll need. Then, lay out the first couple of rows in a dry run, temporarily taping the tile joints with masking tape, if necessary. Snap a couple of intersecting chalk lines at right angles on the backer board, marking the joints of the first row of tiles. The chalk lines will serve as a guide for placement of the first rows.
Stick ‘em Down
When you’re satisfied with your layout, remove the tiles and pour a little thinset mortar in the corner of the intersection of your first two rows. Use a notched trowel to spread the adhesive, combing it slightly to create ridges in the mortar bed with a depth of about 1/4 inch. Place the tiles in the mortar bed, keeping them in line with the chalk lines. Slightly twist each tile as you install it to embed the scrim for a better bond. Continue laying adhesive and tiles across the room, using a floor level to make sure the tesserae remain flat and level. Davis suggests starting at the far corner of the room and working toward the door so you don’t “trap” yourself with the new flooring.
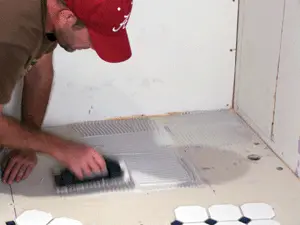
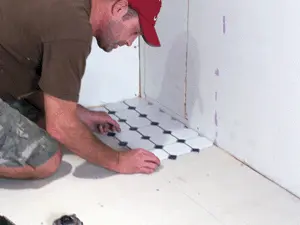
If the individual tesserae blocks are uneven, then lift the tile and adjust the mortar bed beneath it. And, although scrim-backed mosaic tile is designed to be “self-spacing,” Davis notes that the flexible nature of the scrim can cause the small tiles to shift slightly out of position. When this becomes an issue, he uses standard tile spacers to keep all the joints consistent.
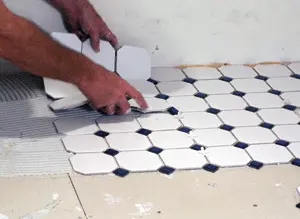
For edge tiles, you can cut the scrim right along the tesserae joints with scissors, shears or a utility knife. Use construction paper to make templates for fitting tile around pipes, vents and other obstacles. You can cut out individual tesserae as needed, and tile nippers can be used to make partial cuts of the individual blocks. When installing the cut tiles, be sure to allow for the 1/8-inch grouting joint around walls or obstructions.
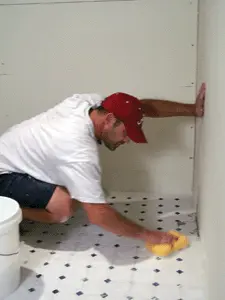
Try to avoid walking or kneeling on newly laid tiles. Clean off excess adhesive with a damp sponge as you move along, so it doesn’t harden on the tile surface as it dries. Once all tiles are in place, allow the floor to set overnight.
Grout the Joints
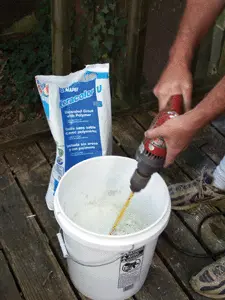
The following day, Davis used a power drill and paddle attachment to mix up a batch of polymer-modified, sandless grout for the new floor. Manufactured by MAPEI, the Keracolor U grout that Davis used contains BioBlock technology to protect against mold and mildew. Whatever brand you choose, make sure the grout is waterproof and mix it according to instructions—usually to a consistency similar to pancake batter.
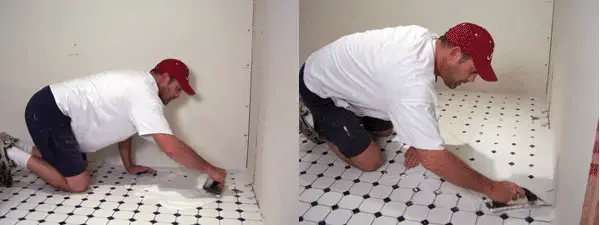
Start in one corner of the room and apply roughly a pint of grout to the floor. Use a rubber grouting float to work it evenly into the tile joints. Holding the float at a 60-degree angle, press the edge down firmly to ensure the joints are filled completely. Apply the grout from one corner of the room toward the door, working with a pint at time and sponging up any excess as you go. Pull the sponge diagonally across the tile so it doesn’t pull grout out of the joints. You’ll need to keep a bucket of water handy to rinse the sponge often. Davis also suggests using a sponge that has an abrasive pad on one side for scrubbing grout loose as it begins to dry.

Once the tile is fully grouted, you can expect to revisit the floor two or three more times with a sponge and clean bucket of water. The grout will likely leave a film that will take a few attempts to remove.
Seal it Up
To fully waterproof a mosaic tile floor, use a mildew-resistant caulk to seal around pipes and bathroom fixtures. Allow the caulk to cure 24 hours before exposing it to water.
Many scrim-backed mosaic tiles come pre-glazed, but if that isn’t the case, then the floor will require a sealer. If using unglazed mosaic, then seal the entire floor. First sweep away any dirt, dust or loose debris. Use a paint roller to apply a coat of tile sealant according to the manufacturer’s instructions. Wait about a half hour after the application to clean up any excess sealant, and let it dry overnight.


