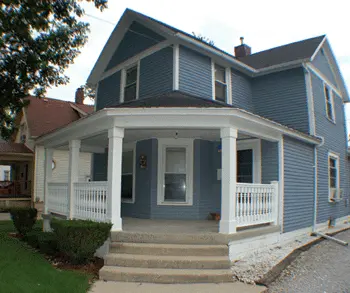
PVC Column wraps and a matching balustrade system create a stylish porch with great curb appeal.
Most homeowners dream of relaxing on their front porch and watching the world go by. Tina and Brett Mealer had the same dream, so they decided to transform their ho-hum, bare-basics porch into a showpiece.
“We had some ugly wooden posts holding up the porch overhang, and the kids kept jumping off the porch area,” says Tina Mealer, a resident of Wauseon, Ohio. “We wanted to create more of an enclosure that we could all share together plus add ‘curb appeal’ to our home.”
The Mealers got their dream porch when local contractor Steve Roth installed PVC Column Wraps from Fypon to surround the wooden posts and added balustrade systems to enclose the entire porch area. Made of synthetic materials, the low-maintenance porch pieces resist warping, all forms of insects, decay and rot.
“The column wraps went up easily,” says Roth. “Each one comes in a kit and includes a semi-assembled, two-piece wrap with the cap, base, installation cleats and caulk adhesive. The external cleats make installation a breeze by making them easy to reach and providing flexibility in positioning. I had each column wrap up in under 15 minutes.”
Working with PVC Column Wraps
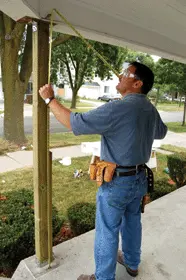
Fypon PVC Column Wraps are non-structural and must be installed around a previously installed structural post. The post provides the load-bearing component of the column, and the load-bearing capacity is determined by the strength of the post. Note: Do not use untreated lumber for the structural posts.
The bottom of the post should be mounted to a wooden deck or concrete porch floor using a code-approved method and post anchor. The top of the post should be mounted to the beam using an approved post-to-beam mounting bracket.
Cellular PVC becomes more brittle in colder temperatures, making it more susceptible to damage, so the material should be warmed to 50-55 degrees before installing. To do so, just move the pieces into a heated space and allow time for the material to warm up. If you are unable to warm the columns before installation, you should pre-drill the nail or screw holes to avoid fractures.
Cellular PVC can be cut with conventional carpentry tools. Small pneumatic finish nailers and staplers can be used to fasten the column wrap. However, large framing nailers are not suitable because the drivers can fracture the PVC material. Coarse thread, galvanized or stainless steel drywall screws are suitable fasteners. Be sure to drill pilot holes for screws longer than 1-5/8 inch.
Installing the Column Wrap Kits
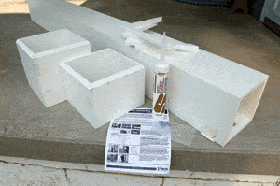
The Fypon column wraps are sold in complete kits. Each kit contains two L-shaped PVC column halves, two L-shaped cap halves, two L-shaped base halves, four L-shaped external installation cleats, and one tube of Siroflex Duo-Sil Adhesive Caulk.
Begin the installation by dry-fitting the column wrap in position over the structural support post. Make sure the column base does not overhang the deck or porch. Note: Always check with local safety codes for any regional requirements.

Measure the support post to determine the length of the column wrap. Use a square to mark cut lines along the wrap half. Cut each wrap half to length with a circular saw or jigsaw.

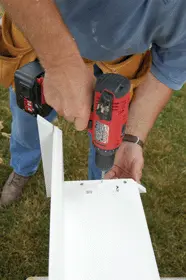
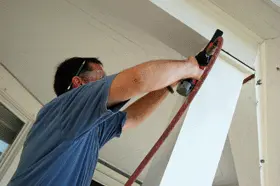
Cut the column wraps to size with a circ saw or jigsaw. The wraps are mounted to the floor with L-shaped cleats.
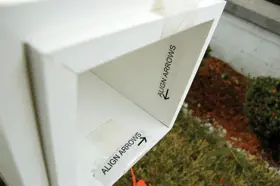
Next, use the screws provided with the kit to attach the L-shaped external installation cleat to the outside bottom of the column wrap. The cleat designates the bottom of the column. Then dry-fit the two halves together over the support post. Fypon provides arrows inside the column wrap to ensure the miters match up correctly.
For this particular porch project, the Mealers wanted a matching balustrade railing system. If installing railing, then pressure-treated blocking must be installed at the height where the railing will be attached to provide solid support for the railing and fasteners. The thickness of the blocking must span the entire space between the post and inside surface of the column wrap. Additionally, the mounting screws must be long enough to go through the blocking into the support post. However, if no balustrade system will be installed, you can skip the blocking.
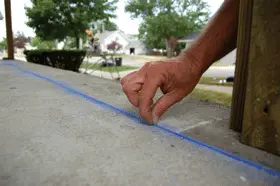
Use a chalk line to guide the installation when installing multiple wraps in a row.
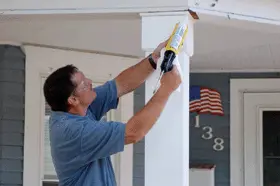
To install the wraps, first apply the provided caulk to the two mitered edges of the column wrap halves. With the L-shaped cleats at the bottom, position the two column halves around the support post. Make sure the cleats are flush at the base. Fasten the shaft seams together every 6 to 8 inches using 1-1/4-inch rust-resistant fasteners. Wipe off the excess caulk before it dries.
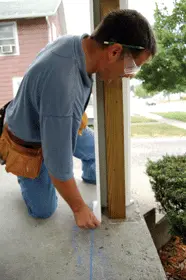
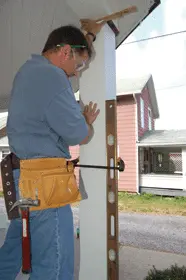
Install the wraps one half at a time using code-approved exterior fasteners and the supplied adhesive.
Next, fasten the base of the column to the floor by driving flat-headed fasteners through the cleats. The base assembly of the column wrap will set directly on top of these fasteners, so they need to be flush. The cap and base will conceal the fasteners.
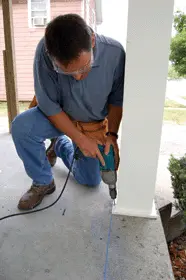
Plumb both sides of the column shaft. Use a pencil to mark the position of the shaft when plumb. Then secure the two remaining installation cleats to the ceiling, while the shaft is plumb. The cleats will surround the column, locking it into position. Again, the fasteners should be flush so the cap can butt up tightly against them.
Finish the installation by attaching the cap and base to the column, positioning them directly against the cleats. Apply the Siroflex brand Sealant and Adhesive to the mitered edges at the corners. Also caulk the small gap between the column shaft and the cap and base. Wipe away any excess caulk and use lightweight spackle to fill the fastener holes. Lightly sand or scuff the surface to remove excess spackle. Then clean the surface with light detergent and water, denatured alcohol or window cleaner. Remove any soap residue with clean water.
For best performance, paint Cellular PVC using light colors with a Light Reflective Value of 55 percent or higher. Dark colors will have an impact on the expansion and contraction of the material.
Wrapping it Up
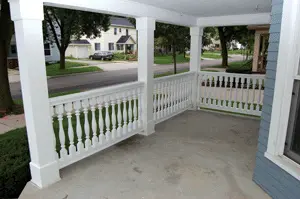
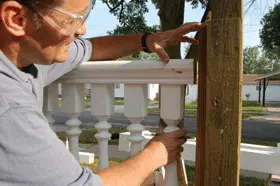
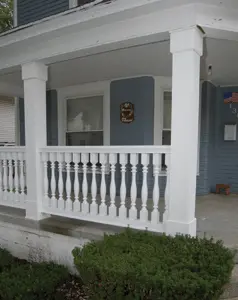
After installing the three PVC Column Wraps, Roth moved on to the structural balustrade system. The Mealers selected an Ashley design that connected to the column wraps and enclosed the entire front porch.
Made of non-corrosive parts with fasteners that are hidden to provide clean, classic looks, the Fypon balustrade system features reinforced baluster rails, newels and porch posts. “The rail system went in as effortlessly as the column wraps,” says Roth. “It’s impressive that these pieces connect together so well and each piece is so uniform.”
Fypon’s balustrade systems are also available in installation kits, which contain all the hardware and fasteners necessary to complete the project. The systems are available in more than 40 different sizes and styles.
When installing the balustrade system, blocking must be added inside the column wraps to provide a solid mounting location for the fasteners.
SIDE NOTE
Why PVC?
Polyvinyl Chloride, or PVC, was discovered in the 19th century and is a hard plastic that is made softer and more flexible by the addition of plasticizers. PVC cellular trim products are used on both the interior and exterior. Each trim piece is made of stable high-density PVC that resists decay, mildew, warping and splintering. PVC products are available in boards, sheets, bead board and corners that are easy-to-install and do not require paint. Available in smooth and wood-grain textures, each piece has a consistent quality and finish that requires no sanding, priming or sealing.
When working with PVC, shapes and cuts can be made with standard woodworking tools. It can be also painted to achieve your desired color.
When compared to wood, PVC has a closed cell nature, so water cannot penetrate the product. Unlike wood, PVC trim will not swell, rot or shed a painted surface due to water infiltration. Additionally, PVC resists all forms of insect infestations, woodpeckers, mold and mildew. Another benefit is that PVC has 100 percent product usage. There are no knots, voids or splits (which occur routinely in wood) that can lead to waste and unsightly appearance.


