

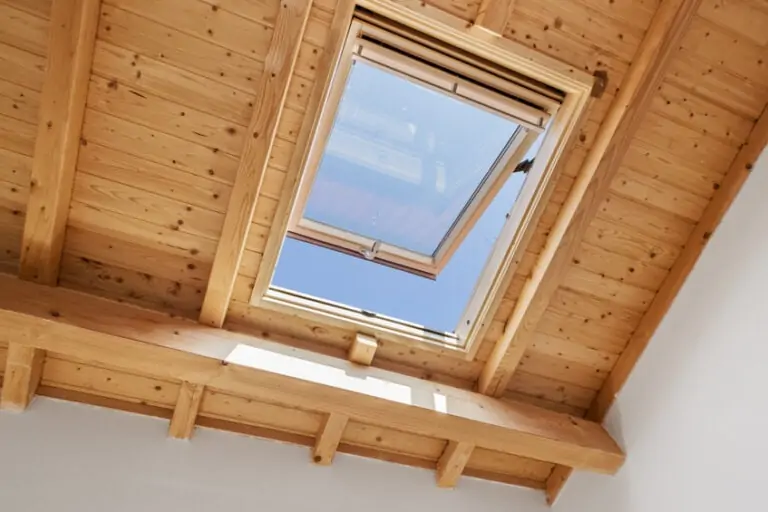
Nothing transforms a space like natural light and fresh air. The beauty it brings into your surroundings is a quality that no artificial light source can imitate.
Providing 30-percent more light than vertical windows and enhancing air circulation, roof windows and skylights deliver a constant source of natural elements to your home. But they do more than just let light in. Because of their unique overhead position, they bring light to life. They transform the room; it looks more spacious, brighter and lighter, with a sparkle that wasn’t there before.
If building a new home, specify your plans for a skylight to be installed in the initial construction of the roof. You may opt for an attractive window placed in an attic-less roof over a room with high ceilings. If your home already has an existing roof, here are some pointers to ease the installation process.
Based on the size of your roof window or skylight, first determine the best location to open your ceiling from inside the room (the model window used in this example is from Velux Inc.). The ceiling opening should be larger than the roof opening to provide better light distribution and easy removal of the insect screen on ventilating units.
Prepare and Cut the Ceiling Opening
Drop a plumb line from each corner of the skylight to determine the minimum ceiling opening. Expand/flare this opening to provide better light distribution and air movement to help reduce any chance of condensation. To flare the opening, draw new lines for the top of the ceiling opening to expand the light shaft as shown. Following the same procedures used to cut the rafters and frame the roof opening, cut and frame the ceiling joist (if necessary), as shown. You must support the ceiling joist before cutting.
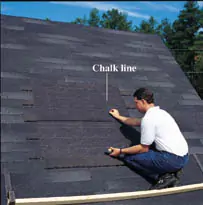
From the roof, remove shingles from around the rough opening to expose the roof deck. Save old shingles for reuse when flashing. Snap a chalk line to mark the rough opening between the corner nails on the roof deck. Make sure the rough opening is level and square. Cut and remove the roof deck at the chalk lines.
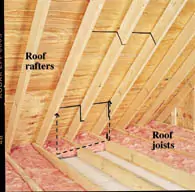
Cutting the Roof Rafters (if necessary)*
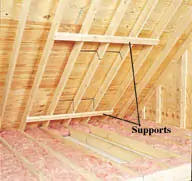
If rafters are cut, each one must be supported and braced from the underside of the roof. The supports must be left in place until headers are installed. Mark cutting lines on the rafters as shown. The center rafter(s) should be cut at an angle so the headers will run flush with the flared soffits. Cut and remove the center rafter(s).
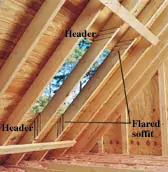
* Roof trusses should not be cut without consulting local building codes, local ordinances and engineering requirements. If there is a problem cutting trusses, choose a window size that will fit between trusses.
Frame the Rough Opening
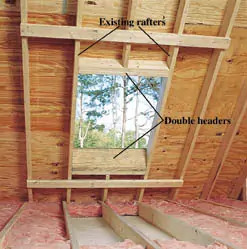
Remember, the rough opening is determined by the size of the skylight or roof window. Refer to the precise rough openings on the dimensional chart of your particular model. Install headers at the head and sill between the rafters. If you’ve had to cut a rafter, you should double the headers. The framing on the roof is now complete.
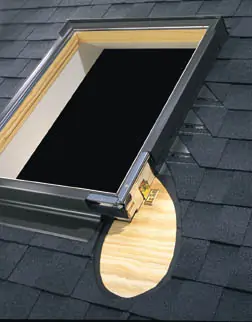
Install and Flash the Skylight
Complete the preparation/installation and flashing of the skylight. There are a few different methods to flash a skylight, and many modern skylights are available as complete installation kits with flashing tailored to its particular make and model. For complete flashing instructions, refer to the instructions included with your skylight.
Prepare and Cut the Ceiling Opening
Drop a plumb line from each corner of the skylight to determine the minimum ceiling opening. Expand/flare this opening to provide better light distribution and air movement to help reduce any chance of condensation. To flare the opening, draw new lines for the top of the ceiling opening to expand the light shaft as shown. Following the same procedures used to cut the rafters and frame the roof opening,cut and frame the ceiling joist (if necessary), as shown. You must support the ceiling joist before cutting.
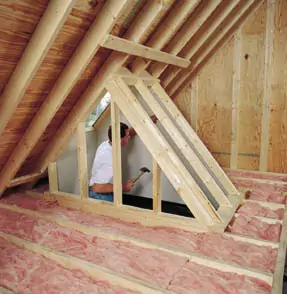
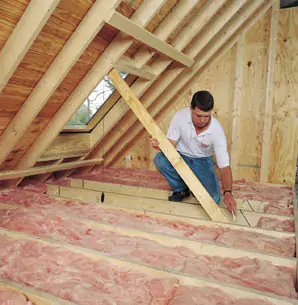
Build and Finish the Light Shaft
Frame the light shaft wall with studs at 16 or 24 inches on center, and nail to the existing ceiling joist. Finish the inside of the shaft with dry wall or other finish material. Insulate around the light shaft and skylight to prevent heat loss, air infiltration and condensation. Use either rigid or batt insulation.
Nothing adds more drama and character to a room than a skylight. It brightens any space in your home, especially areas that are dimly lit. Available models are designed for both within-reach and out-of-reach applications and come in a variety of sizes that will easily integrate into your ceiling and roof construction. Skylights can transform the look of any room into one of the favorite features of your house.
