By Matt Weber, Photos By Hal Jones
Creative thinking combined with innovate building products give rise to a beautiful basement bathroom.
Hal Jones was adding a new bathroom in the partially finished basement of his family’s lake house. Working in his favor was the fact that the unfinished space gave him a fresh canvas on which to install the bathroom amenities. However, working against him was limited square footage because the adjacent areas had already been partitioned into finished rooms. Plus, the area of construction was located on a solid concrete slab, with no drain system in place. Here’s how Hal employed traditional techniques, state-of-the-art fixtures and new DIY-friendly materials to conquer those obstacles and create a bathroom to brag about.
Fixture Fix-Up
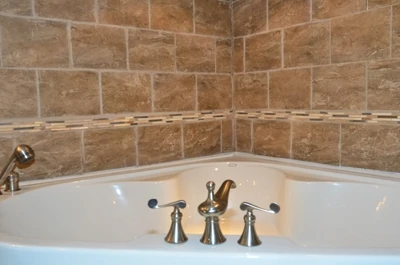
The plumbing fixtures provide the function and focal points of a bathroom, and Hal chose Kohler fixtures to outfit the project. Kohler’s Revival Series white, porcelain pedestal-style sink provided a sleek look while economizing space. Kohler’s matching Revival Top-Trip high-efficiency toilet featured two interesting top-of-the-line attributes, a bidet (AKA dog water fountain) and an electronically heated seat, making this water closet top contender for “Most Lavish Toilet in Winston County, Alabama.” The bathtub was Kohler’s triangular Cornerstone Whirlpool Bath complete with soothing water jets and comfortable armrests to relax in a spa-like atmosphere. Hal was definitely making the most of this project.


Drain Platforms. The first order of business for the plumbing fixtures was to determine a game plan for addressing the lack of drain plumbing. The solution: Raise the fixtures. Rather than cut into the concrete with a slab saw or jackhammer to make clearance for drain lines, Hal took an alternative approach. He constructed joisted a plywood platform for the toilet, similar to building a miniature deck, which elevated it several inches off the floor and provided just enough space to install the necessary drain lines. The toilet was then installed as usual with a flange and wax ring atop the platform. Hal also built a platform and knee-wall that encased the bathtub drain lines, which were also routed above the slab. Naturally, the fixture platforms reduce headspace when someone is standing on top of them, but Hal decided it was a logical compromise for easier installation on this project.


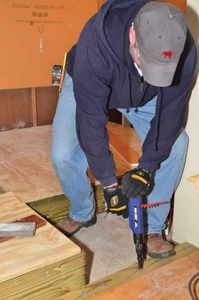

To make sure the surface of the wood decking had a good waterproof seal from the inevitable drips in a bathroom environment, Hal brush-applied ProFlex Primer and Sealer over the top of the plywood decking.
The above-grade drain lines for the individual fixtures still didn’t address the lack of a main drain stack. To solve this issue, all the plumbing fixtures were tied into a Saniflo SaniCubic pump, located out of view in the unfinished basement on the opposite side of the bathroom wall. The SaniCubic was chosen due to its capacity for handling a washing machine and a future kitchenette addition. The pump includes a macerating blade to liquefy solid waste, which is then pumped upward to tie into the existing drain stack of the house.

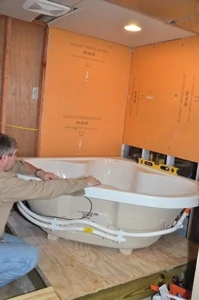
The supply lines for the fixtures were installed using a PEX system, which costs significantly less than traditional copper and is simpler to install. The PEX system was tied into a manifold, which enables the various supply lines to be shut off independently for easy installation and maintenance of the plumbing system.

Tile Tactics
Tile is so widely used in bathrooms because it performs exceptionally well in wet environments. However, tile can also be tricky to install, requiring backer-board, special cutting tools and skilled installation techniques. For this job, Hal combined traditional methods with some innovative new products that quickened the pace of installation.
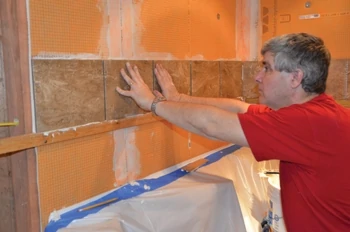
Wall Tile. Quality tile installation requires the use of a backer-board on which to apply the adhesive and tile. However, traditional concrete backer-board is heavy and difficult to cut without generating a lot of lung-clogging dust. That’s why Hal opted for Schluter-KERDI board instead of concrete board for the vertical installation. Schluter-KERDI is a bonded waterproof membrane made of soft polyethylene (similar to rigid foam insulation). Ideal for ceramic and stone tile, the backer-board material is covered on both sides with special fleece webbing to anchor the thinset mortar.

The Schluter-KERDI offered a handful of advantages. Being so lightweight, it was easy to position on the wall and zap in place with a powered screwdriver—with no-pre-drilling. And, rather than kick up a dust-storm by using a special concrete blade on a circ saw, the Schluter-KERDI backer-boards can easily be cut in place with a sharp utility knife. Plus, the material is printed with a 1/2-inch grid, which provides a guide to ensure square installation and makes it easy to follow the lines when cutting.
This printed grid came in handy when Hal installed a level ledger board on the Schluter-KERDI above the bathtub. Following the grid line, Hal nailed the ledger in place to serve two purposes. First, it provided support from below for the wall tile. He began installation above his level ledger, mortaring row after row of tile and using tile spacers between each joint. In some cases, vertical tile installations can slide when installed, misaligning the layout. However, the ledger supported the weight of the tile while the mortar dried, preventing any movement.

The second purpose of the ledger was to serve as a placeholder for a row of mosaic accent tiles that would serve as a kind of decorative chair rail throughout the bathroom. The ledger had been cut the same size as the accent tiles, so upon removal it left a perfectly sized strip to install the chair rail.
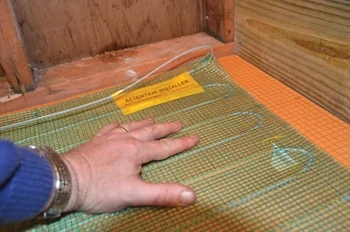
Bathroom Flooring. To make the bathroom floor as comfortable as possible, Hal incorporated an electric radiant heat system. This easy-to-install system utilizes a wire-embedded mat that is installed beneath the finished flooring. Just route the mat throughout the floor, staple in place and connect the terminals to the system’s thermostat and power supply. The radiant system heats on command to provide a toasty walking surface that’s much friendlier to bare feet than cold porcelain.
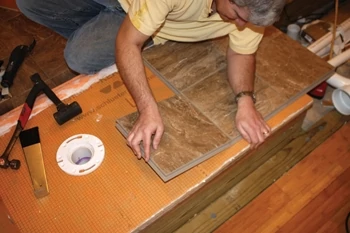
The radiant mat was then covered with Daltile’s new Cliks floor tile, which went down with lightning speed. Cliks is the brand name of the company’s new interlocking porcelain floor tile. Featuring the same patented tongue-and-groove UniClic System popularized by laminate floor manufacturers, the edges of the interlocking tiles join at 20- to 30-degree angles and then fold downward to close the joint. The Cliks system is a floating floor, and the closed T&G joints look like finished grout joints. These unique features completely eliminate the mess and labor associated with grout and thinset mortar, so a new porcelain floor can be completed in as little as a single afternoon.
Odds and Ends
Wall Paint. Bathroom paints are subject to moisture daily and this is no area to compromise on product selection. For the drywall areas not covered by tile, Hal chose Behr Premium Plus Ultra Satin in “Arctic Ocean” for his walls and for the ceiling chose an eggshell finish in the “Light French Gray.” This is Behr’s top of the line paint, and we like it for its high quality, durability and the time-saving inclusion of primer with the topcoat.
Moisture Ventilation and Insulation. All baths should contain adequate ventilation, and this is especially critical for a basement bath that is below ground level. In the bathroom ceiling Hal installed Broan’s QTXE 150, an Energy Star-rated exhaust fan that moves 150 cubic feet of air per minute to keep mold and mildew issues at bay even in these extreme conditions.
The other issue was preventing moisture from penetrating through the bath area into the surrounding non-vented living areas. While the stud cavities were exposed, Hal used Versi-Foam Spray Insulation by RHH Foam Systems to encapsulate the bathroom walls and prevent moisture migration, heat transfer and aid soundproofing.
Mission Accomplished
A custom bath renovation can vary wildly in design, and every project seems to have its special set of challenges. One of the key solutions to this project was the use of elevated drain platforms in lieu of tearing apart the concrete slab. However, with careful use of space and some neat new products that simplified installation, Hal managed to create a contemporary bathroom that had lots to offer in such a little space.


Resources
Behr, www.behr.com
Broan-NuTone, www.broan.com
Daltile, www.daltile.com
Kohler, www.kohler.com
Proflex, www.proflex.us
Saniflo, www.saniflo.com
Schluter-KERDI, www.schluter.com
Versi-Foam, www.rhhfoamsystems.com


