

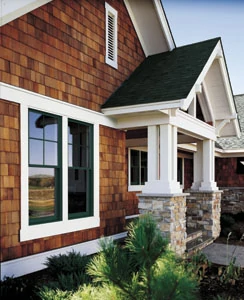
Window and door replacements are among the most common home remodeling projects. According to the National Association of Home Builders (NAHB), window replacements total 44 percent of all remodeling jobs. According to the experts at JELD-WEN, a leading manufacturer of windows and doors, spring and summer is the time to consider the impact home improvement projects will have on future energy use. Windows and doors can have a significant impact on home energy efficiency by helping control the amount of light, air and heat that enters and exits in the home. NAHB statistics show the average home today has 19 windows, three exterior doors and one patio door—all of which can play a major role in energy use.
Old style single-pane windows are a major factor in heat loss. Replacing old windows with today’s modern energy-efficient windows can greatly reduce energy use, as well as add value to your home. The first step is selecting reliable windows and doors designed to reduce energy costs.
What to Look for
The Energy Star label, created by the Environmental Protection Agency (EPA), is the easiest way to identify the most energy-efficient products on the market. The EPA states that a typical household can save up to 30 percent of their energy bills (approximately $400 per year) by selecting Energy Star qualified home products. In order to be Energy Star qualified, a company must be NFRC certified (National Fenestration Rating Council). This NFRC certification is conducted by a third-party organization that uses industry-accepted standards for evaluating and certifying energy performance. The Energy Star program also takes into account those products most suitable for particular regions and climates. Look for windows with the label that shows it meets Energy Star Qualifications for your area.
Several ratings are available on the label, including the U-Factor. The lower the U-Factor, the better the product resists heat transfer and is more efficient. For instance, JELD-WEN suggests Northwest homeowners choose windows and doors with a U-Factor of .35 or below.
Another important factor is the insulating benefit of double panes. These days, most remodelers replace the older single-pane windows with dual-pane units, which provide more protection from both cold and hot weather. Dual panes involve two pieces of glass with a sealed air space between, resulting in an insulating air pocket. The U-factor is approximately double that of single-pane windows.
The most popular energy-saving feature for windows is low emissivity (Low-E) glass, which controls solar heat gain, a major contributor to air-conditioning costs. Low-E glass filters out long-wave radiation, making it easier to cool your home in the summer. In the winter, Low-E glass keeps your home warmer by reflecting shortwave radiation back into your home. The ultimate in insulating is Low-E glass with the use of Argon gas in the sealed space between the panes. It has a much greater density than air, reducing heat transfer better. For more information and suggestions about ways to save energy and energy efficient windows, log onto www.energystar.gov
Sizing up Windows
The method of window replacement depends on the type of replacement window purchased. Two methods can be used, sash or full-frame. For the most part full-frame replacement is the best method. With a sash-only replacement you still have the existing sill and exterior trim. However, in most replacement situations the sills will be in pretty poor shape and require more maintenance effort than the full replacement. In full frame, however you will have to remove the interior trim. If you intend to reuse the trim, remove it very carefully. In most instances you will probably need to replace with newer trim.

It’s extremely important to measure the opening properly for the replacement window and purchase a window closest to that size. Remove the interior trim and measure the outside of the existing window frame or the rough opening. Most window manufacturers offer pamphlets providing the rough opening requirements for their standard window sizes, as well as how to measure for their products. Most manufacturers also provide information on how to install their products. It’s easier to install a window slightly smaller than the opening, but a great deal more work to install a larger window. In the former, you simply fill in as needed, in the latter you’ll have to create new headers and wall supports.

In the case shown, the owners were replacing second story windows and the existing older windows were doubled, creating a loss of wall space as well as lots of lost energy. The choice was to use single windows that were tilting and easy to clean from the inside. The windows were also part of a residing job, so new-construction, full-flange windows were chosen. The windows were fairly economical vinyl frames, purchased off the rack at the local Lowe’s store. Most of today’s windows are fairly standard in size, but some older windows may require special ordering to get the needed sizes.

Out with the Old
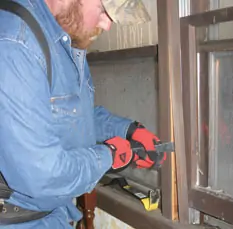
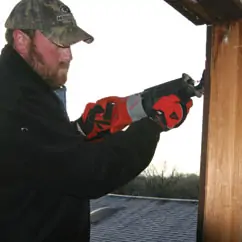
The windows to be replaced were fairly modern, without sash weights, so they were easily removed. If sash weights are involved, cut the cords to allow the weights to fall to the bottom of the chamber. You will also need to remove the parting stop on older sash-weight model windows, as well as remove the balance cord pulleys, or pound them back into the old window jamb. On newer aluminum slide-style sashes, loosen the slides and then take out the old sashes with the slides. Note the sashes are held in place with springs. Be careful the springs don’t snap out and cause an injury. Remove the old aluminum storms by removing their screws. Then remove any exterior trim. In the case shown, this required the removal of some old brick molding.

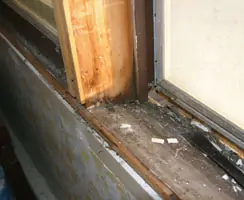
A reciprocating saw was then used to cut through the nails holding the existing window frame in the rough opening. Then the frame, including the sill, was lifted out. In some instances the sill may be installed separately of the frame. In almost any replacement situation the old sill will be deteriorated and should be removed. The windows shown were installed without a sill, in the style often favored these days.

All edges were well caulked, using Dap Side Winder siding and window caulk.
In with the New
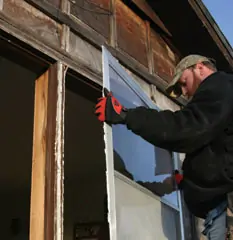
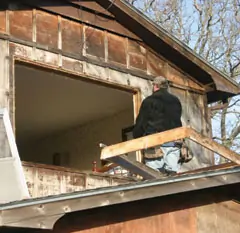
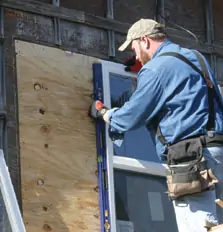
Prepare the rough opening for the replacement window. Blocking can be added to the sides and top and bottom if needed. In the case shown, new rough openings were created for the single replacement windows. Make sure the blocking is installed plumb and square and that the rough opening is the correct size for the replacement window. In most instances you will also have to add filler strips around the outside edges of the blocking to bring them out level with the existing siding. In this case, plywood siding pieces were also installed to close off the smaller opening.
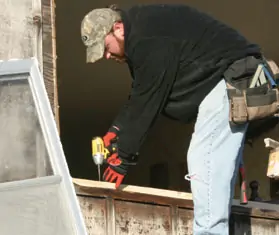
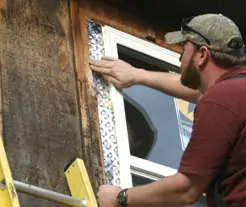
With the opening properly prepared, apply caulk around the inside edge of the nailing fin and lift the window in place. From the outside, use a 2-inch galvanized roofing nail or self-starting exterior screw through the nailing fin to temporarily fasten the window at one upper corner.
On the inside, use shims and your level held vertically to plumb the jambs. Place shims under the jambs to correct for any out-of-plumb. Back outside, level the window at the head and then anchor at the opposite corner. Back inside, shim the sides equally, making sure you don’t over-shim and force them out of alignment. Check diagonally from corner to corner to make sure the window has been installed square and is not twisted.

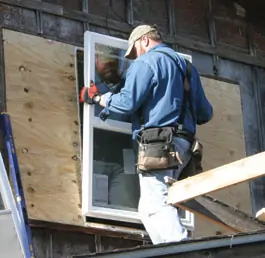
Back outside, fasten the window securely in place by nailing around the exterior of the window through the nailing fin. Or, fasten using self-starting exterior screws. Further insulation and protection from moisture can be created by adding Pella SmartFlash window and door installation tape around the outside of the window, over the nailing fin and to the siding. In new construction, the window opening is often sealed by the use of the vapor barrier before installation of the window. Most window manufacturers have specific installation instructions on sealing both the interior and exterior. For instance, Pella suggests the use of Dow Great Stuff Window and Door Insulation foam for the interior of their vinyl windows.
With the windows installed you’re ready to add insulation, sheetrock and new trim to the inside, as well as new trim on the outside.

