By Clint C. Thomas, Esq. Photography By Sterling Thomas
Metal roofs seem to be in vogue today, and many people mistakenly believe that they are a product of the modern era. Metal roofs, however, pre-date the contemporary asphalt shingle roof by a couple of hundred years. In fact, I’ve been told that Thomas Jefferson’s home, Monticello, still sports its original metal roof. The types of metal roofs that are available today and those that were available during the 1800s and early 1900s have changed dramatically.
Many of us have made reference to an old farm house with a “tin” roof. Ironically, “tin” roofs are not made out of tin. Today metal roofs often consist of an alloy steel with a zinc coating applied to it for protection, known as galvanized metal. A current alternative trend in roofs is the use of aluminum. Available in a variety of color schemes, aluminum roofs require very little maintenance.
Metal roofs of all kinds have many advantages from being long-lasting to shedding water and snow quicker than an asphalt shingle roof. However, all painted metal roofs have one downside in common, and that is that they have to be repainted periodically.
Before you dive head-long into painting your metal roof you need to determine what type of metal it is, because although it may appear to be galvanized, it may in fact be what is known as terne metal. Terne roofing was made by producing the shingles or roof panels out of one of several different types of base metal and then coating the panel with a mixture of lead and tin. Terne metal has been phased out due to the public outcry about the dangers of lead, even though no specific health threat was ever discovered coming from the use of terne metal roofs.
Terne metal roofs are extremely long-lasting, but because they look very similar to galvanized metal a person can unknowingly invite problems if they use the wrong paint. Galvanized roofs require the use of a different paint than what is used on terne metal. Terne is best painted with an oil-based paint. One of my neighbors used an oil-based paint as a primer, since some of the metal was rusted, and then covered the roof with one of the specially formulated roofing paints that is sold by CalBar for use on old metal roofs for an added layer of protection. However, another neighbor did like myself and only used an oil-based paint. Galvanized steel, on-the-other-hand, cannot be painted with an oil-based or aluminum-based paint. Galvanized metal requires either a zinc-dust type paint or a latex paint.
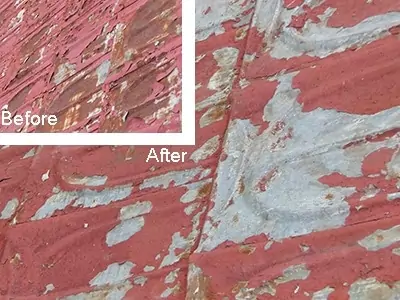
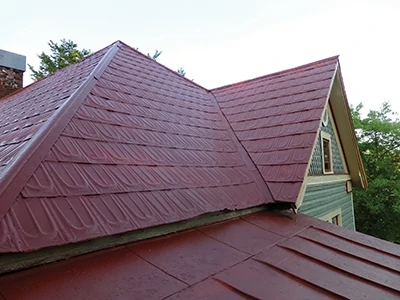
My house was built circa 1880 and still has its original terne metal roof, which consists of individual metal shingles with an embossed decorative pattern. After many years of exposure to the elements, the paint on the roof began to wear off, crack and peel, necessitating a new paint job.
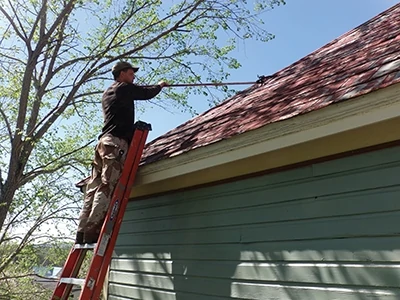
I began my project by purchasing a couple of ridge-hooks from an online supplier of roofing products. When combined with a single section from an aluminum extension ladder, the ridge-hooks made accessing a roof with a steep pitch much easier, and consequently, much safer. I painted the roof using the ladder and ridge-hooks except for one section that could be reached using a 10-foot tall stepladder, which I placed on top of a lower roof section.
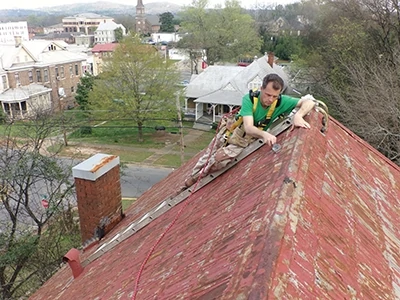
It is also imperative that a safety harness and rope be used when working from any height. One misstep and you could easily fall thirty feet to the ground unless you are tied off to something solid. As an added note of caution, metal roofs are slick as glass when they are wet. Therefore, beware of the morning dew. Long pants and heavy boots with serious traction are also highly recommended. A few hundred dollars spent on safety equipment is cheaper than most medical insurance co-pays.

As with all painting projects, the first step was to remove all of the loose paint. I did this by hand-scraping the roof twice. I considered trying to use a pressure washer but there was no good way to access the entire roof with the wand, and I was also concerned that I might inadvertently catch the edge of a shingle and end up ripping a couple off by accident. Hand-scraping also allowed me to see every inch of the roof and to identify any small holes or other problem areas that I needed to repair along the way. In some places I would attach my scraper to a five foot extension pole which allowed me to reach some of the awkward parts of the roof.
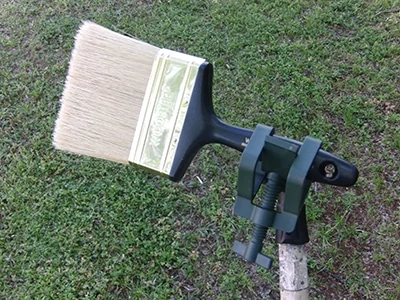
Note: The Lockjaw by Wooster is a wonderful tool. It is a glorified clamp that screws onto an extension pole and can hold everything from a paint scraper to a paintbrush.
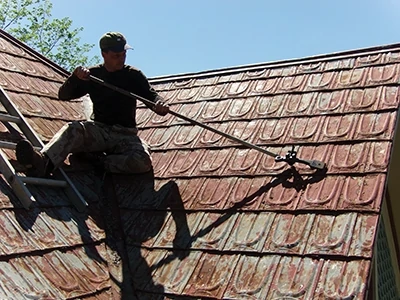
I discovered that by starting at the top and scraping downward that the loose paint chips slid down the roof on their own with-out any help from me. This was due to the steep pitch of the roof mixed with the vibrations created in the metal from the scraping. This helped to reduce my cleanup time considerably.
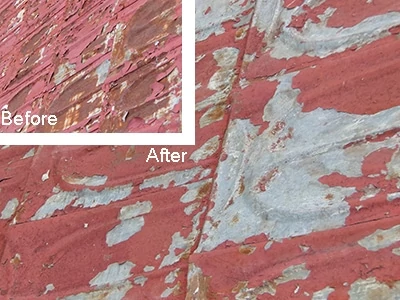
With the scraping done and the necessary repairs made, I was able to begin painting the roof. I used an 18-ft. extension pole with a 3/4-in. nap roller to apply the paint to the roof.
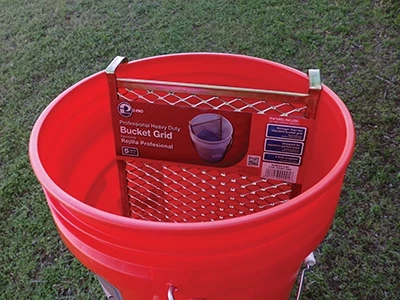
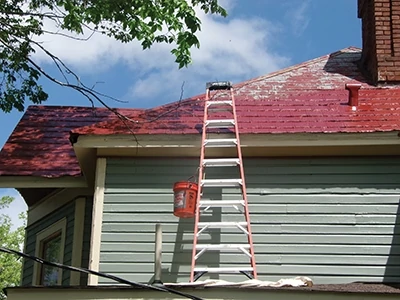
I found that a 5-gallon plastic bucket with a roll-screen inside of it worked beautifully as a roller pan. I would set it on the bottom rung of my extension ladder and secure it to the ladder with a painter’s hook.
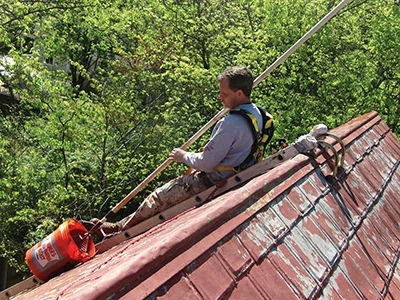
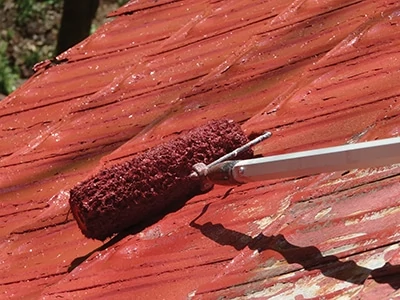
I used a paintbrush attached to the end of the extension pole to paint the valleys and the standing seams on the porch roof. Everything else I painted with the roller. I painted one side of the roof at a time due to the fact that I would have to wait on the paint to dry, or else I would be putting my ridge-hooks in wet paint to start on the new side.
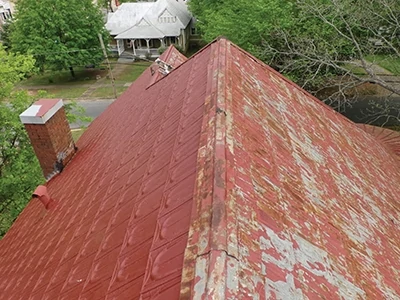
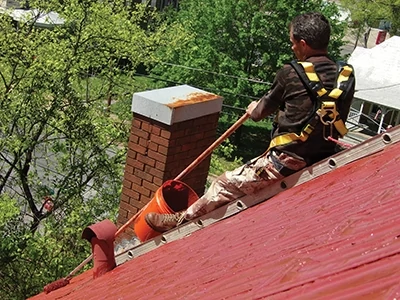
I applied two heavy coats of paint to the roof and tried to roll each coat from different directions each time. For example, I might start at the front of the house and work to the back on the first coat and, then, for the second coat start at the back and work forward. This changed the angle of my roller with each coat to ensure full coverage.
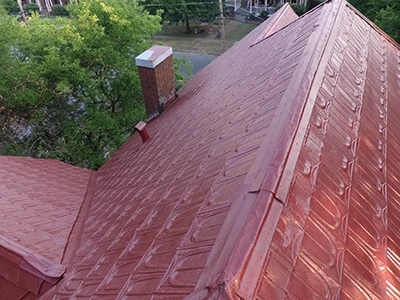
On a final note, pick your seasons when doing any kind of roof work. I realize that most people paint their houses during the summer months but a metal roof is just too hot to work on, or to even touch, during the summer months. I recommend that you begin scraping it during the later winter or very early spring and do the painting during the milder spring months while there are still cool mornings and temperate days.
Side Note 1
E-Z Gutter Guards
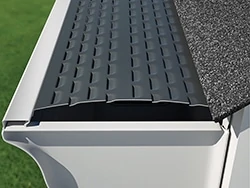
E-Z Quick is made of durable, expanded aluminum, with a tight mesh that is engineered to keep debris out while letting rainwater rush through.
E-Z Zip is also a heavy-duty mesh, but made of powder-coated expanded steel.
E-Z Shield, the top of the line, is built from heavy-duty painted aluminum with reverse louvers that allow the maximum amount of water through, while keeping debris out. The black color blends into the roofline and heats up fast in the winter months to melt ice and snow.
Each version installs by placing the back of the screen on the gutter hangers, and pushing the front of screen back and down until it locks into gutter. They are designed for 5-in. gutters. Each section is 4-ft. long and notched for 3/4-in. in overlap. When installed, each box will cover 98.5 ft. Visit www.e-zgutter.com.
Side Note 2
Be Careful When Scraping!
If you have a terne metal roof like this one, then it has probably been repainted several times over the years. Although it isn’t recommended to use a metal implement to scrape the roof, it was the only way to remove the loose rust and old paint. Be extremely careful not to pierce the metal when scraping. Also, check in advance with your local authorities about any municipal regulations regarding scraping and repainting a metal roof.


