


As a homeowner, you want to be comfortable with the ceiling texture that hangs over your head day after day. Ceiling textures come in different patterns and looks that can influence the overall feel of a home. When we purchased our house, we took one look at the “cottage cheese” ceiling material and knew it had to go. The look of the texture, often called “acoustic texture,” just wasn’t our taste.
Although the task of removing the texture, putting on a new surface and painting seemed intimidating at first, with careful planning we transformed the ceiling to a modern, bright new surface that gave us the appearance we were after.
Check for Asbestos
The first thing to do when undertaking a “popcorn” ceiling removal project is to test the material for asbestos. If the material was applied before 1979, there’s a good chance it contains asbestos. When inhaled, asbestos fibers can cause serious health problems, including cancer. Contact your state’s Department of Environmental Quality or the Environmental Protection Agency for more information on safely removing materials containing asbestos and the proper disposal requirements.
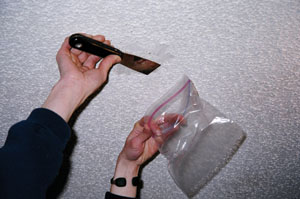
To obtain test samples of your ceiling, use an ordinary spray bottle filled with water to wet down two small areas in different parts of the house and scrape off quarter-size chunks. By sampling different areas you’ll get more accurate results of the percentage of asbestos (if any) in the texture. Try to keep the material from crumbling while you do this, as some labs prefer to test large, whole pieces of ceiling. Place the samples in a clean container such as a plastic bag or small glass jar and seal tightly. Use a damp paper towel to clean up any material on the outside of the container or that might have spilled on the floor. Clearly label the container stating where and when the sample was taken and take the material to a local laboratory for analysis. You can find a laboratory that does this type of analysis in the phone book under “Laboratories Analytical.” The cost is roughly $40 to have the material tested, and the results can often be returned within two days.
Prepping for the Job
When undertaking a project like this, give yourself plenty of workspace. Remove all furniture, accessories and window coverings from the areas to be scraped.
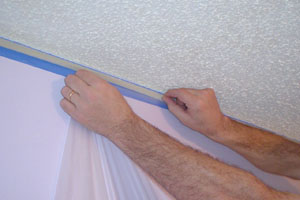
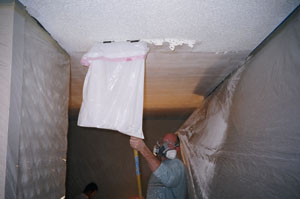
To protect the walls and floor during each stage of the project, use plastic sheathing and brown craft paper to construct a cocoon that drapes from the top of the walls. First, put high-quality painter’s tape where the ceiling meets the wall. Using a top-of-the-line tape will pay off when you remove the tape after the job, as it will not take off any wall paint that you would then need to repair. Place the plastic sheathing over the first layer of tape and apply more painter’s tape to hold it on top of the first tape layer. We used 9-foot sheathing that easily reached from ceiling to floor. As always, you get what you pay for, so use high-quality plastic that will hold up to water, texture and paint without ripping.
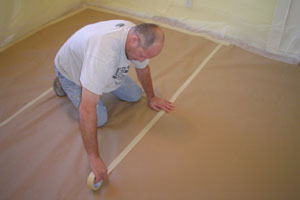
Place a tarp or drop cloth down on the floor and then cover with the craft paper for the bottom of the cocoon. Connect the paper to the bottom of the sheathing using painter’s tape to complete your enclosure. Any debris that falls or splatters can be rolled up after the project and properly disposed.
Give yourself plenty of time to construct your cocoon. For a 1,200-square-foot space, it took the good part of one full day to construct our cocoon and prepare for the scraping. And for moving from room to room, you can make slits in the doorways and use tape to close them when you are working in that space.
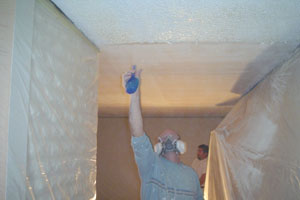
Next, you want to work wet. According to Homax Products, a leading manufacturer of building materials and products, water helps to soften the ceiling texture and works to break down the adhesive bond, which makes scraping the texture off a lot easier. If the ceiling has been painted, knock off the tops of the texture to expose the underlying surface material before you get it wet. Then you can spray it with water. Use either a pump sprayer or a hand-held spray bottle to thoroughly wet your ceiling. Make sure the sprayer is clean and free of any residue. It’s best to wait about 15 minutes to give the water a chance to soak into the material before you start scraping. Then, wet the area again right before you remove the material.
Be sure to wear the proper mask during the operation to protect against inhaling any debris.
Start Scraping
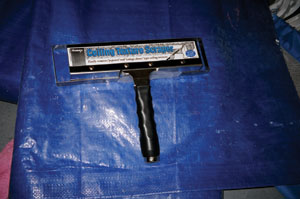
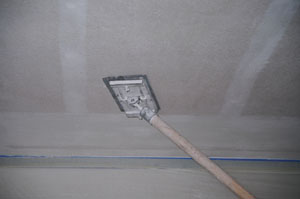
Now that the area is clear, the cocoon is built, and you have the proper tools for the job, you’re ready to start scraping. To remove the “popcorn” material, we used the Ceiling Texture Scraper from Homax Products. We attached an everyday plastic trash bag to the spring steel blade of the scraper, used an extension handle to reach the ceiling, and started scraping. Be sure to keep the scraper at an angle parallel to the ceiling so you don’t damage the ceiling drywall.
By using Homax’s scraper, the old ceiling material fell into plastic bags and limited the amount of debris that ended up on the floor. Use a small razor blade for hard-to-reach areas and around the corners to make sure all the texture is removed.
Scraping approximately1,200 square feet took about a six hours, but with the debris falling right into the trash bags, cleanup was manageable.
Prepping the Ceiling
With the popcorn material off the ceiling, the next phase is preparing the surface for a new texture. Sanding is the first step in prepping the ceiling. Use 200 Grit screen drywall mesh to sand the entire ceiling surface, removing any small bits of texture that were left behind. Now the surface should be smooth and ready to prime.
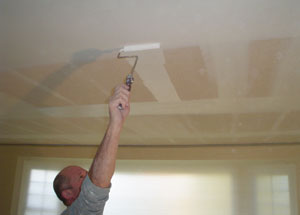
Be careful with the tape joints that are on the ceiling drywall. The tape joints have a tendency to drain the moisture from the new texture, causing a checkerboard effect that can show through the new ceiling covering. To prevent this problem, use a roller to apply regular primer sealer over the tape joints on the ceiling drywall. This seals and covers the tape and allows the new texture to better adhere to the ceiling. Make sure the primer goes on smoothly and does not build up anywhere on the ceiling, otherwise the bumps will show through the new texture.
If you have cracks in the drywall, fix them before you retexture. We used mesh tape followed by a thin layer of compound, or mud, to fill a few areas that needed fixing. Be sure to smooth out the compound so it blends in with the rest of the ceiling and doesn’t create bumps that will be noticeable.
Retexturing
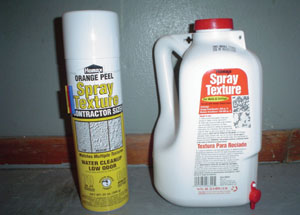
The ceiling surface is now ready for a new texture. We chose a tight orange peel texture that would blend nicely with the walls and match the existing texture in the kitchen and bathrooms. It’s a lighter look than the “acoustic” material and can make low ceilings appear higher.

For this part of the job, we used Homax Products’ Pneumatic II Spray Texture Gun and Homax’s premixed orange peel texture. The gun hooked up simply to an ordinary compressor and the material container loaded right on top of the gun. Take your time and put a nice, easy coat of texture on the area using a slow, sweeping motion. Being careful during this process can pay off later when you don’t have to go back and correct any mistakes. Another tip is to control the airflow from the compressor and make sure the material comes out at a comfortable pace for you. Homax suggests testing the spray pattern on a sample surface until you find the right pattern.
It’s easy to overload some areas with texture and miss others, so you want to strive for an even spread of the texture on the entire surface. Applying the material on the ceiling at a careful pace took about two hours.
The spray gun was light and easy to handle and the texture was simple to load, especially for do-it-yourselfers. We went through about four of Homax’s texture containers and came away with the results we were looking for – a smooth-looking orange peel finish that would look great with a fresh coat of paint. Let the new texture dry for at least 12 hours before you begin the painting process.
Painting
Once the new texture is dry, the ceiling is ready for painting. We primed the entire surface first with more primer sealer to provide a good base coat that would hold the paint evenly. Let the primer dry about six hours before moving on to the first coat of paint.
Make sure you choose a quality interior paint that will hold up for years to come. We used a Canopy Interior Ceiling Paint from Devine Color, a Portland, Oregon-based company that specializes in luxury interior paints. Some nice features of the Devine Color paint are that it is virtually odorless and adheres well to the surface. The paint has a thick consistency, like yogurt, and is designed to cover easily in one or two applications.
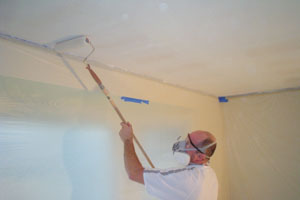
To paint a ceiling, you can either spray like the professionals or use a roller with a handle attachment. Again, take your time and use nice even strokes to get a steady application.
Before choosing a color for the ceiling, we purchased one of Devine Color’s Mini Paint Pouches (see sidebar), which the company sells instead of offering paint swatches, to make sure the color was what we wanted and would match the rest of the décor. The Mini Paint Pouches let us test the actual color without wasting a gallon of paint first. After trying a few colors, we settled on the company’s “Icing” color for a clean look that matched the interior off-white trim. The new finish helped hide minor surface imperfections and provides good light diffusion that is important for a ceiling.
Because our cocoon covered the heat vents and limited the flow of air in the area, each coat of paint dried completely in about six hours. You will be able to tell if your ceiling needs a second coat of paint by watching how the new material absorbs the primer and paint. If you see lines or missed areas, go ahead and apply a second coat.
Cleanup
After the final coat of paint has dried completely, you can move on to cleaning up the cocoons. Working room by room, carefully remove the tape from the ceiling/wall joint and let all the sides gently fall to the ground. Now just roll up the cocoons and place them into the proper disposable bags. Use a brush to touch up any areas that might need additional paint. Take a shop vacuum and go around the floor molding to pick up any debris that might have made its way out of the cocoon. Replace all the furnishings and you now have a new ceiling that fits your taste.
