

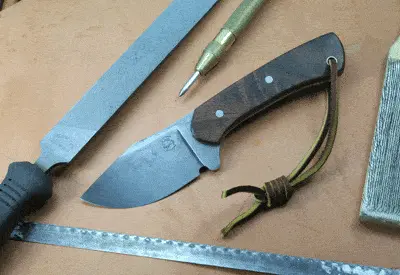
How to Make a Knife
The art and science of making knives is one of man’s oldest crafts. Anyone with a few shop tools, the skills to use them, desire and time can create their own knife. Knives can be made from “scratch” using a metal blank for the blade and wood or other materials for the handle. Knives can also be made from purchased kits. “Made from scratch” knife blades are made by one of two methods: stock removal, or filing and grinding; or forging, also called “bladesmithing.” Stock removal is the easiest to do in a hobby shop and can be done with a few hand and power tools. Forging requires much more experience and tools.
We show making a fixed blade knife with a full-tang handle design. The design as well as step-by-construction details are from my son, Michael Burch, a full-time, custom knife maker (www.burchtreeblades.com). Although Michael has a full shop with machines built just for knife making, he shows how to use simple hand tools and a few “tricks” to build your own knife. “Knife making can be very dangerous,” says Michael. “Always wear full safety goggles, not just glasses, and if power grinding, wear a respirator and hearing protection.”
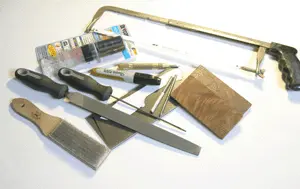
A knife can be built using only a blade, handle blanks and pins, as well as a few hand tools. Power tools, however, make the chore much easier and quicker.
DIY Knife Making: The Right Materials
Michael is using a 1-1/2-by-7-1/2 inch piece of 1095 barstock. “Numerous types of steel are available, but 1095 is cheap, easy to work with, and if properly heat-treated; makes a great blade. Purchase hot-rolled or annealed if available as it is easier to work. Do not use soft steel that can be purchased at local big-box stores, as that steel is made for welding.”
The knife utilizes crotch walnut wood blanks for the handle. The best woods for knife handles are hardwoods and even better; professionally stabilized wood. Stabilizing fills the wood pores with a chemical that protects the wood from deterioration. Stabilized wood not only lasts longer, but is easier to grind and easier to finish. Stabilized wood can be purchased from knife-making suppliers or you can “stabilize” your own wood using Minwax Wood Hardener. Create a stabilizing tool with a mason jar and a brake line bleeder, available at auto-supply stores.

Wood used for handles should be stabilized using Minwax Wood Hardener. A homemade stabilizer can be created from a Mason jar and a brake line bleeder.
“Install the bleeder through a hole in the jar lid and make an airtight seal,” says Michael. “Place the wood in the jar, add the wood hardener and pump the handle until bubbles come out of the wood. This means the wood pores are filling with wood hardener. Do this very slowly and carefully. Do not overdo the vacuum, and always wear safety goggles. Release the vacuum, then remove the blanks, wrap in plastic wrap and allow the wood to dry slowly.”
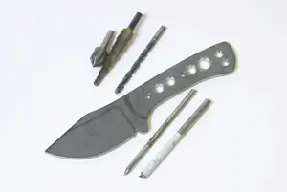
The knife shown also utilizes 3/16-inch stainless steel rod for the pins, and 1/4-inch stainless steel tubing for the thong hole. Both are available at full-service hardware stores such as Ace Hardware.
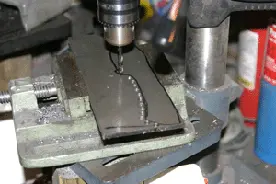
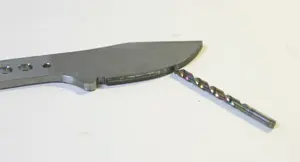
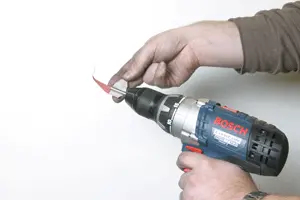
While the wood is curing, Michael starts on the blade blank. “Create a full size paper pattern of the blade and trace it onto the blank using a felt-tip pen. Using a metal punch, create starter dimples for a series of holes around the outside edge of the outline. The dimples should be spaced a little farther apart than the full diameter of the drill bit and half the diameter apart from the outline. Then using a Cobalt drill bit in a drill press, bore the holes. Work slowly, keep the bit lubricated with cutting oil and do not allow the metal to get too hot or you can ‘work-harden’ the steel. Again, wear safety goggles and make sure the blank is clamped solidly so you don’t get ‘helicoptering’ when the bit catches in the metal. Mark the locations of the pin holes and the thong hole, and bore them as well.” Michael uses a chamfer bit to slightly chamfer the holes.
![]()
![]()
(Left) First step is to create a pattern for the blade. Note that the knife shown has a full tang blade. (Right) Use a pin punch to mark locations of successive holes to be drilled around the outline of the blade.
![]()
(Left) With a good cobalt bit in a drill press, drill the holes around the outline of the blade. (Right) Shown is the drilled blank, ready to cut free and shape.
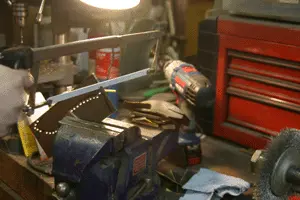
Once all holes have been bored, clamp the blade blank in a solid vise on a sturdy workbench and simply “connect the dots” by cutting between the holes with a good bi-metal hacksaw blade. Naturally, a metal-cutting bandsaw makes this chore quicker and easier.
![]()
(Left) Use a hacksaw to “connect-the-dots” or cut the metal between the holes. (Right) Shown is the rough-sawn blank.
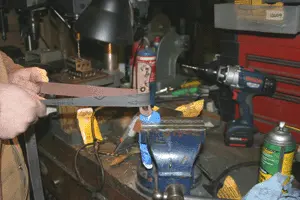
“Now comes the fun part, shaping the blade,” says Michael. The traditional method is filing, but it takes time and effort. Clamp the blade blank in a good solid vise and using a new flat bastard file, file the blank down to the outline. Use a file card to keep the file clean of metal filings. Always keep the file at 90 degrees to the blank. An upright grinder such as a 1-by-42 grinder will quickly grind the profile down.” Put a bucket of water under the grinder to catch the sparks and wear all safety gear.
![]()
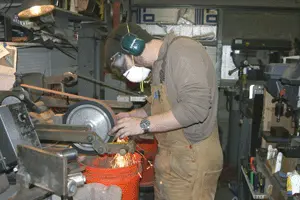
(Left) The old-fashioned way to shape a knife blade is to use a good crosscut bastard mill file to file and draw-file the metal. (Right) A variable speed knife/belt grinder makes the chore easier.
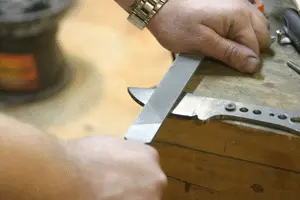
Next, find the center of the knife edge. Use a thick Sharpie to mark over the bottom edge of the blank. Place the blank on a smooth, flat surface and use a sharp-pointed drill bit, a little smaller in diameter than the thickness of the steel, to scribe the centerline. Simply roll the bit along the edge, turn the blank over and roll it again, creating two lines down the blade about 1/16-inch wide.
Screw the blade blank down to a solid workbench with the blade protruding over the edge. Use a chainsaw file to create the “plunge” line (where the bevel stops) at the back of the blade. Then use the bastard mill file to draw-file the blade to shape, following both the outline of the blade side and the marked centerline on the bottom edge. Again, this takes time and effort, but if the blank is solidly attached, you’ll be surprised at how quickly the chore goes. Repeat on the opposite side. Cover the bevel you’re creating with a thick Sharpie and file over it to find high and low spots in your blade.
![]()
(Left) The rough-shaped blank is ready for drilling. (Right) Locate and bore the holes for the handle pins, and a lanyard hole if desired, using a drill press. It’s also a good idea to bore additional holes in the handle area to lighten the knife and provide more balance.
To locate the center of the knife blade edge, use a fat “Sharpie” to blacken the edge, then scratch or scribe the center line by laying the blank on a smooth flat surface and rolling a drill bit, the same thickness of the blade, along the edge.
(Left) Now comes the fun part. Use a felt tip pen to create a pattern for the blade shape. Fasten the blank to a sturdy workbench with screws. Then use a chainsaw file to mark the “plunge line” or where the blade edges stop. Do this on both sides of the blade. (Right) Using a good bastard mill file, draw-file the blade edge to shape. Use a file card to frequently clean the file.
“Now you’re ready to fit the handle blanks,” says Michael. Lightly sand the blade blank as well as the handles to make sure all are smooth and flat. Place masking tape on the outside face of one handle blank and clamp it to the blade blank. Bore holes through the blade and blank. Remove the blank and mark the inside, then repeat for the opposite handle blank. Mark the outline of the blade blank on the handle blanks and cut them to shape using a bandsaw, leaving the handles slightly oversize.
Cut the pins and thong-hole tubing to slightly oversize in length. “Chuck the pins in a portable electric drill and use sandpaper to lightly roughen them and thin them down a bit so they will fit into the holes. They should fit snugly, but not extremely tight into the handle and blade blank holes. If too tight, they can split the handle material,” explains Michael. Fit the handle blanks to the blade and tap the pins and tubing in place. Rough-grind the handle and blade blank to shape. Remove the handles, mark the front profile and rough grind them to shape.”
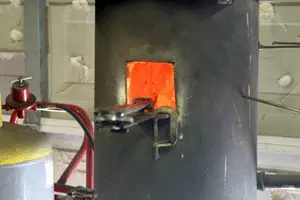
The blade should then be heat-treated. Although professional knife makers use a forge and oven, traditional primitive methods will also work.
The blade should be heat-treated, and although Michael uses precise specialty equipment to get the most potential out of his blades, he suggested a “primitive heat-treat” that will produce a great knife without the use of a kiln or forge. “You’ll need a closable container of peanut oil and a good, hot campfire. A fire of hedge works well because it burns very hot. Let the fire burn down to hot embers and place the blade in the coals using a pair of long metal tongs.” 1095 should reach about 1475-degrees to become “critical,” a term used to explain when the steel composition starts shifting to “austenite.”
Although not exactly the same temperature; many makers use a magnet to know when the steel starts to austenize. A magnetic “pick-up” tool from an automotive store will work to test the blade. Once the blade becomes non-magnetic, leave it for a few minutes to let it reach true “critical” temperature and then let it cool to black. Do this a few times to help “normalize” the blade. The third time you bring the blade up to temperature, quickly quench the blade in the peanut oil. After it cools; clean the blade and run a file across the edge. The edge should be “glassy,” and the file will skate across the edge instead of biting in.
“Now for the tempering,” says Michael, “after quenching in the peanut oil, the blade is hard, but extremely brittle. Tempering brings the hardness down and the brittleness out of the steel. Set your kitchen oven to 400 degrees and ‘cook’ the blade for 2 hours. Wrapping the blade in a couple of layers of aluminum foil will help keep the blade from smelling when being cooked. Let it cool and repeat; your blade is now heat-treated!”
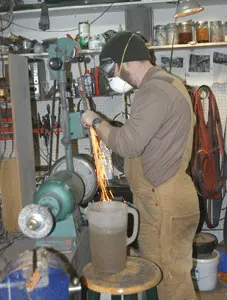
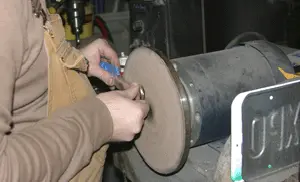
The blade blank is given a final finish with a belt grinder.
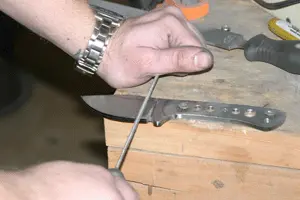
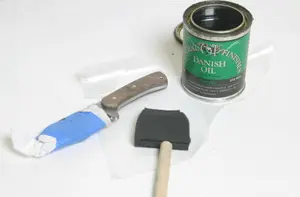
The next step is to finish the blade. “The blade needs to be securely clamped down. Use 3-M Imperial Wet/Dry sandpaper, available in any O’Reilly’s or other auto shop.” Start with the highest grit possible to get your scratches out—Michael usually starts with 320-grit, but that is after grinding them to a smooth finish. Back the sandpaper with a block of square Micarta or a piece of flattened wood. Use a squirt of Rem-Oil, WD-40 or Windex to lubricate the sandpaper. It helps move the grit out of the way while sanding. Then work up the grits, working them in 45-degree angles to remove the previous grit’s scratches. Sand until you get to the desired finish, Michael usually ends with an 800- to 1,000-grit, but a 400-grit finish (called a hand-rubbed finish) still looks great. Clean up the 45s by sanding horizontal lines from plunge to tip.
![]()
(Left) Clamp one handle blank to the blade blank and mark the handle outline and location of the pin and thong holes. Repeat for the opposite handle blank. (Right) The handle blanks are then ready to be rough sawn to shape on a wood cutting bandsaw or with a saber or coping saw.
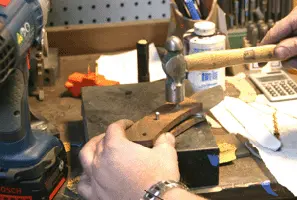
(Left) Lightly sand the pins and thong tube, and chamfer the holes in the blade blank. (Right) Tap the pins and thong tube in place to temporarily hold the handles in position.
(Left) Rough shape the handle using a wood rasp or belt sander, and mark the bolsters, then remove the handles and cut them to outline and shape them. (Right) Make sure the handle backs and blade blank are extremely flat and smooth.
“Clean up the blade with rubbing alcohol to remove any oils and give it a little dunk in Ferric Chloride to ‘etch’ the blade and bring out the ‘hamon.’ Vinegar will do the same, but takes a bit longer. Then scrub down with baking soda to neutralize the etchant and run over a few times with the final grit. If you want to ‘mark’ your blade, a local trophy shop can add your name.
(Left) Use epoxy to glue the handle blanks to the blade blank and tap the pins and thong tube in place. Allow to set overnight. (Right) Continue to shape the handles with wood rasps. With the blade wrapped and taped for protection, use a thin strip of sanding belt to further shape and polish the handle area.
“Now it is time to glue on the handles. Clamp them together to ensure the handle fronts are even on both sides, and finish the fronts to the desired grit.” Michael suggests putting a little WD-40 on the blade and wrapping it in a paper towel covered with masking tape to protect the blade while putting on the handles. Lay out wax paper, rubbing alcohol, Q-tips, clamps, and Devcon 2-Ton, 30-minute epoxy. (Five-minute epoxy dries too fast.) Rough-up the tang and handles a bit to give the epoxy more sticking surface. Clean all areas with rubbing alcohol and mix plenty of epoxy. Roll the pins in epoxy and tap them through one handle side, then glue-up the handles and tap the pins all the way through. Clamp to squeeze down the handles, using Q-tips to clean the excess epoxy. Let dry overnight (bring into your house if it’s too cold in your shop/garage).
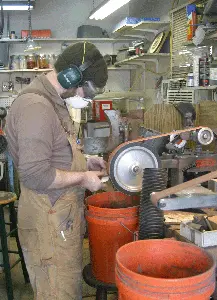
A belt sander or grinder with progressively finer grits of paper makes finishing the knife easier and quicker.
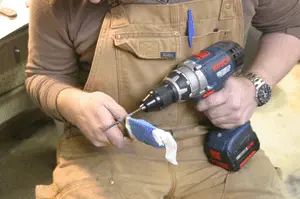
“After everything is dry, grind down the pins,” says Michael. “Go slow—you can heat the pins and burn the wood around them very easily.” Use a good wood rasp or grinder to shape the handle. A Scotchbrite flap wheel chucked into a drill will help. Finish with sandpaper. Sand until the handles are smooth and scratch-free, then apply Tung or Danish oil.
“Obviously; the level of finishing is completely up to you. The process is time-consuming; but the rewards are amazing.”
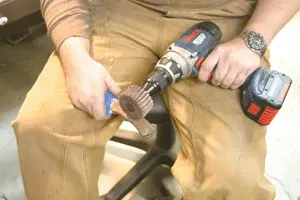
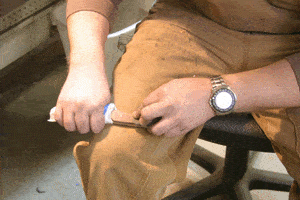
(Left) Use a Scotchbrite flap wheel to create a smooth, polished surface. (Right) Smaller pieces of progressively finer sandpaper grits can be used to further smooth the handle.
(Left) Tiny pieces of sandpaper, wrapped around a drill rod, smooth the thong-hole tube. (Right) Danish oil is hand rubbed into the handle area.
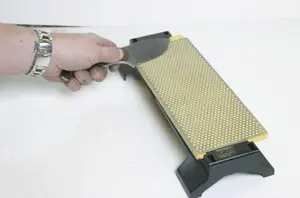
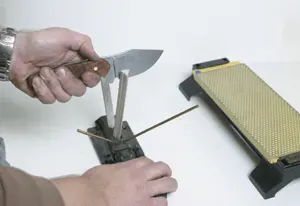
(Left) The blade is then sharpened, first using a diamond grit sharpening hone. (Right) In the following stage, use a ceramic-stick hone.
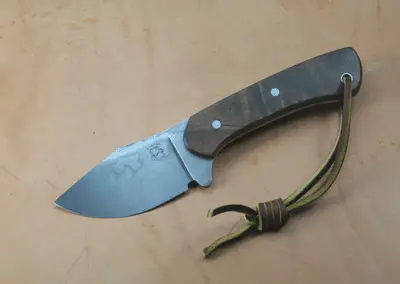
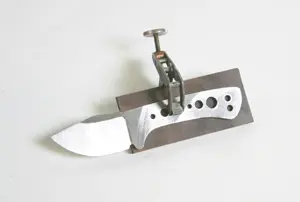
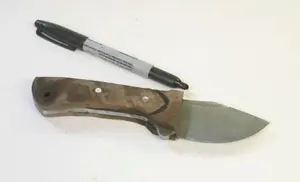
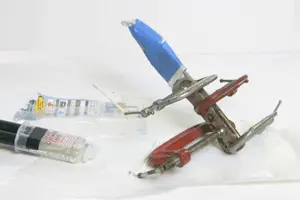
… Finished knife
Michael Burch of Burchtree Bladeworks has created a variety of unique knife styles of that are very popular with collectors. Visit www.burchtreeblades.com.
