Tile a concrete patio for a decorative touch to your outdoor space.
By Jeanne Huber
Handmade clay tiles or stone tiles with naturally split surfaces look great in a garden setting. But accommodating the size variation requires a slightly different installation process than you’d use for the factory-made tiles that are more common indoors. This project originally appeared in Walks, Walls & Patio Floors by Jeanne Huber, published in 2008 by Sunset Books. The patio features handmade saltillo tiles, which are popular where winters are warm. They are too porous to survive a freezing winter. The procedure also applies to stone tile with slightly irregular dimensions. These saltillos were glazed at the factory. If you are using unglazed saltillos or porous stone, apply a sealer before you install them to prevent mortar stains.
Sort the tiles before you begin. Set aside warped pieces with a slight hump in the center until you have mortar prepared and can spread a little, like frosting, to make the backs flat. If thickness varies significantly, sort out the thicker pieces and include at least one in each section you set so that the paving turns out even.
Before tiling a concrete slab, be sure it is stable. Deep cracks are likely to show up in your tiled surface, even if you patch first. Run a straightedge along the surface and knock down any protrusions with a hammer and chisel or a grinder. Patch large holes, clean the concrete, let it dry, then paint the surface with concrete bonding adhesive.
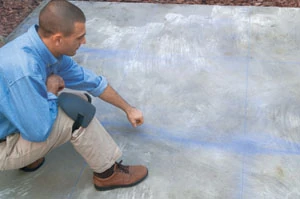
Lay out the project. Check the slab to make sure corners are square. If not, draw two lines at a 90-degree angle to each other and make all your measurements from them. Do a test run by placing tiles to make a section about 3 feet square. Space them to allow grout lines of a width you want. Measure the width of the tiles plus one extra grout line. This is the size of the squares in which the tiles should be laid. Using a tape measure and chalk line, mark lines in both directions to produce a grid of squares.
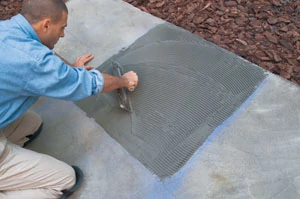
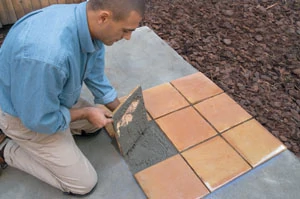
Trowel on the mortar. Mix a batch of latex-reinforced mortar so it is just stiff enough to cling for a second or two to a trowel held vertically. Using a notched trowel of the size recommended by the tile dealer, spread the mortar inside one of the squares. First spread a thick layer using the flat side of the trowel. Then use the notched side to comb the mortar. Don’t scrape down to the concrete.
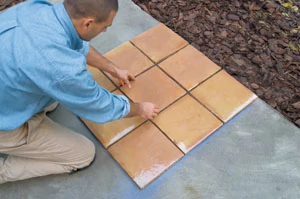
Place and align the tiles. Fill the square with tiles, leaving gaps for grout lines. Set the tiles straight down into the mortar; don’t slide them or press down on them. Stand up and examine the tiles from several angles to be sure the grout lines are as consistent and straight as possible.
Bed the tiles and check adhesion. Place a block of wood or a piece of plywood across several tiles and gently tap it to seat the pieces evenly. Every so often, pick up a tile to make sure the mortar is sticking to at least three-quarters of the back surface. If it’s not, back-butter each tile with a thin layer of mortar before setting it in the troweled mortar.
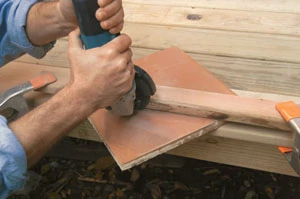
Cut tiles to fit. At edges, you may need to trim some pieces. Cut tiles using a rented wet saw, or a grinder or circular saw equipped with a masonry cutting blade or a diamond blade. Some tiles are easier to cut with a snap cutter. Ask your tile dealer which cutting tool to use.
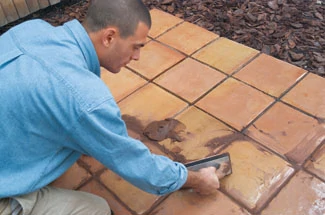
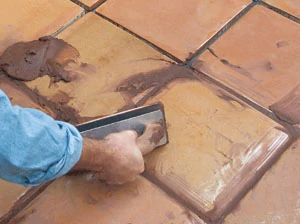
Grout and clean. Wait about 2 days for the mortar to harden. Mix a batch of latex-reinforced sanded grout just to the point that it does not pour readily. If joints are 3⁄8 inch or wider, apply the grout with a mortar bag and shape the joints with a brick tool or the rounded end of a trowel handle.
If joints are narrow, hold a laminated grout float nearly flat and push grout between the tiles in at least two directions. When the joints in an area are full, tilt the float up and use it to squeegee away most of the excess grout. Drag a wet towel over the area, then wipe lightly with a damp sponge, rinsed often. Once the grout starts to stiffen, use the sponge to shape the surface to a consistent depth. Allow the surface to dry until a white haze appears, then buff it away with a dry cloth. Mist the grout with water until damp and cover it with plastic for several days, making sure it stays damp.
New Ideas for Outdoor Living
New for 2009 is Patio & Stone, A Sunset Design Guide. This handsomely photographed book includes the latest ideas on design and materials, along with essential landscaping advice from industry professionals. Design an inviting patio with decorative features such as flagstone paths and stone walls. Discover a wealth of great landscaping materials, from natural stone to concrete pavers, brick and tile. Plus, you can see advanced views of the spaces you are planning with the 3D interactive design software that is included with the book.
Photo Credits: “Photos courtesy of Wayne Cable”
Editor’s Note: Excerpted by permission of Sunset Publishing Corporation from Walks, Walls & Patio Floors by Jeanne Huber and the editors of Sunset Books, published in 2008 by Sunset Books.


