

A New Metal Roof Tops Off a Florida Remodeling Project
By Clint Thomas, Esq.
My daughter and her husband recently bought a fixer-upper in Florida. The roof on their house has a very low slope, a 1:12 pitch to be exact, and came with an 18 year old modified bitumen roof that was at the end of its life expectancy. They obtained two different quotes to replace their roof with modified bitumen, or a comparable product, but those quotes were enough to buy a brand new economy car. I suggested that they consider installing a low-rib metal roof since I had installed several of these before for a fraction of the cost of their professional estimates.

The old modified bitumen roof is shown prior to replacement
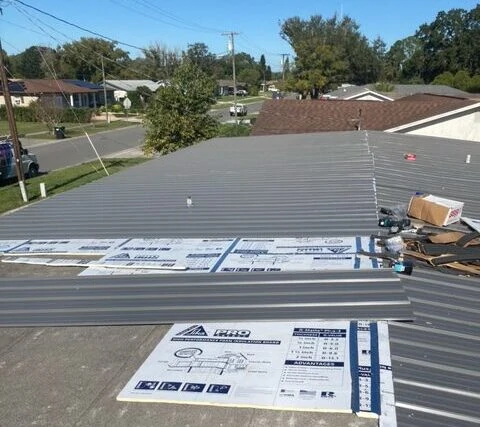
Metal roofs have many benefits. The biggest is that they will last virtually forever. The primary maintenance issue is having to replace the screws every fifteen to twenty years because the washers will deteriorate over time. Another benefit of a metal roof is that it can be installed over an existing asphalt shingle roof or modified bitumen roof by simply putting down a layer of roofing felt or insulation board between the original roof and the new metal panels. Since my daughter and son-in-law’s house is located in the Sunshine state with little to no shade around it we decided to install 3/4″ iso-board insulation over the existing roof before the installation of the new metal roof for an added layer of protection.
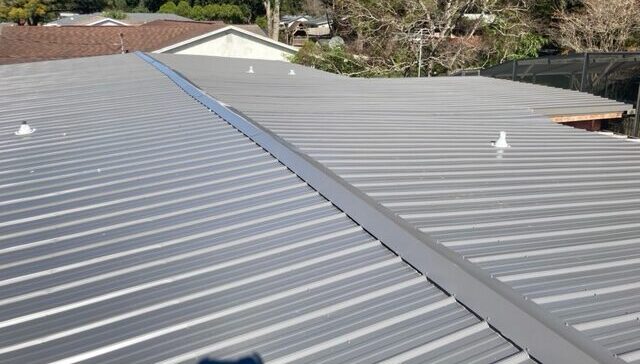
Metal roof panels come in different types, i.e., low rib metal panels, PBR panels and Snap-Lock panels. Low rib panels are commonly used on residential property while the later two types are designed for commercial applications. Low rib panels can generally be ordered in two different thicknesses of either 29 gauge or 26 gauge. Like shotgun barrels, the lower the number the bigger the gauge, i.e., thicker the metal. I prefer the 29 gauge low rib panels for residential applications.
Thanks to the Internet, I easily located a metal supplier near my daughter and son-in-law’s house that provided certification information verifying their low rib metal product is approved to be used on a roof with a pitch as low as :12. The only caveat is that if the slope is less than 3:12 butyl tape must be installed on all of the lap seams to insure a tighter seal.
Roof pitch is defined as the amount of rise in every 12 inches of run. In plain English, imagine an imaginary line running from the top of the outside wall of the house to the top of the outside wall on the other side of the house. The roof pitch is how far the roof rises up off of this imaginary line for every 12 inches that you move along the line until you reach the peak that is known as the ridge.
A roof’s pitch is determined by measuring the width of the house from one outside wall to the other outside wall and then diving that number by the distance from the top of the outside wall to the bottom of the roof at the ridge line. The quotient of these numbers provides the first number of the pitch (X:12).
Knowing that the pitch of this roof fell within the range allowed by the metal roof’s certification report, I then took the necessary measurements of the roof so I could order the metal.
I began by measuring the length and width of each side of the roof. My daughter and son-in-law’s roof measured 64 feet wide and 18 feet from top to bottom. Metal panels are manufactured to be three feet wide and come in whatever length that a person requests.
In addition to the panels themselves, it is necessary to order the appropriate trim which should include eave flashing, rake flashing and a ridge cap at a minimum. Metal flashing typically comes in ten foot lengths and in a variety of designs to fit the required use. Custom styles can also be ordered for special or unusual applications. Self-tapping hex headed screws, butyl tape and pipe boots can also be ordered from the metal supplier.
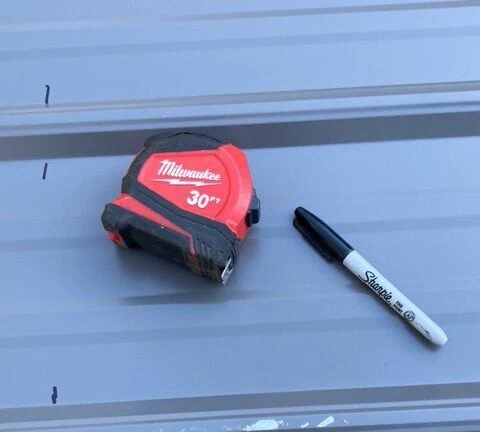
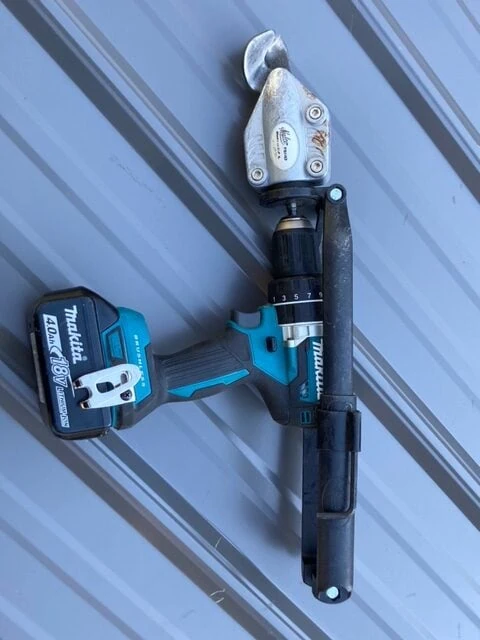
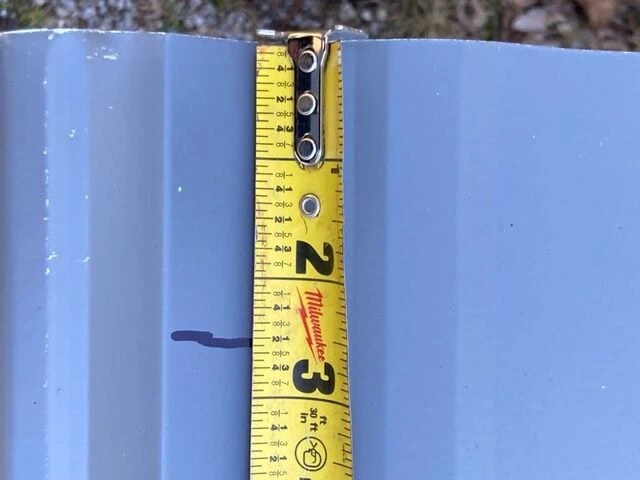
A cordless screw gun, an impact driver, a magnetic hex head bit, usually a 1/4″ inch in size, that is designed to drill metal, a tape measure, a Sharpie pen, aviation snips and cutting nibblers are the minimum tools that are required to install a low rib metal roof. I suggest having several extra batteries on hand and a battery charger because of the number of screws that have to be fastened. A caulk gun and one or two of tubes of gutter seam or high-grade roofing silicone are also necessary to seal around the bottom of any pipe boots and ventilation fans. A Sharpie pen is the best marking tool and a pencil must be avoided. The graphite in the pencil lead can cause an adverse chemical reaction to the metal panels as does red chalk in a chalk line.
In addition, metal roofing materials, panels and flashing, can NOT be in contact with pressure treated lumber. Historically, Chromated Copper Arsenate (CCA) has been used to preserve pressure treated lumber. However, due to environmental concerns over the more recent years, CCA is being replaced with Alkaline Copper Quaternary (ACQ) which is more corrosive to steel and coated steel. United States Steel Corporation published a Technical Bulletin (TBP 2005.19) ACQ Pressure Treated Lumber Effect on Sheet Steel discussing this issue in depth. ACQ will cause the metal to corrode. Therefore, if any pressure treated lumber is being used where a metal roof is being installed some type of water resistant barrier, such as ice-and-water shield, must be installed between the pressure treated lumber and the metal roofing components. A water resistant barrier is required since corrosion occurs in the presence of water while in contact with the wood’s preservatives.
Most metal manufacturers will supply an installation guide that contains a screw pattern section. Typically, screws are placed in the fields of the panels on either side of the ribs when attaching the end panels and only on the right-hand side of the ribs for the remainder of the panel for what is commonly referred to as the standard pattern. Unless the manufacturer’s instructions state something different, #10, 1 inch or 1 5/8 inch self-tapping woodscrews with rubber washers should be utilized.
Screws should not be placed in the tops of the ribs. Some people believe that is the better location since the water runs down the field of each panel and the ribs are higher than the field. However, the problem is not the water but the wind. A 2 inch or 3″ screw has to be used when panels are fastened through the ribs. Over time, as the panels expand and contract from temperature changes, in addition, to being buffeted by the wind those long screws will slowly wallow-out the hole that they are in and after ten or more years can often be easily pulled out with your hand. However, when screws are installed in the field the only part that is above the roof is the screw head and washer. This limits the effects of the elements. For an at-home demonstration, take a three inch screw and screw it 1 3/4″ into a piece of 2×4 and then screw a shorter screw all the way down until the washer is firmly against the 2×4. Then, grip the top of each screw with a pair of plyers and wiggle them back and forth and see which one moves the most.
The final note about screw installation is to find a happy medium when torquing them down. If they are too tight, then the washers will flatten out like a pancake which causes water to run under them. If they are not tight enough, then the washer will not be firmly seated and that too will allow water to run under the washer and down the screw hole.
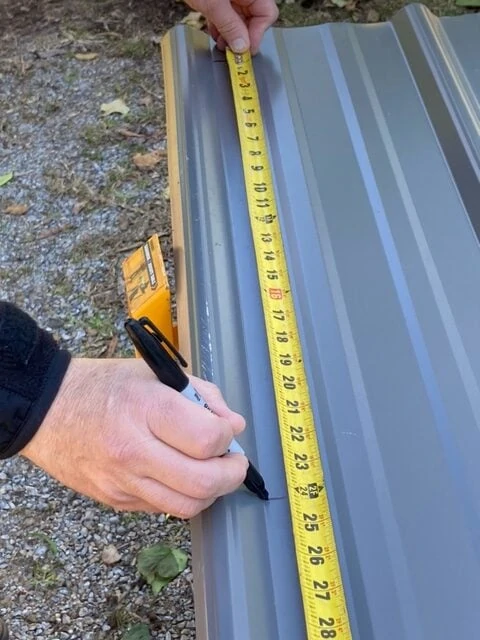
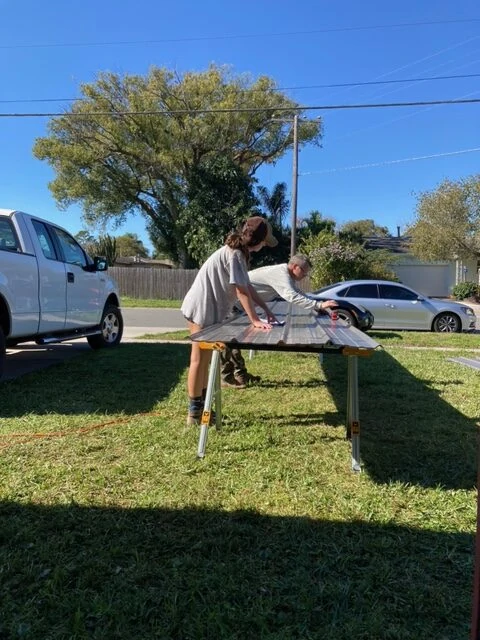
To install the metal roof, begin by stacking five to six panels together on saw horses making sure that all of the ends are perfectly even. Then measure from the bottom edge of the panel up two and a half inches and put a mark with a Sharpie. From that mark, measure up the panel placing a mark every twenty-four inches. The first mark that is at two and a half inches is assuming that a two inch over hang is being utilized. In other words, the metal panels will extend two inches past the fascia board to help shed water away from the house. Next, transfer each of these marks horizontally across the panel from one side to the other. This is the spacing that you will follow when pre-drilling the screw holes. I usually will also place a mark everywhere a screw is required according to the manufacturer=s installation instructions to I don=t make any mistakes. If you follow this same procedure with every stack of panels your roof will have perfectly straight screw lines from one side of your roof to the other when you are finished. It’s also helpful to use clamps to hold the panels together when pre-drilling the screw holes.
After pre-drilling the first five panels install eave flashing or fascia flashing, which is just a larger version of eave flashing, along the eave the entire length of the roof. Follow that by rolling out some butyl tape one half inch in from the eave and stick the foam closure strips to the tape. The next step is to roll butyl tape over the top of the closure strips. Two kinds of closure strips can be purchased. There is breathable and non-breathable depending on the application and local building code.
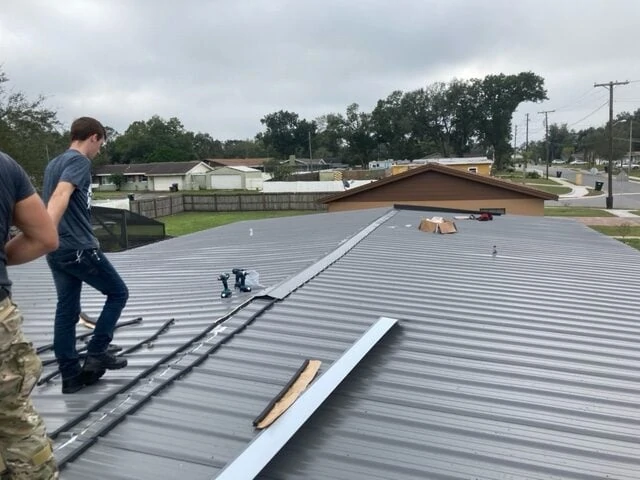
Follow the butyl tape by lifting the first panel onto the roof and laying it down starting at an outside corner. It is imperative to spend a little extra time on the first panel on each side of the roof to get it square because all of the rest of the panels will run off of it. Place it so that the outside edge of the panel is even with the outside edge of the roof, i.e, the rake, also making sure to align it so the panel extends past the bottom of the roof, i.e., the eave, by two inches. This is the overhand mentioned earlier.
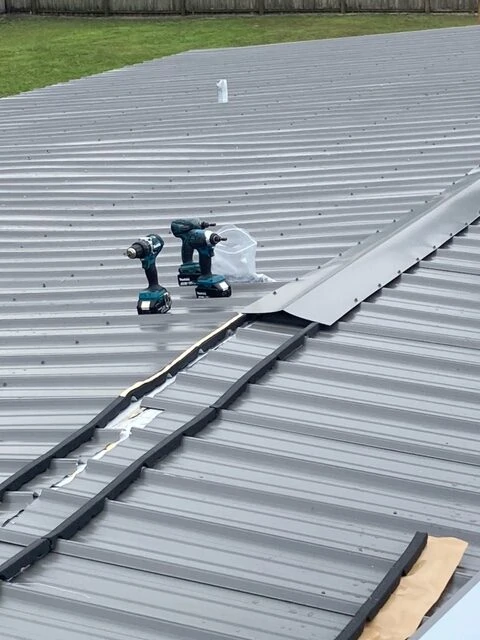
Once the first panel is secured then it=s just a matter continuing the process of rolling out the butyl tape, attaching end closures and laying each consecutive panel down so the outer most ribs overlap. Don’t forget, if the pitch of the roof is less than a 3:12 then butyl tape must also be used to seal this seam known as the lap seam. Continue this process until reaching the opposite end. Next, move over to the section of roof on the other side of the ridge and repeat this procedure.
After all of the roof decking has been covered with metal panels, it’s then time to install the rake flashing. Rake flashing is designed to be flush with the field of the roof on the inside and touch the fascia board on the outside. I usually will dry fit the rake flashing first and place a few marks with a Sharpie along the inside edge. After moving the rake flashing out of the way, I use the marks as a guide to know where to stick the butyl tape to it sits directly along the seam between the roof panel and the lip on the rake flashing. When installing the two upper most rake panels on each side of the roof the top ends of both panels will have to be cut at an angle that compensates for the pitch of the roof. A bevel square is the best tool to use to achieve the correct angle or speed square can also be used if you understand the markings.
Once the rake flashing has been installed the next step is to attach the ridge cap. Unlike the roof panels, the ridge cap is drilled into the ribs themselves and not into the roof panels. As with the rake flashing, I will dry fit each piece of ridge cap and mark the outside edge to use as a guide for installing the butyl tape and end closures. Be aware that the end closures used under the edges for the ridge cap are what I call Afemale@ closures because they are made to go over the tops of each rib. The closure strips used at the end, or eave, of each panel have little pyramid looking protrusions and are designed to go up into the bottom of each ridge hence my label of Amale@ closure strips. The point of this is be sure not to confuse the two types and use the wrongs ones.
Small protrusions through the roof, such as vent stacks, are sealed off by rubber pipe boots that are screwed in place after an thick application of gutter seam or a quality roofing silicone has been applied to the bottom four edges of the boot. Larger protrusions, such as attic fans and vent turbines, require that the roof panel be cut to the exact size of the opening and then are sealed by applying a thick laying of gutter seam or a quality roofing silicone around the circumference.
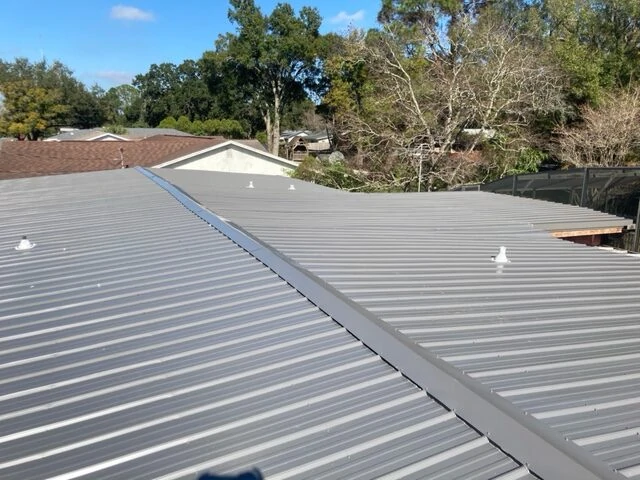
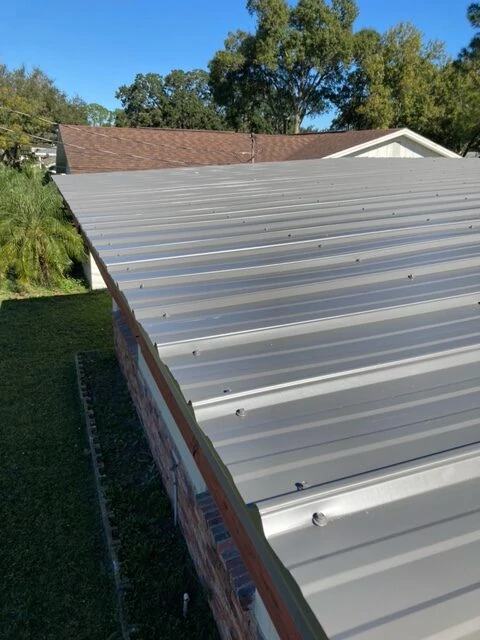
My daughter and son-in-law’s roof is approximately twenty-four square. The installation of the new roof took five people two and half days and saved eighteen thousand dollars! The professional roofing estimates that they obtained for roofs with a twenty-year maximum life expectancy were eighteen thousand dollars higher than the cost of the materials for a metal roof, including the iso-board, that will out last all of us. So, if your house needs a new roof, call over half a dozen of your friends and spend a long holiday weekend working on your sun tan albeit not by the pool. Your checkbook will thank you.
