A Cool shed design if your shed wants to be a tiny house—or home office, or extra bedroom–when it grows up.
By Mark Clement
I have a unique take on sheds. And I have some really fun and forward-thinking customers who bear with me when I’m prattling like a little boy talking about blanket forts at our design meetings.
Basically, it’s that the run of the mill sheds available at every big box, big city exurb whose denizens share the road with horses and tractors, are designed to be sheds. Just sheds. And they look like sheds that are trying to be little houses, but they often look like what they are sheds. Just sheds. There’s nothing wrong with that. It’s just that with a few extra details and some site building, it can be more than that. Way more than that.
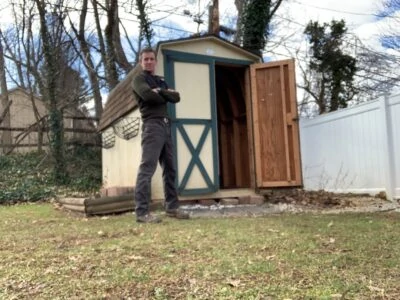
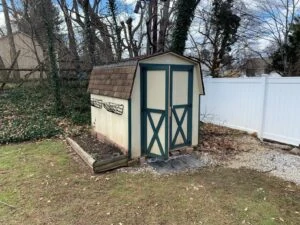
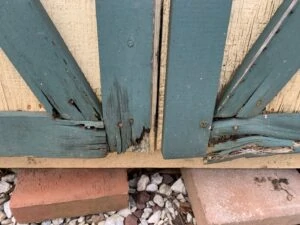
Spectacular example of (1) a shed looking like a shed and (2) all the ways sheds rot.
It all starts with the foundation.
Unless there’s already a shed there, then it starts with…
Demo
Carefully pick the old shed apart. On this one with the gambrel roof, I cut between the rafters through the shingles with a circular saw, then cut and tipped the trusses over one-by-one.
Foundation and Footings
I have torn down enough sheds to observe that the typical 4×4 skid foundation and borderless gravel pile they rest on collect both mountains of unclean-up-able debris and leaves and critters and eventually the un-treated floor system starts breaking down and/or the near ubiquitous T1-11 siding starts wicking water and critters get in through that vertical bark mulch.

Footings, Layout
The first step in any build is knowing how to lay it out accurately. With a shed, there’s nothing to measure to or from, so I took what is now my favorite building material—strapping—and made a full-size template to reflect the shed’s foot-print. Only a couple of pounds, I could position it exactly where I needed it to go, mark the hole locations, then toss it out of the way. We’ll see that strapping again later.
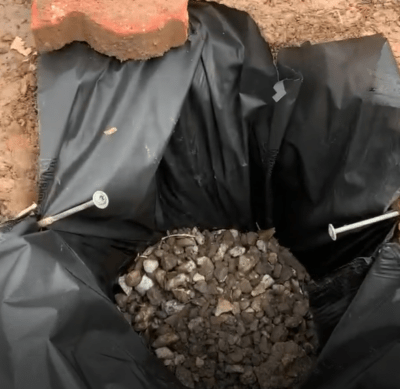
I don’t want to truck cubic yards of ¾-clean gravel into someone’s back yard as a base for a shed. What I do instead is dig (for this 8×12-foot unit) six 2-foot deep holes about 20-inches in diameter. I line them with landscape fabric and fill them with pea gravel. On top of that, I place a cobble or paver stone. To get everything level I add or remove gravel. The landscape fabric isolates the stone from the surrounding dirt, keeping it in tact and not filled with silt. The cobbles get the wood off the ground.
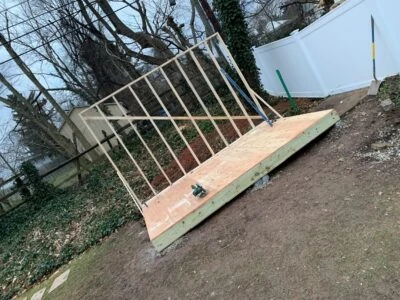
For a long lasting—and insulate-able, I’ll get to this in a minute—nevermind bomb proof floor system, I dispense with the typical SPF 1×3 on top of 4×4 skids and I frame a 2×8 PT “deck”. I get that nice and square, then, to hedge the hedgehogs later on, I skin it with ½-inch PT ply.
Skinned, I flip it over so the PT faces down. No critter will creep in there, ever. Then I place it on my cobbles. Note: It’s heavy and the flip is guillotine dangerous if you’re not respectful of the forces in play. Be ready. This is not a “hold my beer moment”.
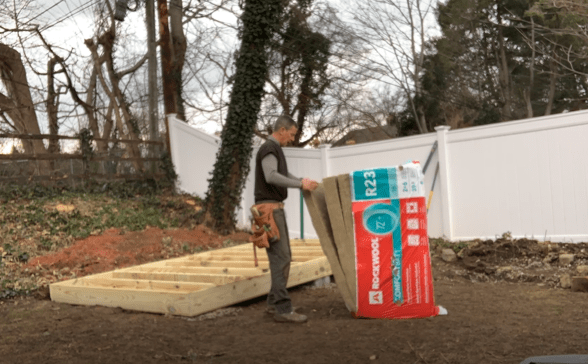
Insulation and Evolution.
So, the primary reason for this—Hello almost post-Covid world—is that this building is designed to evolve if need be. Sure, right now it’s a shed. But in the future, it may be called on to become a home office. And if that’s the case, the details needed later are built in now. As the electricians say, “wire is cheap while the walls are open”.
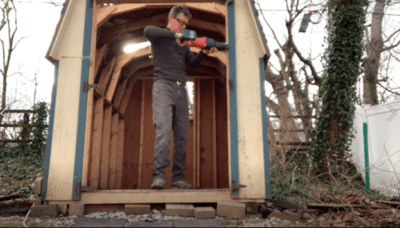
Framing and Bracing
I relied on two things to make this build a success. First, I relied on details from barn design and second, friends who know the details of barn design. The upshot is this:
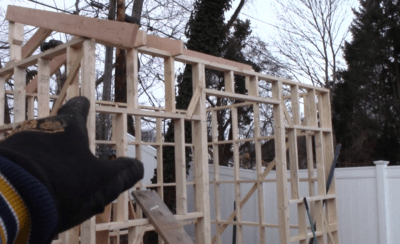
The shed’s footprint is 8×12-feet. The walls—plate to plate—are 94 1/2-inches tall (single top and bottom plate plus pre-cut studs).
When I tipped the walls up, I held them fast with sections of strapping I recycled from the template.
Bracing
Even though the vertical shiplap would act as a membrane like plywood does, it was advised I add some extra umph. So I let in a notch for diagonal bracing which I made from—who’s keeping track—more strapping!
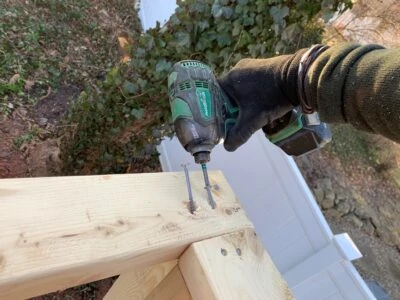
One of the purposes of a typical home’s double top plate is to mechanically lock the walls together (framers use it to straighten the walls too, called “plumb and line”) but that wasn’t necessary here. Still, I wanted the walls fused in place so I drive a coupe #10×3-inch Spax screws in there. Locked and rocked.
Rafters
I’m no math genius. I laid the rafters out by determining that a 2-foot rise looked right (it looks awesome!) and traced a blank in place. No math. All muscle.
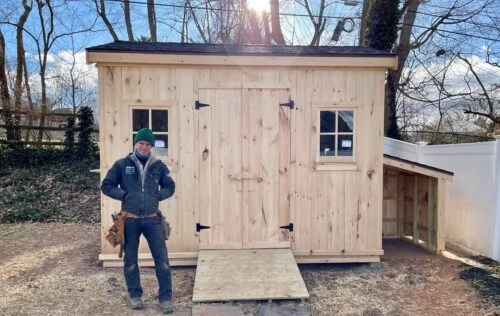
Cladding
I cannot be more in love with knotty pine shiplap siding. It’s just glorious to work with and very affordable. And it doesn’t look anything like a shed. At all.
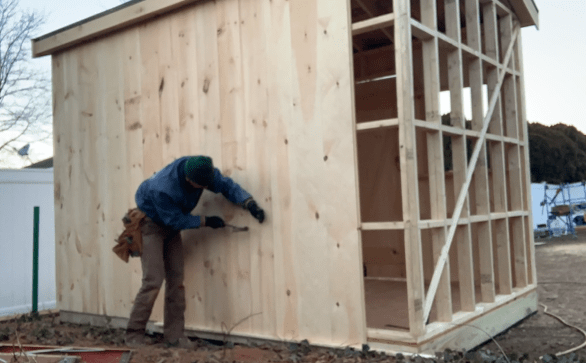
The pine I get is textured for a barn-y look that’ll also hang on tenaciously to any finish you may want to put on there. It is also heat treated so it can bear up and weather naturally in the elements. (I live in the Northeast; we have all the elements).
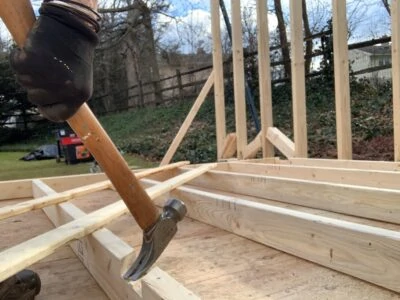
Blocking
For nailing, I added blocks at 2, 4, and 6-feet—which I probably should have done while the walls were on the deck. Next time.
I then stapled a ledger…wait for it—of strapping!…1-inch down from the plywood deck and rested my boards on it as I installed (similar to how cedar shingles are installed). Then, two hand-drive galvanized siding nails per board, per block. Simple butt joints at the corners.
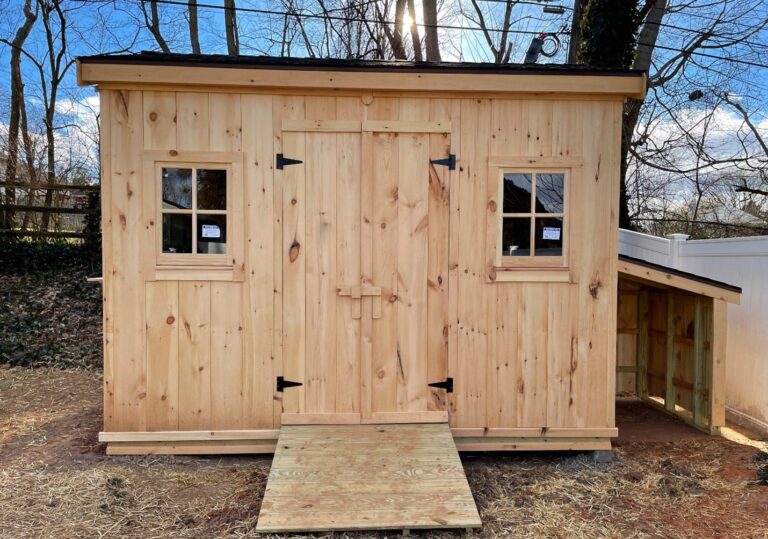
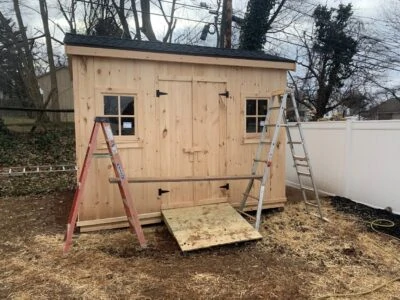
Doors and Details
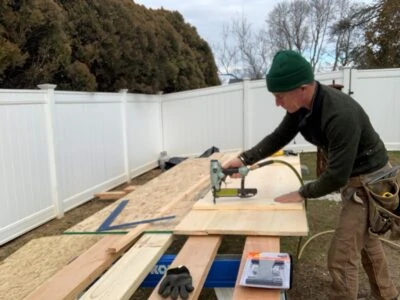
I made the doors from shiplap. Two 24-inch (minus about ¼-inch each for clearance) panels for a 48-inch wide opening worked. I had to do a little finagling to line up all the shiplap gaps. Next time, I’ll just make each panel 3-pieces of shiplap each. Each door has a glued and stapled Z-brace on the back and a simple 1×3 works as a stop.
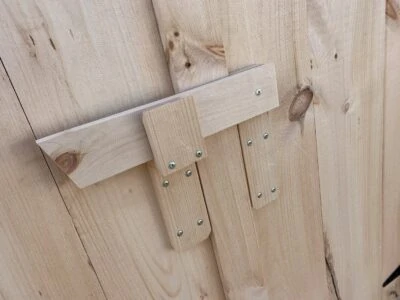
Door “hardware”
Don’t ask me how I decided to do this, probably necessity because I couldn’t find a latch that’d work, I ended up making my own. Just a few blocks, screws, and fender washers and it works like a charming charm. I used, what else, Spax washer head screws. They’re gold coat but that’s still a coating. They’ll last for a long time. And this is a door knob not a deck.
Extras and Other
Because this shed is designed with a floor system that is not on the ground, the usual river of stones that leech put of typical shed pads won’t do that here. Also, the end grain of the pine is also away from rain splash and snow piles. I added horizontal strips at the bottom of the siding (called a weather board) and one where the edge grain of the PT ply (remember that?) was visible.
A ramp is an obvious necessity. But a nice little extra on this is the “tractor shed” on the side. There’s no immediate need for it, but the homeowner (awesomely nice by the way) though it might come in handy for bikes or kids toys or quick clean-ups when the rain comes in.
Also, because this shed is raised, you need a way to get up there. My Little Giant 12-foot stepladder was a big help, teamed up with a 6-foot step ladder and a 2×10. It worked. It wasn’t awesome.
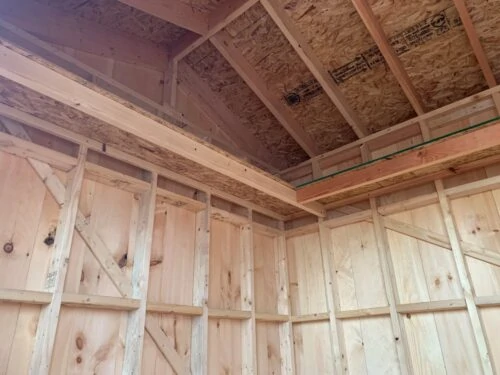
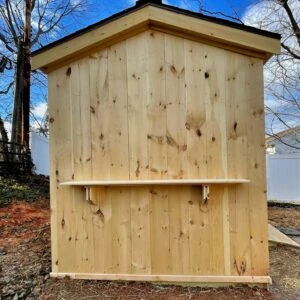
What was, however, awesome is a Clement trick I somehow figured out once. And that is a shelf running near the top plate on three walls. A ledger, 2-by struts and some OSB and the homeowners has gobs of otherwise wasted space for near nothing. They can store mountains of stuff up there and not give up an inch for shovels and rakes and mowers and all the stuff that shed hide while we can see them bejeweling the back yard in plain sight.