

By Larry Walton
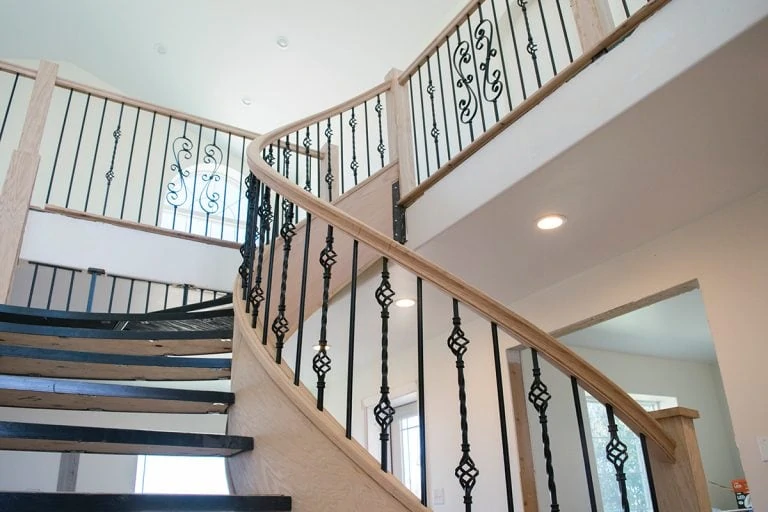
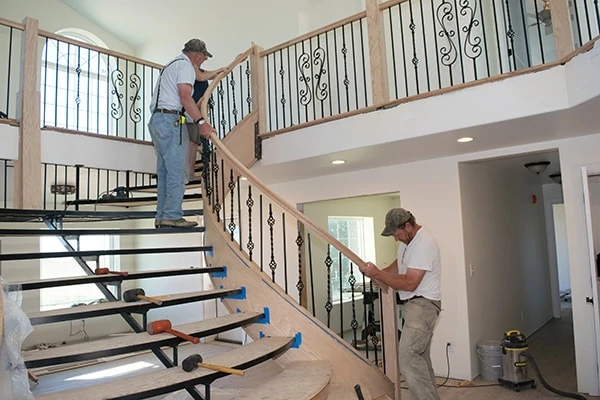
When Robert Lipskoch was drawing the plans for his house, his kids wanted a curved slide from the second to the first floor. Although the slide did not remain in the plans, a dramatic dual curved staircase emerged as the centerpiece of the house plan.
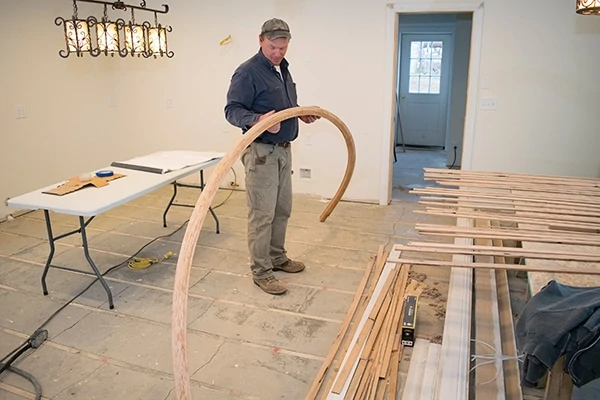
Robert laminated the curved stringers in place using 16-in. wide strips of thin plywood and finished both sides with oak veneer. He constructed the treads of steel frames and plywood panels between the stringers, which means the stringers also functioned as knee-walls that we fit with caps on top and bottom. He laminated the caps in place with 1/4-by-3/4-in. oak strips.
The balusters, which support the handrails, were designed to penetrate the stringer caps, which meant the handrails needed to match the curve and climb of the stringers. This would be achieved by gluing and clamping the handrail components together directly on top of the stringers.
TWISTED MYSTERY
I can’t explain the trigonometry involved, but the combination of stair rake (ascending at an angle) and curving around a plan-view radius results in a continuous twist in the rail from bottom to top. The right rail in our dual stair case curves clockwise as it goes up while the rail itself twists counter-clockwise so the top of the rail remains at the top at any point along the stair case.
Bending Rail from a stair parts manufacturer is designed to handle both the bend and the twist of these forces. The local lumber yard ordered the oak bending rails. The bigger challenge for this project was the construction of the stringers, especially the caps, which had to be laminated a few layers at a time and shaped to match the treads along the way.
CHOOSING THE RIGHT GLUE
After much debate, Robert chose DAP Weldwood Plastic Resin Glue for two reasons, open time and stability. Open time refers to the amount of time you have to get things into place once you mix and spread the glue. If the glue sets too fast, it will hinder the bending process and could ruin your expensive bending rail.
Glue stability is the next consideration. We saw that standard yellow carpenters glue had a certain amount of elasticity that may allow the layers of rail to creep under pressure for a long period of time. Robert was looking for a glue that would be as stable as possible over the long term.
CODE CONSIDERATIONS
Stairs must be built to specific building codes, and several code requirements come into the picture for a project like this one. Tread and riser sizes, guardrail/handrail heights and baluster spacing are among the top priorities. Be sure to check that the tops of the kneewalls are parallel with the stair nosings. Guardrail/handrail heights are determined by stair nosings, not the knee-wall. Adjust the knee-wall with temporary shims, if needed, before bending the rail. Check your local codes and plan accordingly.
HOW-TO TWIST A BENDING RAIL
The following is how we laminated, fit, drilled and assembled the curved handrails.

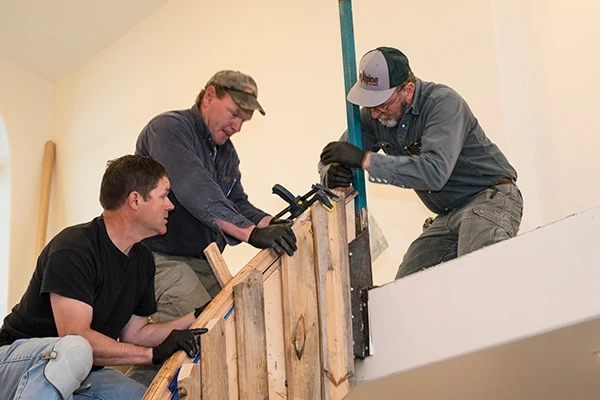
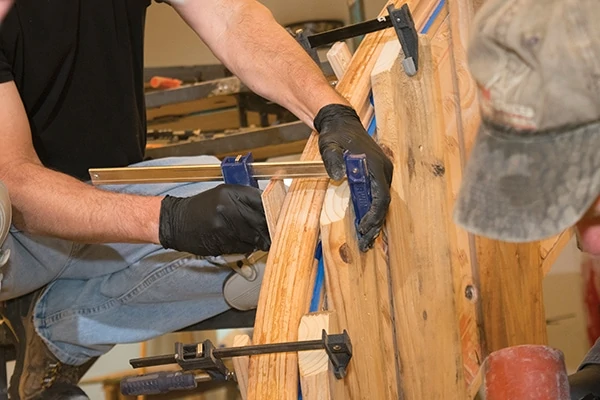
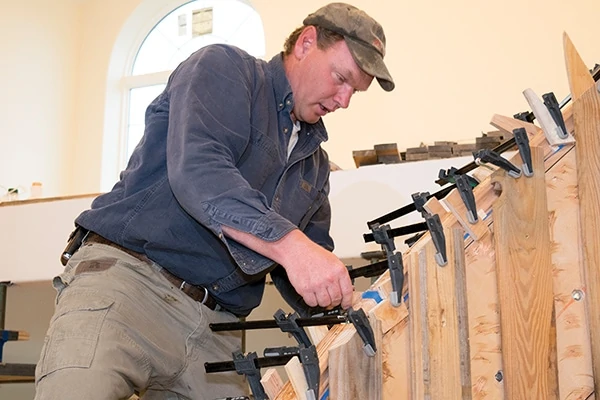
We attached clamping boards vertically up the sides of the stringers. These boards were about three inches higher than the top of the stringers, and the ends were cut at the rake angle of the stairs.

We rough-cut the end of the bending rail to reach past the newel post location but not reach the floor.
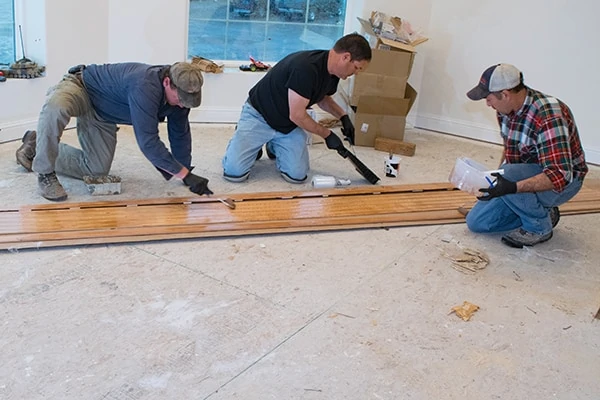
After mixing the plastic resin glue according to instructions, we spread the rail pieces out on the floor and applied the glue using mini rollers with foam roller covers.
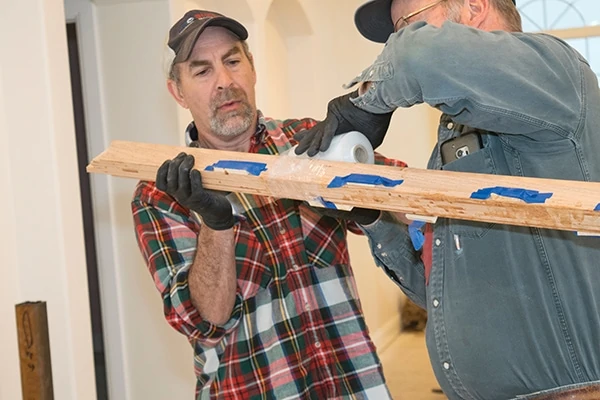
We re-stacked the glued pieces and wrapped the assembled rail with stretch-wrap film in a few places. We also taped some wood pieces to the lower part of the rail that matches the bead and builds the bottom out flush with the top.
The rail was placed on top of the stringer and against the clamping boards.
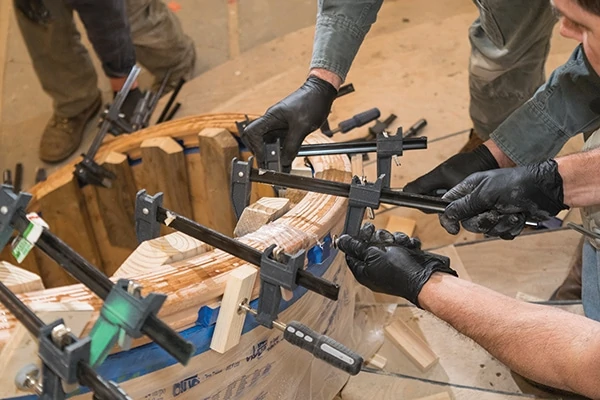
The rail was clamped about every 6 inches from top to bottom.
We used pieces of wood that matched the bead profile at the bottom and blocks to distribute the clamping force bridging from top to bottom.
Clamps added between the clamping boards helped to minimize gaps.
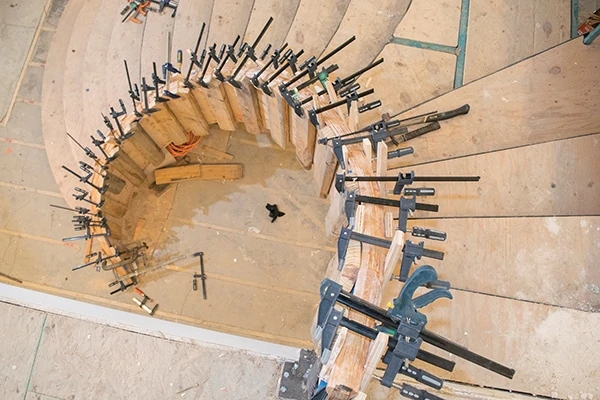
With all of the clamps in place, we let the newly laminated rail dry for 24 hours.
After removing the clamps and lifting the rail from the stringer, we could see how much twist the bending process put in the rail to keep it level with the treads all along the stair case.
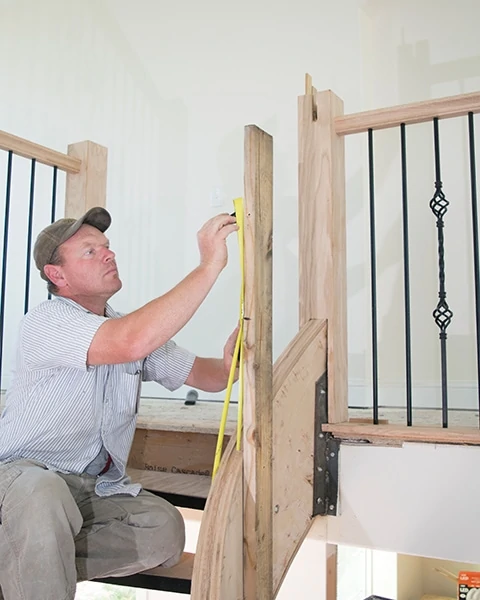
To fit the rail in final position, we put vertical boards in three places along the stringers and marked the elevation of the top of the rail that would have it function as both guardrail and handrail (which in this case was 37 inches measured vertically above the stair tread nose).

We used a reciprocating saw and a scrap board against the newel post core to cut the rail to length at the proper angle.

We used a Dewalt 20volt impact driver with a special threaded driver bit to insert the rail bolt into a predrilled hole in the end of the rail.
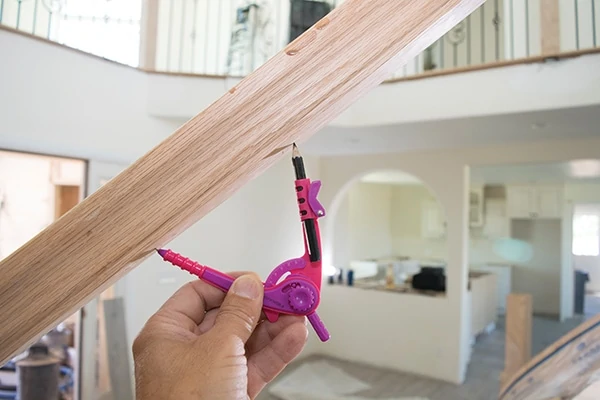
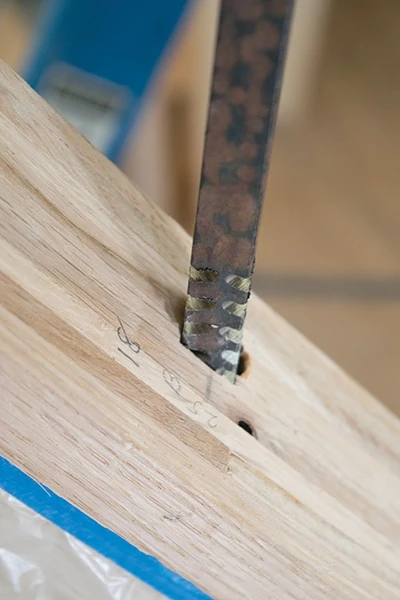
We used a compass to lay out the baluster locations along the length of the rail. The minimum baluster spacing is determined by the building code.
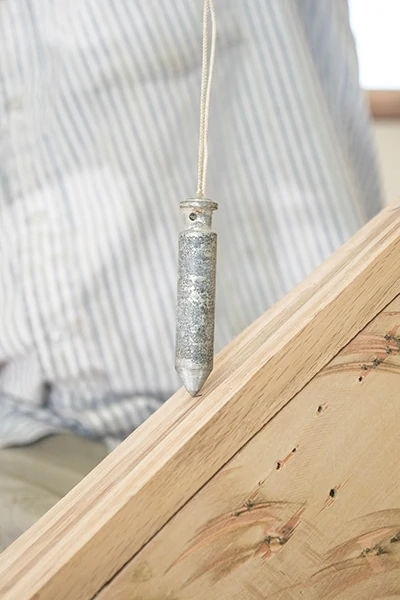
A plumb bob showed where to transfer the rail markings to the top of the stringer caps.
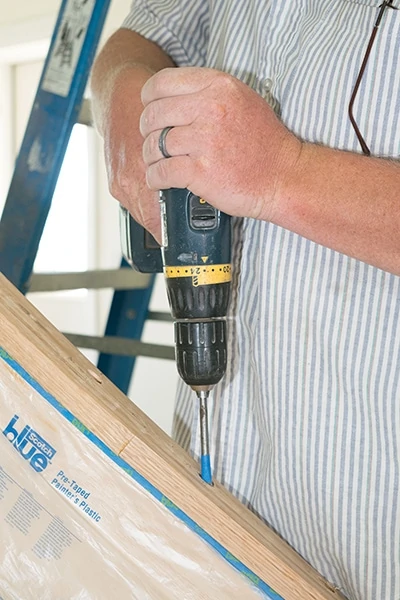
We marked the depth of the baluster holes on a spade bit with tape, and drilled the holes with a drill that had a built-in circular bubble level on the end.

When drilling the holes in the rail, we had an additional guy watch the bit to make sure it stayed plumb.
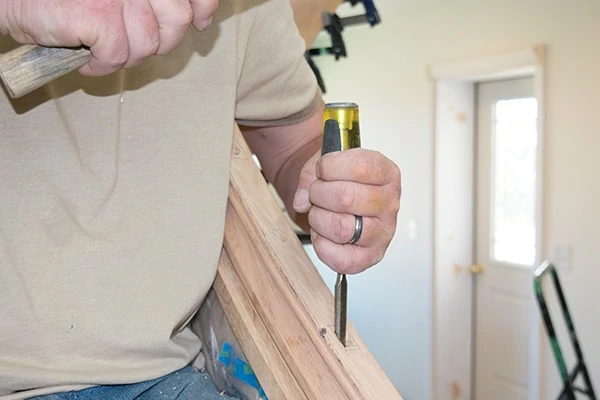
A wood chisel helped us to square the holes for the square balusters.
We cleaned out the square balusters with this homemade cutting tool.
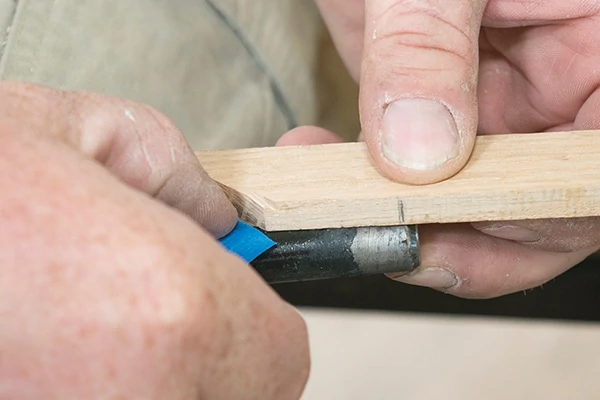
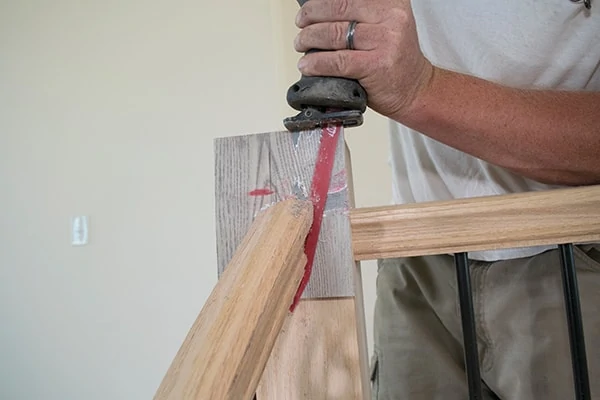
We marked the penetration depth of the balusters using masking tape and a gauge cut at the rake angle.

We drove the balusters into the stringers to the marked depth.
It took three people to place the rail onto the balusters and into position at the newel posts.
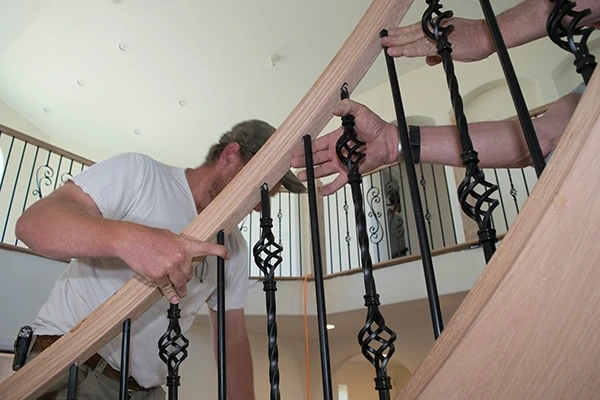
Working from the bottom to the top, it took lots of hands to keep the balusters in place as the rail was lowered into position.
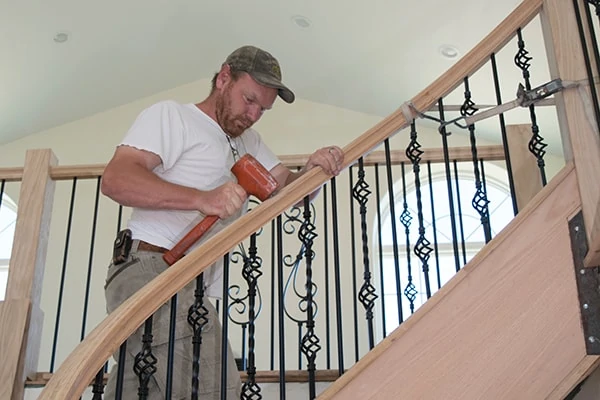
Robert used a dead blow hammer to fine-tune the rail onto the balusters to the proper height.
We again placed a protective scrap against the newel post to fine-tune the end of the rail’s compound angle to the post with a reciprocating saw.
Side Note
WHAT IS BENDING RAIL?
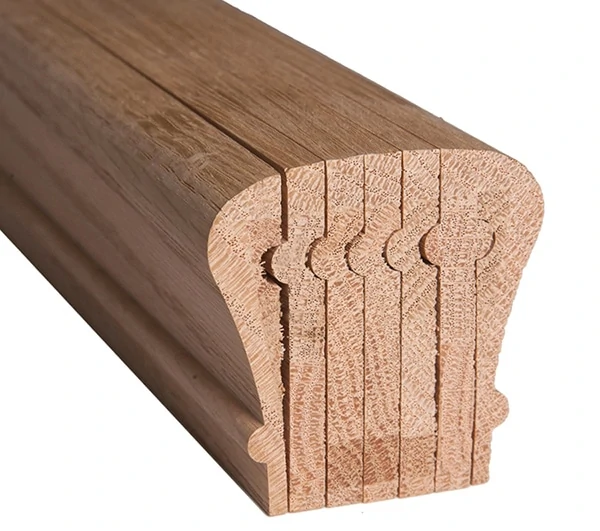
Bending Rail is designed for making curved railings on most curved staircases and balconies at the jobsite. Bending handrail comes in multiple layers (ply) and is glued together to form the new handrail. Each ply comprising the bending rail is designed and manufactured with a tongue-and-groove bead to create an alignment of the plys. When assembled, bending rail results in a match of a standard rail profile. Photo © affordablestairparts.com.
