Maybe the concept of installing a home computer network seems a little far-fetched, but for those of you who already own multiple in-house computers, this may be a helpful move. An Ethernet network can be a critical issue, particularly if you’re interested in using some sort of high-speed connection. A broadband connection allows everyone on the network to connect to the Internet simultaneously. Other network benefits include the ability to share files; share printers, scanners and other devices; or to back up important files to other computers on the network. You can also extend the life of an old computer by installing a larger hard drive, allowing it to live out its remaining years as an mp3 server or backup file server.
The Blueprint
Ask a typical question: What will you need and how much will it cost? Get a typical answer: It all depends. Basically, the parts and tools required to install a home computer network are pretty standard and readily available at hardware and electronics stores. These include a stud finder, drywall saw, measuring tape, wall jack, mounting plate, etc. The big question then becomes, how do you want to wire the network?
Do you want to expand the scope of the wiring to include cable TV, phone or stereo? If so, this would be a great time to take care of all the wiring in one fell swoop. The result will be a single wall plate in each room that brings in the computer network, telephone, cable TV or other wiring. This will be a safe, practical method to install your electrical accessories, so before making your first purchase, carefully plan your wiring strategy. Choose proper locations for the electrical jacks, making sure these areas are readily accessible but not intrusive to the room’s appearance or function. When spec’ing a room, decide if all the wiring going from each room should be integrated into one jack, or if some rooms require different locations for computer, phone and cable. While the integrated systems are nice and orderly, you’ll defeat its purpose if you end up with cables pulled across each room because you’ve decided to position a TV on the other side.
Next, determine a central point in the basement or a closet where all the wiring will converge. This should be a dry location already wired for power. It would be convenient to have this location near the telephone and cable entrance points if you are planning to include these systems in an integrated wiring scheme.
Then, depending on your central point, decide if the wire to each of the rooms will come from the floor or the ceiling. Are jacks already positioned near the floor of the room you’re targeting? If so, this makes the decision easy. And keep in mind that if you have a two-story home, you may need a route all the way up to the second story.
Getting Started
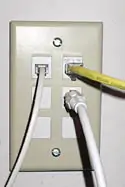
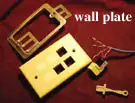
First visit your local home-improvement store and check out its line of modular electrical jacks. For most applications, models are available with wall-mounting plates to facilitate installation in finished walls. Select the required type and quantity based on your wiring blueprint.
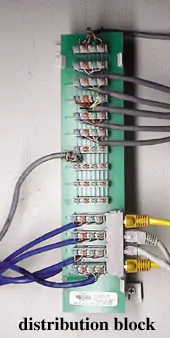
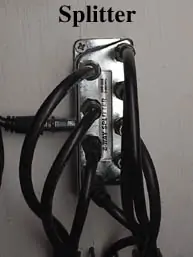
Your next required piece of equipment is a distribution block that can accommodate a computer, telephone, cable, or other accessory. The distribution block will be the hub of the entire network. You may opt for separate blocks to further distribute your accessories, such as several cable TV outlets; a splitter for cable TV is very inexpensive. For the average home, the entire project will probably cost $300 to $400.
For a home computer network use at least Category 5 cable, which will allow the network to run at least 100 megabits per second. You may opt for Category 6 wiring, which allows a slightly higher capacity at a minimal additional cost. The categories refer to the cable’s maximum speed of transmission and are called “Cat 5” and “Cat 6.”
The network cable consists of four pairs of wire — blue, orange, green and brown. The wall jacks and distribution blocks are also color-coded accordingly, so making the connections is an easy task.
For the telephone line you will need “stationary wiring” or Category 3. Make sure the cable contains at least two pairs of wires, which will allow for more than one phone line in a room. Telephone wiring is particularly easy, because each phone line only involves two wires. The wires come from the outside telephone network access block (the gray, plastic box on the side of your house), with the red and green wires indicating line 1, and the yellow and black wires indicating line 2.
For cable TV use RG-59/u cable, which is readily available at home improvement stores. You will have to install a connector at each end of the cable to connect to the splitter or distribution block on one end and the back of the wall jack on the other. A crimp tool and a bag of connectors should be on your shopping list.
Pulling the Cable
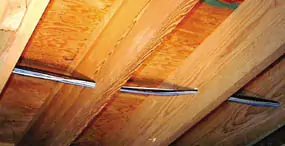
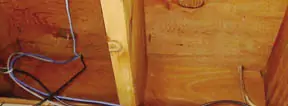
Route the cable from your central distribution point to each place the cable will go into the wall. Cut off plenty of extra cable to go into the wall and to the outlet, allowing for any twists and turns in the cable’s path. Bundle the cables that are going in the same directions. Assuming you are beginning in a typical basement with an unfinished ceiling, drill holes through the exposed joists, threading the bundles through the holes to house the cables along their route. Hooks are also available to route the cable without drilling the joists. If you use staples, use a large size and do not let the staples squeeze the cable where they attach. Similarly, if using wire ties to bundle the cables, don’t pull the wire ties tight. Make all corners in the cable path smooth, wide arcs to prevent the cable from crimping or knotting.
If you are running telephone, cable TV or other wires with the network cables, run them all to each location before pulling any of the wire up into the wall.
As our example, we’ll assume you’re running the cables from the basement through the floor plate to get into each wall, but the process is the same when coming from the top and working downward.
Locate where you want each outlet. You should be able to see where the power wires enter the wall, so use those as a reference. Measure at least 16 inches away from any power cable to position a wall stud between the power wiring and the pathway of your network cable.
In the room above (or below), use the power outlet as a reference point and measure the same distance and direction as the previous room to determine the general location of your network outlet. An electronic stud finder is a reliable tool for locating wall studs to make sure one is between your network and the power wiring.
Locate your network outlet at the same height as the power outlet, making sure it’s in a level position. Mark the wall to accommodate the jack mounting plate previously acquired. Use a drywall saw to carefully cut along the pencil line. As you complete the cut, be careful the piece of drywall doesn’t accidentally fall out. This could rip the paper outside the area and require additional work.
If you are running the cable up from the basement, you can probably reach into the wall-plate hole you’ve cut and feel the hole in the floor plate. At this point, an assistant to help pull the cable through the walls would help immensely. However, if you’re flying solo, bend a coat hanger and hook it on the wall-plate hole to retrieve the cable from below. If you are routing cable from a higher floor downward, drop a fishing line equipped with a small weight on the end through the wall in the top floor and almost to the floor plate of the room below. Grab the line and secure it on the floor of the room that will have the wall plate. (A fish tape may be required in lieu of a weighted line when pulling wire through insulated walls. Fish tape, a tool available at most hardware stores, offers the right combination of flexibility and rigidity to assist pulling the wire.)
With a line (or coat hanger) reaching from the hole in the floor plate to the hole cut for the wall outlet, secure the cable ends to the line for retrieval. It’s also smart to include an extra length of pull line to the end of the cable. Once pulled through the wall with the cable, this extra string will be ready and waiting at the jack, running through the wall and to the hole in the floor plate, where it can be used as a convenient pull string to add any future accessory cables to the network.
Pull the cable through the hole and let it hang out of the wall-jack outlet. Let the wire extend about 8 inches from the wall. Carefully strip the outside insulation jacket from the network cable, without twisting the pairs of wires any more than necessary. Be careful not to nick the wires when removing the covering. Punch the wires into the small cracks on the back of the wall jack with the tool that is provided with the jack. The color code on the jack matches the colored pairs of wires.
With the same procedure, install the wires to the distribution block, which offers the same color codes to punch in the ends.
Hook it Up
For shopping trip number two, visit a computer supply store. Each computer on the network will need a network card and a cable with an RJ-45 plug on each end to connect the computer card to the wall outlet. Make sure the computer card is marked for 100-megabit-per-second capacity (usually designated 10/100Mb).
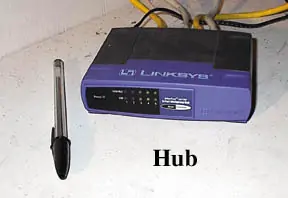
You will need short RJ-45 jumper cables to go from the distribution block to the computer hub (or router). The hub or router is the piece of hardware used to interconnect your computer network at the distribution point.
The least expensive box you can use to interconnect your computer network is a hub. A hub should cost less than $50 and will offer networking capability. What it doesn’t give you is any features. A hub simply passes along whatever signals are transmitted to it.
A more advanced choice for the heart of your network is a router. For less than $100 you can purchase a router that will connect to your cable or DSL modem, provide some firewall protection and provide some intelligence in handling the traffic on your network.
An option to consider for the central distribution point is an Uninterruptable Power Supply (UPS). The smaller UPS models are inexpensive and will keep your network operating during small power blips. But even better, they will provide some measure of protection from lightning strikes. Most of today’s UPS’s have protected telephone jacks that shield your network from strikes on the telephone line. To install, you would wire your incoming telephone service to the UPS, then to the distribution block. A good ground, such as a large, copper line running to an outside rod in the ground would also be a nice safety feature of your distribution center. Some blocks and cable splitters have built-in lightning protection but need a good ground to be effective.
Turn it On
Once your network is wired, you’re ready to connect. To set up Windows for Networking (for the PC world), visit the World of Windows Networking web site at www.wown.com. It covers just about everything you need to know on how to configure your machines to talk to each other.


