By Clint C. Thomas, Esq.
“They don’t build them like this anymore,” is a phrase that we have all heard in connection with old houses. Those words take on a whole new meaning after you’ve actually gotten your hands dirty while working on an historic property. Older homes were built in a very different manner from houses that are built today. They were usually framed with rough-hewn lumber, balloon framing was common, and mortise-and-tenon joints were as normal as a nail gun is today.
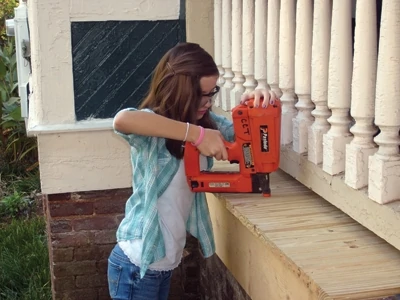
My family and I have the privilege of living in a Victorian home that was built circa 1890. Recently, I had to make a repair to the side porch where it connects to a corner of the house. Over the years, the deluge of rainwater running off the porch roof eventually caused it to rot along with the skirt that covers the porch’s structural components.
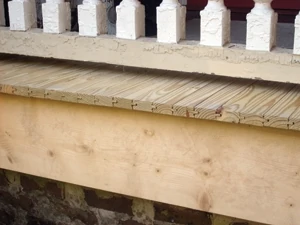
The majority of the original porch floor was unaffected and is still as solid as the day it was first installed. I decided to repair only what was actually damaged so I could retain as much of the original wood as possible. Only the outside six to eight inches of floor had been damaged. Therefore, I made the decision to remove enough flooring to go from the outside edge in as far as the first floor joist. This distance measured 19 inches.
Damage Removal
For my first step, I located the first floor joist in from the edge of the porch, and cut a line parallel with the edge of the porch with my circular saw. To do this, I set my blade at a depth to cut through the flooring, but nothing else. I tore out the rotten tongue and groove with a framing hammer, removed all of the old nails and then pried off the original skirt.
I attached a new joist onto the original one using pressure-treated lumber and lag bolts. The original joist did not have any damage, but it was easier to use it as a guide for the saw blade than to try and cut a perfectly straight line along the midpoint of an existing joist.
Right-Size Replacement
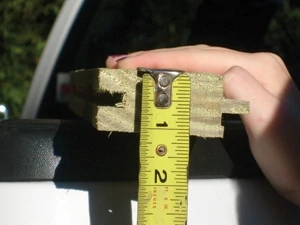
Next came the hard part. The home’s original porch flooring, like all of the other original lumber in the house, is true dimensional. This means that a 2-by-4 stud actually measures 2 inches by 4 inches, and not 1-1/2-by-3-1/2 inches as is commonly available today. The porch floor was a real oddity because it actually measured 1-1/8 inches thick and 2-3/4 inches wide. It had been milled from heart pine and even after 120 years it still produced a strong smell of sap when sawed.
I wanted to replicate the original flooring to retain the home’s historical character, but I also wanted to improve the finished product to keep it from rotting again. I knew that it would be impossible to purchase lumber in the dimensions that I required. I’ve yet to find any store that sells 1-inch thick stock, and certainly not 1-1/8-inch thick lumber. The easy way would have been to use modern 1-by-4 material, rip it to width on the table saw, and then shim the bottom of it. However, the easy way is rarely the best way.
As I have had to do several times before, I decided to mill my own lumber. This is actually much easier than it sounds and produces a very satisfactory sense of accomplishment.
For this project, I chose to use pressure-treated pine lumber to resist any future rot or water damage. I selected the best looking 8-foot 2-by-4s that I could find at the lumberyard and then set about milling my new flooring.
One tip when selecting treated lumber for this type of a project is to purchase boards that have been stored in the direct sunlight and have already dried out. If you mill wet lumber, it is going to shrink as it dries, making your finished product smaller than what you planned. Another option, if you purchase wet lumber, is to put it in direct sunlight until itdries and then mill it.
The first step was to plane down each 2-by-4 from 1-1/2 to 1-1/8 inch thick. This process was the most time-consuming phase of the entire project because it required multiple passes through the planer. With the help of my daughter, Zoe, we planed seven 2-by-4’s to the proper thickness. Planning them also had the added benefit of removing any imperfections, most of the knots, and made the boards totally flat and smooth. We planed them in their factory-cut 8-foot lengths to maintain as uniform a thickness as possible.
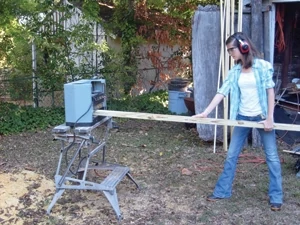
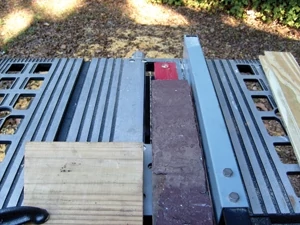
The next step involved ripping the boards to the correct width on the table saw. I am a template nut, and used a piece of the original flooring as a guide to get the exact width. I put the original piece on the table saw between the blade and fence, and then installed a makeshift feather board to keep the 8-foot long piece of lumber from wobbling as I slid it through the saw. When measuring, be sure that the tongue is included in the measurement of the width. It is easy to overlook.
Milling the Joint
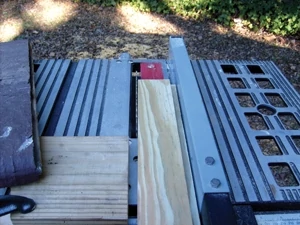
After ripping the new stock to a width of 2-3/4 inches, we then embarked on the next step of making the tongue and groove (T&G), which was by far the most difficult part of the entire process. Milling a T&G joint is not that hard by itself. The difficulty is making the joint on the new stock match the one that’s already on the house. Remember, this was a repair, so the new lumber had to abut the original flooring that remained on the porch. The easiest way to ensure that the new joint worked smoothly with the old one was to use a piece of the old flooring as a guide, or template, if you will.
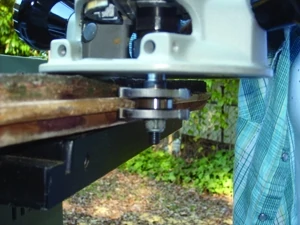
I set my router on top of a piece of the old flooring and adjusted the depth of cut until the router bit matched exactly the tongue on the original piece. I then routed the tongue on all of the new boards at one time. I repeated this same procedure for the groove. The only difference is that as I finished milling the groove on each board, I would lay it next to the last piece, groove to tongue, and then eyeballed them to make sure they lined up properly.
My router bit could not remove all of the waste material from the tongue side of the new flooring because of the wood’s 1-1/8-inch thickness. To remedy this, the final step of this stage involved running the tongue side of each freshly milled piece through the table saw two more times, once for each side. When I did this, I adjusted the height of the blade so it would only take off the remaining waste without hitting the new tongue, and ran each board through one time on both sides to produce a perfect tongue.
New Flooring
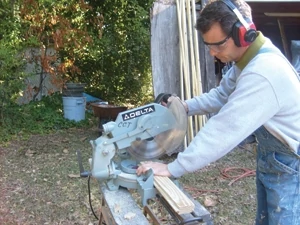
With the milling completed, I then measured and cut each piece to length on the miter saw. Before installing the new flooring, I draped a piece of 4-mil plastic over the porches outside frame for further protection from the elements, in case water ever worked its way through the new flooring. I also ran a thin bead of clear silicone inside each groove as I installed each piece. This may seem unnecessary, but this particular corner catches a lot of water coming from three different roofs, so I figured it is better to be safe than sorry.
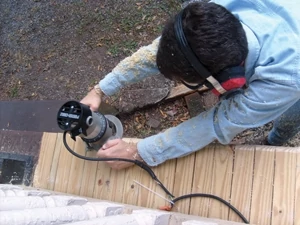
After the flooring had been installed, I routed the outside edge with a 3/4-inch round-over bit to match the original flooring. I performed this task freehand on-site, rather than try and get a uniform edge by individually passing each piece through the router table.
DIY Moulding
The last step in completing this repair involved installing a new piece of decorative trim underneath the floor’s overhang. Decorative trim is another area of concern on older homes, since the trim in question has probably not been manufactured since the 1940’s. This, too, involved me having to mill my own stock.
The best way to replicate older trim work, without spending a fortune at the local moulding shop, is to look at a piece of the trim from the side, then mark off the geometric patterns. In this case, I could see that the trim could be divided into a 2-by-5/8-inch wide rectangle, a 1/2-by-1/2 inch square and a piece of cove moulding.
There are two options to reproduce moulding outside of having it professionally milled. One is to divide the original piece into the geometric patterns mentioned above and then assemble new pieces of lumber with those same dimensions. This method works well for many applications, but it is not historically accurate, nor is it as durable as one solid piece of trim.
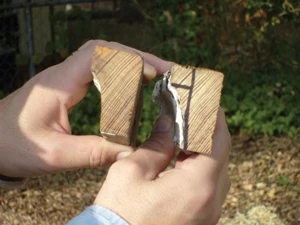
The method that I chose was to mill new moulding with my router and table saw. The initial step in this process involved ripping a pressure-treated 2-by-4 stud down to a width of 2 inches on the table saw. I then ran it through the planer to reduce the thickness from 1-1/2 down to 1-1/4 inch.

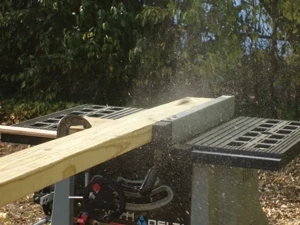
With the basic stock completed, I had to apply the decorative edge to match the original trim. I did this by using a 1-1/2 inch vertical panel-raising bit in my router. All of the above steps I performed on an 8-foot long piece of lumber. Again, this helped ensure a uniform size and shape throughout the entire process.
Once I had applied the decorative detail, all that remained was to attach the new moulding along the top of the skirt immediately under the porch floor.
The end result is a new and improved porch floor that will be weather-resistant for many years to come while still retaining the home’s original charm and historic character. It is true that we don’t build them like we used to build them, but there’s no reason why we cannot build them with the same quality. All that is needed is a little bit of know-how with a little patience thrown in.
Editor’s Note: Clint C. Thomas, Esq., is a practicing lawyer, Professor of Law and freelance writer. He lives in a home that is listed on the National Register of Historic Places with his wife and three children, and performs all of his own renovation and restoration work.


