

By Mark Clement
I love Fences-good ones, anyway.
Shooting my eye down 100 feet of pitch-perfect, parallel fence posts rising true and straight from the earth speaks to my inner carpenter. And, once connected by rails and slats, I love to see how this simple amalgam of boards ignites featureless landscapes and bolsters boring borders. I also enjoy that the mere presence of a fence is pivotal, because fences impact the homeowner and the homeowner’s neighbor. I really think it’s important that considerate attention be paid to designing and building a structure I’m proud to put my name on.

A knot called a Trucker’s Hitch works on more than just mason’s line for laying out fences. I use them anywhere I need constant, dependable leverage, like holding this sapling out of the way.
Detailed here is a privacy screen designed to beautify a back yard and erase a poorly maintained rental on the adjoining property. The screen delivers succulent lines for the interior and a crisp, but solid, wall from the outside.

Fence Layout Techniques
While every site slings unique challenges, I approach each fence basically the same: I find the property line and immediately set what I call a “control-post”—usually in a corner—and then pull as much layout as possible from there.

Show is the completed fence, constructed from Western Red Cedar.
Property Line & Control Post. After determining the true property line via the home’s plat plan (usually available via the building department or courthouse records) and/or property stakes, I mark the center of the control-post hole. I lay it out such that wherever the post is set, the exterior face of my fence is 1 inch inside the property line—just in case. Once I know the first post’s location I excavate and set the post using quick-setting concrete.
Corner or End Posts. The next post I lay out and set is an end-post that is in-line with my control post. This post can end up being a corner post. Clement Carpentry Trick: If this is a contracting job I set a control post the evening before the job starts in earnest, or do it while someone else unloads the truck or breaks down the lumber package—nobody’s idle while the concrete dries.
Layout Stakes. Alternatively, I sometimes mark the site using stakes and string. This works great on long, straight fences where I can overshoot the fence’s actual location with my layout string. The best stake I’ve used is threaded 2-foot by 1-inch gas pipe.
I use a knot called a Trucker’s Hitch (that delivers a 3-to-1 mechanical advantage) to suck all the sag out of the string. I also use trucker’s hitches as come-alongs.

Shown here is a U-jig in action, used for consistent spacing of the posts.
Jig It. For fences where panels are fastened between posts, I sometimes use my site-fabbed U-Jig—basically an 8 foot 2-by-4 with 2-by-4 blocks screwed on each end. I butt or screw it to the control post then, once fixed, it marks the next hole location—no measuring required. To dig, I remove it and set the post. Sometimes it makes sense to screw several U-Jigs between posts as I go. This helps keep everything running straight and minimizes mistakes before pouring concrete.
Posts and Slats Wild. I almost always install posts and slats wild, or too tall, and then trim them all at the end of the installation to final size.

I used the Toro Dingo with auger attachment for this fence and it worked great for drilling holes–even in zero clearance applications.
How I Do It. Some crews excavate and pre-set all their posts at once, then go back to the rails and slats. For fences that don’t end evenly in an 8-foot matrix, this can end badly because the last panel ends up 2 feet wide (or whatever), which looks really out of place. Full or close-to-full panels are what you’re after. Furthermore, I like my concrete to be in the hole drying while I advance down the line. So, I set 3 to 5 posts, and then pour. When I come back in the morning, concrete has set up all night.
And, measuring four posts ahead lets me see if I need to recalculate the panel width to fit the space (knocking them down to 6-1/2 or 7—or up to 9 feet—works to trick the eye). This creates the illusion of full panels, without having to make very detailed measurements.
Cedar Fence: Stain & Posts
This Western Red Cedar privacy screen is gorgeous: Rough-sawn 10-foot 4-by-4 and 8-foot 2-by-4 make up the rails, caps and posts, while dual-textured tongue-and-groove siding—smooth-side in, rough-side out—make up the slats.
Step 1: Stain & Posts. Cedar has more than proven itself as a durable material. Nevertheless, The Western Red Cedar Lumber Association’s recommended best practice is to apply two coats of oil-based stain to extend the material’s service life in ground-contact applications. That was no problem on this fence because it was planned to be stained anyway. I double soak the end grain of the boards for extra protection.
Spreading out the material so you can get to it with a paintbrush requires maximum workspace (and you want to brush it; no rolling). Sawhorses and stickers work, but the JawHorse worktables that I make work better—just clamp a 2-by-4 on edge in the jaw of each one for a massive but stable work surface. I hasten to add that while I like to pre-stain as much as possible all at once, this much material had to be stained in stages—posts, then rails, then slats.

Western Red Cedar lasts longer if water can move around the bottom of the post, so before pouring concrete I drop about 4 inches of gravel into the hole and tamp it down with the blunt end of a digging bar.
Post Layout. For rails to fit between posts, the holes must be augered dead-on according to the layout. Enter the U-Jigs. Before setting posts, I poured 4 inches of gravel (cheaper in bulk than bags) to facilitate water movement around the post bottom, and then set the posts plumb along my string line.
Post Detailing. Even though this was a zero-clearance installation, I could bore my footing holes using Toro’s sub-compact loader—what a time saver. And, before setting the posts I poured gravel into each hole to facilitate water movement around the bottom of the post, extending the posts’ in-ground service life.
Fence Rails
For this fence, I trimmed the rails on the miter saw then pre-stained the ends.
Laying Out a Graded Site. This grade pitches down. To get a stepped effect I treated the posts as pairs, using the uphill post as the control point for positioning the bottom rail—8 inches from grade to the rail bottom.

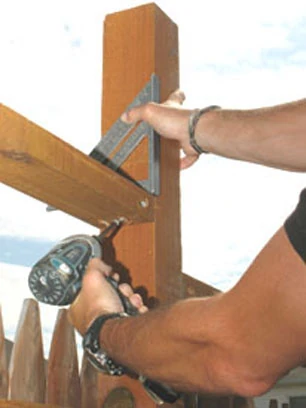
I set my combination square to mark rail layout–again, it’s more accurate than measuring every time.
Marking Posts. I set my combination square to uniformly mark all rail locations 2-1/2 inches in from the exterior post face, without measuring each one. Next, I mark the next four posts. This shows how the rails are stepping up, and I can ensure they look right and minimize compounding errors if something goes wrong.

Pre-drilling pocket holes with my countersink and pre-setting screws makes installing the rails on layout faster and easier. I like screwing rather than nailing in this case because screws sock the materials up tight with one another.
Installation. Pocket holes and pre-set screws in the rail ends are the key to a quick and solid installation.

Even though I use guide blocks for locating the top rail, I double check periodically with a level.
Top Rails. Clement Carpentry Trick: Run cleats from the bottom rail (48 inches here) to the top rail location and install without measuring. I also double-check level periodically as a failsafe.

Clement Carpentry Trick: Once you have the bottom rail set level, use cleats (aka guide blocks) for the rest of your layout. They’re faster and more accurate than measuring
Cap. Repeat the cleat trick, this time with an 8-1/2 inch cleat for the top cap. Always remember to square-check the installation for tighter tolerances.

The T&G siding came in 16′ lengths and needed to be trimmed to size. Instead of measuring each one, I jigged up my miter saw cut-station and cut them–accurately–at production speed. What a time saver.
Fence Boards
To size and square the siding/slats I jigged out my miter saw, gang-cut them, and then pre-stained the end grains.

For calculating materials, each panel takes 18 full slats and one ripper. Rip cuts are much easier and faster on a table saw.
With nineteen full boards and one ripper filling an 8-foot panel, it helps to have a table saw on site to save time and improve quality on the rip cut.

In zero-clearance applications like this one, articulate the slat behind your rails and cap, pull it tight to the rail, then fasten with screws.
Once I managed the tilt-and-lift scenario of getting the slats between the rails and existing fence, I touched each slat to the bottom of the top cap—gently—then pulled it to the rails. To seat the groove over the tongue, the boards might require a little persuasion. Again, just an easy tap is all it takes. Next, I fastened from the inside with 2-1/2 inch ceramic-coated screws.

Install posts high or “wild” and trim to final height after the fence is installed.

The Western Red Cedar siding slats are straight but may need a little nudging to lock to their mate. Tap; don’t smash, for best results.
The last step is to dial in the posts. To achieve a uniform step, I measure final post height—4 inches above the high-side post cap—and cut. Finish up by staining the end-grain for matching color and extra weather protection in the years ahead.
