

Imagination and a few specialty paints can turn drab, aged or even unfinished new furniture into fun and exciting décor. This includes both inside and outside furniture. A wide range of paints are available in both brush-on and spray for creating your own fantastic furniture finishes.
Crackle
One of the most dramatic furniture finishes is a “crackle.” A crackle finish is great for revitalizing old, drab furniture pieces, but works equally well for accent pieces. A crackle finish can be applied with a spray-on or hand painted technique. Spray-on finishes are best for smaller accent pieces.
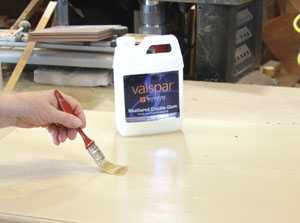
The crackle finishes manufactured by Valspar, both spray-on and paint-on, are available in two styles, Weathered Crackle and Porcelain Crackle. Weathered Crackle has large cracks or splits in the top finish; Porcelain Crackle has smaller checks, more resembling aged porcelain. Both are available in a wide range of both base and top-coat colors. Check your local Lowe’s store for what’s available.
Spray-on crackle finishes consist of two cans, base and top coat. Brush-on finishes consist of a base coat, Crackle Glaze and a top coat. Any latex paint can be used as both base and top coat. The effects can be dramatic. Experiment on a scrap of wood before tackling your furniture or accessory project to make sure you understand the crackle finish and the colors.
In both instances, make sure the surface is clean of all grit, oil and loose particles. For spray-on crackle, spray the base coat at room temperature, making sure the coating is applied evenly and that the surface is covered well. If the object to be covered has a previous paint coat, test spray in an inconspicuous area to make sure the paints are compatible. In most instances you should apply at least two coats of base to make sure the object is well covered. Allow the base coat to dry thoroughly, and then spray on the crackle top coat.
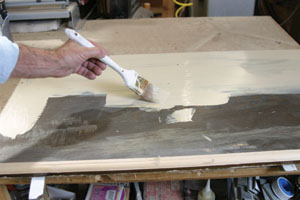
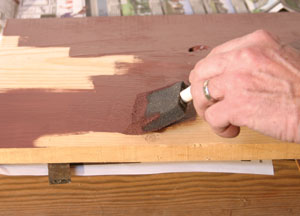
The glaze technique using brush-on or roll-on latex paint requires applying a smooth base coat of the desired color with a roller or brush, making sure the coating is smooth and evenly applied. Again, you may wish to apply more than one coat to ensure thorough coverage. Allow the last coat to dry overnight. For a Porcelain Crackle, apply an even coat to the surface using a foam brush in an X pattern, overlapping the brush strokes to cover the surface. Reload the foam brush and even out the glaze by running the brush over the surface. Add more glaze as needed and make a final smoothing with the grain of the wood. Allow the crackle glaze to dry at least 24 hours, and then apply Valspar Antiquing Glaze or Translucent Color Glaze to the surface with a dry rag or brush. Remove excess glaze before it dries and then apply a coat of Valspar Clear Protector.
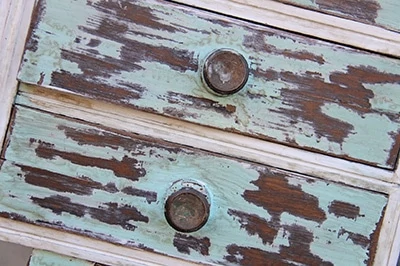
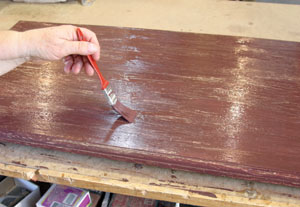
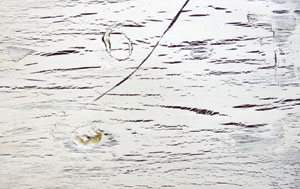
Weathered Crackle is applied in somewhat the same manner, first applying the base coat and allowing to dry overnight. Then apply the Weathered Crackle Glaze to the surface using a quality nylon brush or short-nap (1/4-inch) roller. For a more pronounced crackle, use the brush. For a more delicate appearance, use the roller. The more Crackle Glaze applied, the more pronounced the separations. Make sure the coat is applied evenly, but do not overwork. Allow the glaze coating to dry 2 to 4 hours. Then, using a roller or brush, apply a top coat of interior flat paint. The paint must be flat sheen paint. Any other sheen will not produce an effective crackle finish. Do not overwork the top coat, as this can cause the paint to ball up. Within minutes the top coat will begin to separate into crackles, allowing the base coat to show through. Allow to dry overnight. To create an even more weathered look, rub Antiquing Glaze or Burnt Umber over the Weathered Crackle Finish. Allow to dry at least 72 hours, and then apply a coat of Valspar Clear Protector. Create an even more distressed appearance by rubbing or sanding off the edges or down through the top coat to the under coat.
Create a Rubbed Finish
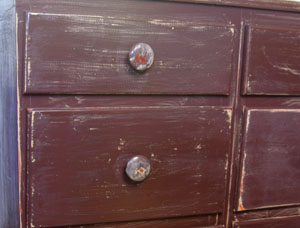
The popular “rubbed” finish is actually not rubbed but sanded. This technique is especially effective on furniture. The simplest technique is to apply several coats of a quality latex paint to the object, allow them to dry and then use fine sandpaper to lightly sand the corners and edges. As you can guess, this technique works best with furniture designs with lots of edges, such as frame and panel.

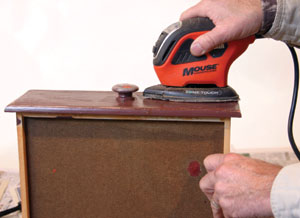
An alternative method is to apply a base coat of one color, allow it to dry and then apply several top coats of another color. Sand down through the top coat to the base coat in selected areas. This technique is great for matching a furniture piece to room décor, using either the base or top coat as the match and the other coat as a complementary color.
“Antique” Finish
The “antiqued” finish has been extremely popular for some time. This finish consists of applying a base coat, then following with an antiquing glaze. The products are often sold in kit form containing the undercoat and glaze. You can also create your own antiquing glaze by adding burnt umber oil colors to polyurethane varnish and use any choice of color for the undercoat. In either instance, experiment on scrap wood before attempting your furniture project. After the base coat has dried, the glaze is applied with a foam brush, and the excess glaze wiped off with a clean rag. Always apply glaze and smooth out with the direction of the wood grain. Again, furniture projects with pronounced edges and moldings produce the best effect.
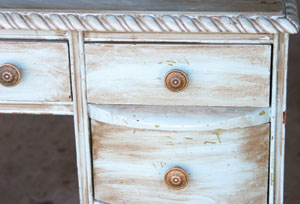
Limed Oak
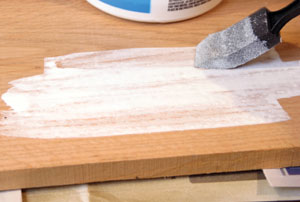
A very popular and simple furniture finish is limed oak. Actually, this has become increasingly popular as a cabinet finish as well as for house trim, not only on oak but with other woods as well. The process is actually quite simple. Dilute a satin-sheen white latex paint about half with water and apply in a smooth, even coat to the cleaned wood surface using a foam brush.
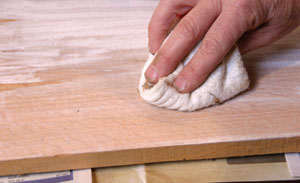
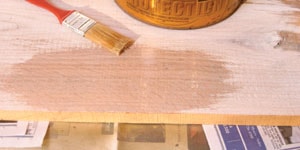
Allow the latex to sit for a few minutes, then remove the excess with a clean rag, wiping in the direction of the wood grain, but leaving plenty of color in the wood grain. Allow to dry thoroughly, and then apply a top coat of polyurethane or Valspar Clear Protector.
Spray Paints
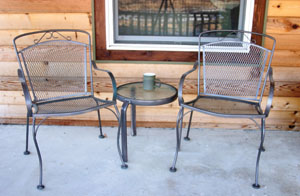
If you haven’t walked down the spray-paint aisle in a big-box store for some time, you may be surprised, not only at the vast array of colors, but also the number of specialty paints as well. Some of the most interesting are the metallic colors. Gold, silver, brass, bronze, copper, pewter—you name it. The most striking are the “hammered” metallics, but other finishes also simulate “suede” and stone as well as other textures. Several of these specialty metal-style paints can be used for a quick and easy rejuvenation of metal outdoor lawn furniture and accessories.
It’s important to choose a long-lasting spray paint designed for outdoor use on metal, such as Rust-Oleum. Although this can actually be applied directly over rust, it’s important to first loosen scale and remove loose paint and rust flakes with a wire brush and/or sandpaper. Then clean the surface with soap and water to remove grease and oils, and allow the surface to dry thoroughly. The use of a primer, such as Stops Rust Primer from Rust-Oleum can also help the paint adhere and provide a longer lasting finish.
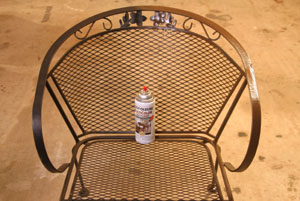
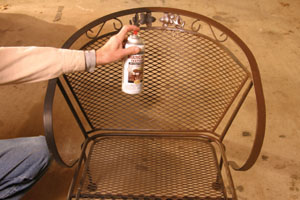
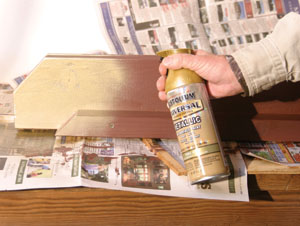
Spray paints should only be used outdoors or in a well-ventilated area, such as an open garage. Do not apply in windy conditions. For the best drying, apply in temperatures between 50 and 90 degrees and with humidity less than 85 percent. Shake the can thoroughly then apply the paint in smooth even strokes approximately 12 inches from the surface, overlapping the strokes and keeping the spray nozzle the same distance from the surface at all times. It’s best to apply in several medium coats, rather than one heavy coat to lessen the chances of runs and drips. In good conditions the paint should dry in 15 minutes, to the touch in 90 minutes, and should cure thoroughly within 48 hours.
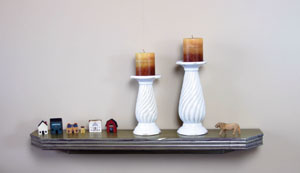
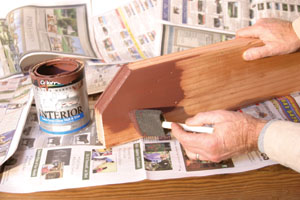
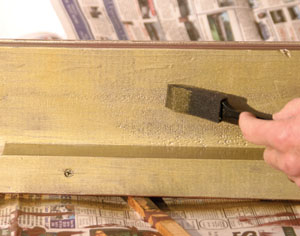
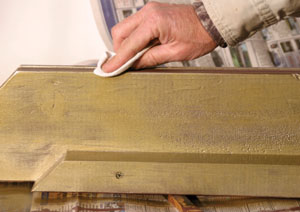
Today’s spray paints can create unusual decor. The shelf shown is a 2×6, California Redwood scrap from a building project with a distressed gold finish. First step is to cut the shelf and rout the edges. Then cut a bottom support strip and fasten it to the underside of the shelf.
Faux Finishes
A number of other Valspar brand “Faux” paint finishes, designed primarily for covering walls can also be used to create unusual finishes on furniture. These included Textured Stone, Rag Rolling, Linen Weave, Color Washing, Sponging, Leather and Metals and Patinas.
In most instances the entire furniture piece is not treated, only the top, panels of doors and other selected areas. In all instances these consist of first applying a base coat, then applying a top coat using a variety of tools to create the design desired. For more information on faux finish products and techniques, visit www.extremehowto.com.
Magnetic Paintbrush Holder
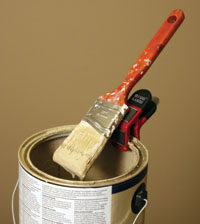
Simple in design but handy during a painting job, the Magnetic Paintbrush Holder from Bigg Lugg, Inc., does just what it sounds like. The EHT staff put the gadget to use on some recent paint projects, and it conveniently clips to the rim of a paint can so the metal ferrule of the brush can adhere to the magnets, vertically or horizontally. This helps prevent the bad habit of laying a wet brush “just any old place,” where it usually collects dirt or debris and/or leaves a drippy mess. The downward angle of the brush also allows paint to flow from the bristles back into the can, making brush cleanup much easier. Plus, the clip includes a metal tab for opening paint cans.
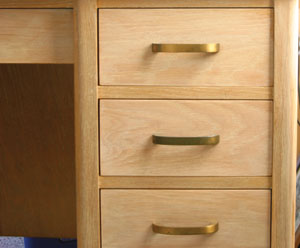
Handsome Hardware
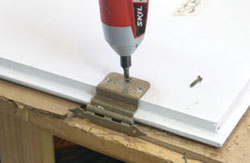
Furniture is not the only household items that can be revamped with a new paint finish. If you’ve priced today’s cabinet and furniture hardware, then you know they’re quite expensive. Old hardware can often be redone with a new spray-on finish. We recently repainted some kitchen cabinet hardware and saved a ton of money. You can create an “antiqued” type of hardware finish by first spraying with a metallic paint, then rubbing “gilt” paste across the top surfaces. We have refurbished old light fixtures, furnace floor registers and a number of other items with a new sprayed finish. Appliances can also be spray painted. The first step is to thoroughly clean the item with mineral spirits and allow it to dry completely. Position the item so it can be sprayed from all sides, and then apply the spray paint according to the manufacturer’s instructions.
