

I was testing some Dick Cepek mud tires on my F-250 last year so I took off the OEM chrome tube side steps for the photos. I really like the look of the truck without the steps, but other members of the family missed their functionality. I had to keep a short step ladder in the bed for when my mom needed a ride.
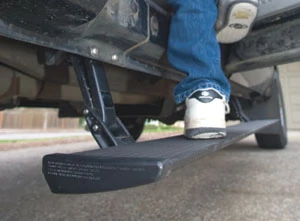
Enter AMP Research with a brilliant solution: the Power Step. Available through AMP Research (www.amp-research.com), the Power Step is a very well engineered system that uses heavy-duty motors to deploy the steps in less than a second when any door opens. The steps completely retract under the vehicle as soon as the door is closed.
“I kept hearing people complain about their running boards being awkward to use,” says inventor/designer Horst Leitner, “so we did some ergonomic research and studied people of various heights, weights and ages to come up with the perfect height and extension for a running board.” He adds, “The research said that most truck and SUV step boards are mounted too high and too close to the vehicle to provide a natural step.”
The key is the fact that the steps retract. They couldn’t be positioned as low or as far away from the vehicle if they didn’t tuck away while the truck is in operation. Now, I have the look I want on my truck (clean and lean), and everyone has a comfortable step for climbing aboard.
The components fit very well to the stock mounting points, the wiring harness was the right size for the crew cab, and the kit included some nice details such as butt connectors, cable ties and connecting wires.
The operation of the steps is just cool. When you open any door, the step on that side deploys very quickly so you don’t miss a step getting in. When the doors are closed and the steps are up you cannot see them, unless you happen to be two feet tall.
The Power Step costs about $1,200, and you can save yourself a couple of hundred dollars by installing it yourself. When ordering the kit, be sure to pursue any information available on AMP’s website about your specific truck model. You can download the installation guide and scroll down until you get to the wiring guide. Find the page that is specific to your truck and look for any additional kits required. In our case we needed some single diodes.

Here’s how we got the install done on a 2001 Ford F-250 Super Duty Crew Cab using a basic tool kit in our home garage:
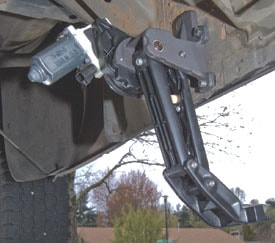
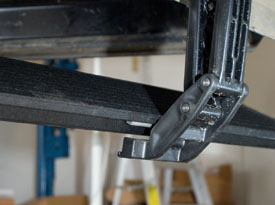
We started by attaching the motors to the rear linkage assemblies. A gear cover/gasket is sandwiched between the motor and linkage and held together with three hex-head bolts.
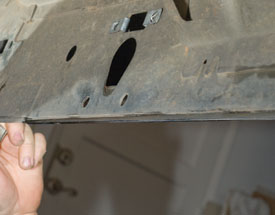
We located the second set of holes from the front in the inside wall of the body exterior on the passenger side of the truck. Get your head under the frame rail and look up and toward the outside of the vehicle.
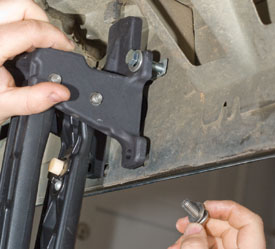
We removed the U-nuts from the old side steps and used the supplied U-nuts to start the hex bolts in the top holes. With the hex bolts in place, we positioned the slotted openings in the idler linkage and aligned the bottom holes with the holes in the truck body.
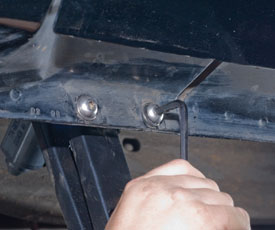
We used the button-head bolts and stainless steel washers through the outside of the pinch weld and into the threaded holes of the assembly.

With the idler (motor-less front) assembly in place, we folded it back to make sure it cleared the Banks TransCommand, which is mounted near the outside of the frame rail.
We repeated the process for the rear assembly in the set of holes closest to the rear tire and moved across to the driver’s side.

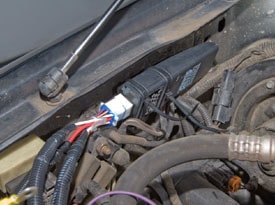
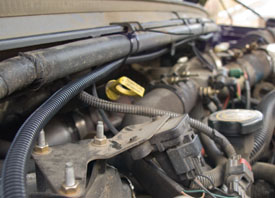
We used the supplied zip ties to attach the control box inside the engine bay, and then we connected the harness to the controller.

We opened the inline fuse holder and removed the fuse.
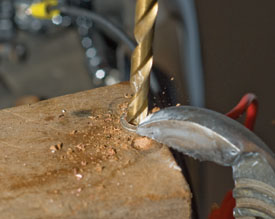
We found that the openings in the terminal ends weren’t large enough so we drilled them out. A large pair of Channellocks work well to clamp the end to a block of wood for safe drilling.
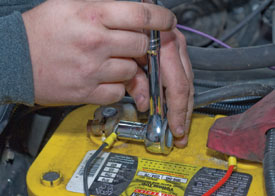
We connected the ends to the clamp bolts on the battery terminals.
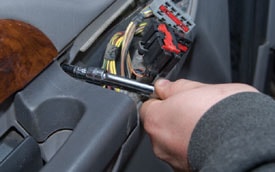
We threaded the short leg of the harness out of the engine bay between the firewall and the fender well on the passenger side, and threaded the long leg across the top of the firewall and then between the firewall and the fender well on the driver side.

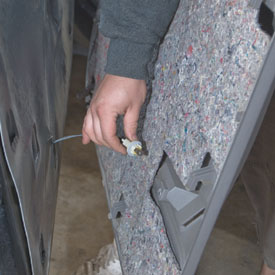
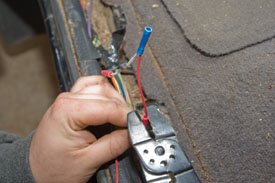
We removed the step plate inside each door and rolled back the carpet.
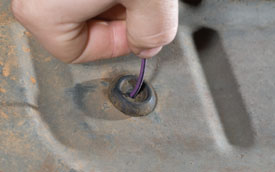
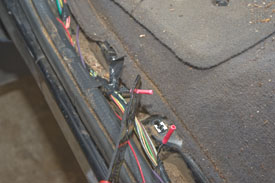
We punctured the floor grommet and pulled the purple trigger wire from each side of the harness up through the floor on each side of the truck.
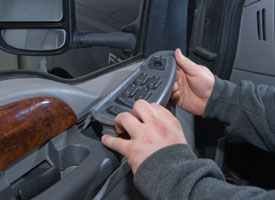

We popped out and unplugged the door lock controls.
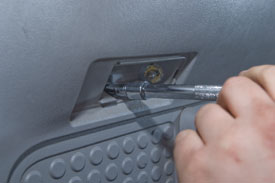
We popped out the door light lense and removed the door panel mounting bolts.
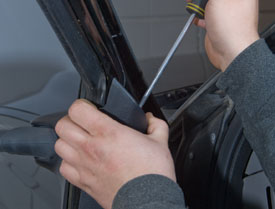
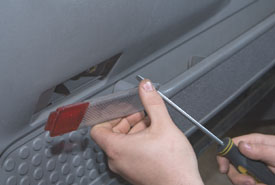
The door trim panel near the A-pillar comes off with a standard screwdriver.

We removed the door panel by lifting up and over the lock pin, which pulls out the tabs on the bottom.
Be careful to fish the light fixture out of the back before setting the door panel aside.
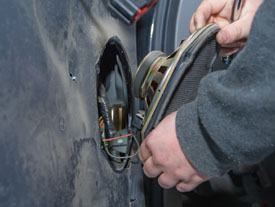
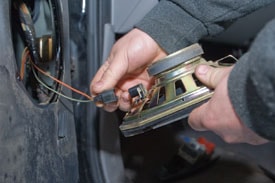
We detached the speaker and tipped it out of its door mounting hole.
Be sure to unplug the speaker before setting it aside.

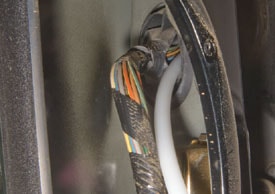
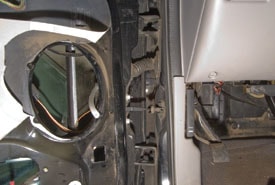
AMP supplied a tube, which we fed through the speaker opening, past the grommet and through the wire chase into the cab.

With the tube in place, a wire can be threaded through it.
We located the rear door-ajar wire under the sill plate and cut it.
We attached butt connectors to each side of the now-cut door-ajar wire.
We installed a single diode harness in between the two halves of the door-ajar wire.

We attached the purple trigger wire, which goes through the floor and into to the main Power Step wiring harness, to the double diode harness. One leg of the double diode gets connected to the red wire running into the door and the other leg goes to the single diode, which is now connected to the rear door-ajar wire.

We tapped into the front door-ajar wire inside the door panel.
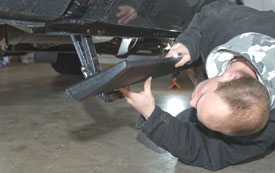
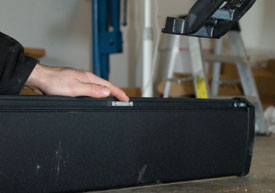
We located the sliding T-nuts and lined them up with the corresponding grooves in both arms.
We fastened the steps to the arms using the supplied hex head screws.
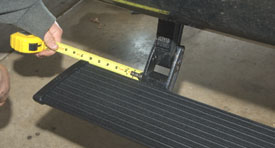
Lastly, we used a measuring tape to match the position of the steps on the arms for both sides of the truck.
