John Meadows, owner of a 1996 Chevy Z71, travels several hundred miles to a farm he manages on the weekends and he often trailers two horses. He is also in the middle of a home renovation where he is replacing all the windows and doors. “It seems like I’m towing or hauling something heavy every weekend,” says Meadows. “Towing a fully loaded horse trailer or hauling a bed full of windows really puts a strain on the truck, and passing is dangerous … Actually, I can’t pass.”
Meadows’ problem is not unique. The performance of his truck shrinks with the increased payload. And with the cost of a new truck hovering around $35,000, he wanted another alternative to solve his problem.
To improve the truck’s performance we decided to do a two-stage horsepower upgrade: first, the electrical and ignition system; second, the air intake and exhaust. And you can do the same. Either of these upgrades will improve the operation of your truck 3 to 6 percent on average. But used together in the “bundling concept,” you’ll get a 50-state legal package with closer to a 15- to 20-percent horsepower increase that delivers what we all crave — more speed and torque.
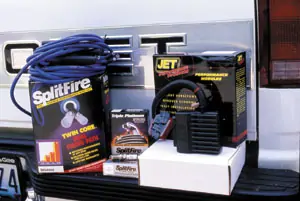
The electrical upgrades included a new computer chip, new wires and plugs.
Chipping Up
To improve the ignition system we contacted JET Technologies of Huntington Beach, California. They recommended a Stage II computer chip upgrade.
The upgraded computer chip accomplished several things. It widened the shift points by at least 200 rpm’s and increased line pressure to the transmission for firmer shifts. The chip also monitors and changes other fine adjustments like spark, temperature, air intake and air exhaust. All of these changes can result in increased performance of 15 to 20 additional horses. It costs around $240. That’s as cheap as a dealer tune-up.
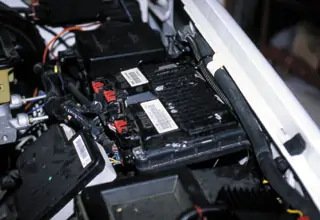
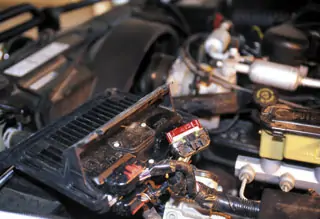
We found the installation to be pretty simple. The computer on this Z71 was on the driver’s side fender well, inside the engine compartment. First, disconnect the negative battery terminal. To find the correct connection, we had to remove the computer carefully and turn it upside-down to reach the red connecting input.
For this project we removed the computer from its original location inside the driver-side fender well.
Then we turned it upside-down to find the correct connection.
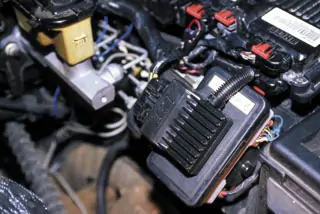
You then disconnect the wire harness, plug the new JET chip in its place and take the existing harness and insert it into the new JET chip. You will also have to find the power wire to activate the chip. The wire in our case was all pink (with no black line) and we connected it to the black harness. A 3M connector is supplied and makes the job a snap. The total installation took 40 minutes.
In forty minutes the chip was installed and the computer was mounted back into position.
Although this is an easy installation, read the directions very carefully and handle the wire harnesses gingerly. Weekday tech support is readily available, but they are not available on weekends. If you have a question, it will only be answered by tech support during business hours.
Also, keep in mind that Ford chips are in a different place than Dodge chips, and so forth. The same goes for the location of power wires (if one is required). Again, read the instructions fully before you start.
Wires and Plugs
Wires and plugs are often ignored with many power upgrades. If you do not include a set of high-performance plugs and wires, you will really be selling your truck short of the maximum power your new chip is capable of delivering.
We selected SplitFire Platinum Plugs and Twin Core Wires. Changing the wires and plugs took less than an hour and we found the fit and lengths of the wires to match well.
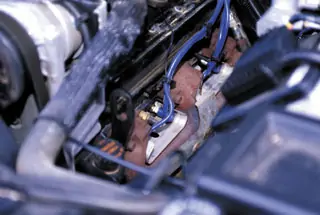
This upgrade featured new high-performance plugs and wires to boost the juice in the electrical system.
The Platinum Plugs are guaranteed for 100,000 miles. I recommend that you give them an inspection around 50,000 miles. The wires are a very important upgrade in this package. Your ignition system is only as good as the conductors that make it work. The twin core wires will ensure every ounce of performance that your coil can produce will get to your distributor and plugs.
A Breath of Fresh Air
The other quick horsepower fix is letting more air in, and getting more air out. On top we put in a K&N air-intake system that had great instructions and was surprisingly simple to install, taking about an hour to complete. Once you’ve mounted the new air intake, make sure there are no leaks and all the fittings are tight. We estimated that the intake system alone would improve the truck’s horsepower by about 7 percent.
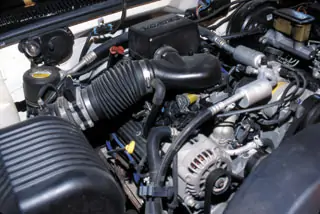
This old air-intake system was replaced.
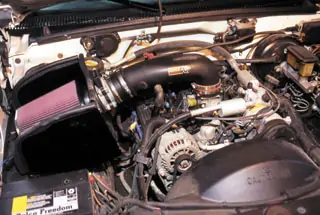
This new K&N air-intake system was surprisingly simple to install.
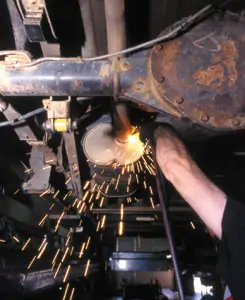
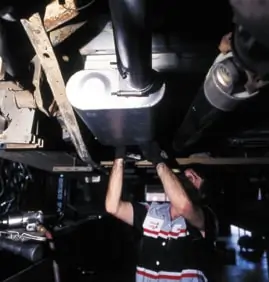
To properly change the muffler you need to have access and the skill to weld it in place. If you have a welding unit at home, you’re in good shape and you will find the instructions very straightforward. However, if a torch and brazing skills haven’t found their way into your garage, it’s better to let a pro install the exhaust.
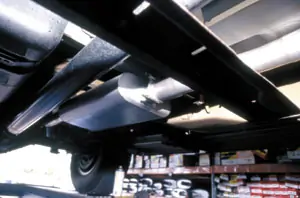
The old muffler (above) was replaced with the new model (below). You’ll need a welding unit, under-car access and brazing skills to install the new muffler.
We installed Flowmaster’s American Thunder #17225 with a single tailpipe exhaust. It comes ready to mount with all the hardware and pre-fitted pipes. Although the dual-pipe exhausts by Flowmaster are very popular, I’ve found that they don’t do well off-road or in landscaping situations and often get bent because they extend beyond the bumper.
The new exhaust increased airflow out of the engine and delivered a 4-percent increase in horsepower compared to the truck’s stock system. Although an exhaust change is more expensive than some of the other upgrades, it’s the final improvement that made this bundling concept so efficient.
The Performance
Ah … the fun part. The truck was in need of a tune-up when we started, so the upgrade seemed even more dramatic. After an afternoon’s worth of work, Meadows’ truck felt better than new. It is quicker off the line and notably faster on the highway. In fact we drove it over 93 mph, turning only 2,500 rpms in overdrive. The truck was turning 3,200 at the same speed before the upgrade. In this case the upgrade added to the fuel economy by 1.5 miles to the gallon when driving on the highway at an average speed of 75 miles per hour. Another bonus was that the operating temperature of the transmission dropped by 20 degrees while towing.
The only disadvantage is that the truck is now louder. The exhaust has a lower note, and when the truck downshifts you can really hear the air intake. “The only time I notice it is on the highway,” says Meadows, “but I have to tell you it has surpassed my greatest expectations. When the truck’s empty it’s downright fast, and when loaded I have the confidence to pass on a two-lane highway.”
With the new system upgrades, the truck was quicker off the line, faster on the highway and exhibited better fuel economy.
Do Your Homework
If you have a late-model truck, get on the Internet and do some homework. I have upgraded almost a dozen different vehicles in the last three years and have found the results to be well worth the work and extra cash. However, some of the late-model trucks I’ve upgraded, such as the ‘02 and newer models, haven’t shown the performance improvements like trucks from the nineties. Many manufacturers are squeezing more horses out of their engines by doing just what aftermarket products have been providing for years. Check with your mechanic or someone that has upgraded their truck and see specifically what worked for them. Or search the Internet by “year model upgrades.”
THE COST
Plugs $40.00
Wires $60.00
Chip $240.00
K&N Air Intake $415.00
Muffler $336.00
Muffler installation charge $50.00
For more information, contact:
Jet Technologies, 714-848-5515, www.jetchip.com
K&N Filters, 800-760-5319, www.knfilters.com
Flowmaster, 800-544-4761, www.flowmastermufflers.com


