

An Alarming Development
Most of us work hard for the things we own, including our tools. Even if you don’t use your tools to make a living, they can represent a serious investment. Unfortunately tools are a favorite target of thieves, many of whom are much more practiced at stealing than we are at securing our belongings.
Tool thieves don’t care if the hand tools in your box have been in the family for four generations, or that you were planning to hand your quality tools down to your kids. Just ask my brother, a finish carpenter by trade, how devastating it can be to have a whole vehicle full of tools stolen.
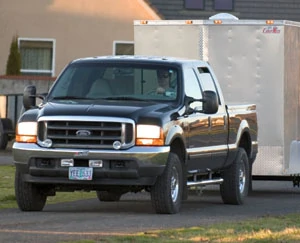
That’s why when I started looking for an alarm system for my truck I wanted to make sure I had something that would also protect my tools. Usually there’s not much inside the cab of my truck, but look under the tonneau cover or in the tool trailer and that’s a whole other ball game.
So an alarm system to protect my truck also needed to secure the tools and whatever else I might be hauling in the bed or trailer. That’s why I ordered SPAL’s AS 80 system, which features wireless remote switches. The remote sensors make it possible for this system to be triggered when either the tonneau cover or trailer doors are opened. In addition, it has a motion sensor so activity on the outside of the vehicle can be detected before any of the doors are opened.
When we wanted to get an “up close” view of how to install an alarm system on the F-250 Super Duty, we enlisted the help of Jon Pankratz of Dan Judy Automotive in Salem, Oregon. Not only does Jon know what he’s doing, he also puts up with most of our questions and interruptions for photography.
Right: Say hello to your new home! Most of the work on this project will be done under the steering wheel. Removing the access panel below the steering wheel on the Ford Super Duty makes it a little easier to see what you’re doing.
Brain Transplant
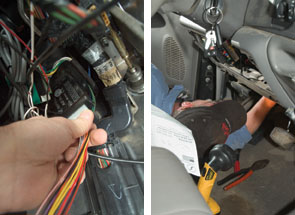
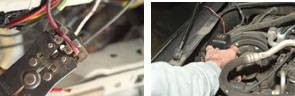
The core of this project is installing the main module, the brain of the system, which sends and receives signals from your truck’s electrical system, the remote control on the key chain and the wireless remote switches installed on your tonneau cover, canopy, trailer or boat.
The module is a small black box, which comes with its own wiring harness. On one side of the box are connector ports for plug-and-play components that come with the system such as the indicator light, antenna and siren. The other side of the main module has an 18-pin connector for the wiring harness, which connects to the wiring system on the vehicle.

Right: A large zip tie makes a great snake to feed down through the dash. You can tape the indicator wire to this to feed it through.
The driver’s side area between the dash and the firewall is a good location for the main module. There’s room for the module, access through the firewall is handy, several of the wires needed for the install can be found there, and you are usually within reach of one of the cup holders.
Right: Mount the indicator light to the trim piece before feeding the wire through the dash with a fish tape.
Warning Light
We tackled the system’s LED early in the install because it can be helpful in testing how the install is progressing. Because a primary function is to warn would-be thieves that the truck is protected by alarm, the indicator light should be visible from outside the vehicle from most angles. This is why we chose the middle of the top of the dash for the red blinking light.
The F-250 has a trim piece designed to cover a dash mounting bolt, which can be popped out to provide easy through-the-dash routing and a mounting point for the light. You can use a screw driver to pop off this trim piece for drilling a mounting hole and to feed the indicator light wire through the dash.
Right: Our research indicated that this red and light blue wire is the starter wire, which needed to be cut to install a relay for the starter interrupt.
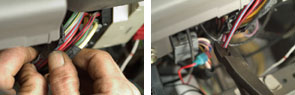
Jon used a fish tape to find a route through the dash and to pull the wire through that path. A large zip tie makes a good fish tape for feeding wires through tight places. You can tape the plug-in connector end to the fish tape and pull it through to the throttle pedal area. From there, follow the under-dash wiring harness to your module location.
Getting Connected
Because this system is intended for general purpose, in the sense that it wasn’t designed specifically for your vehicle, the biggest challenge is connecting the module wiring harness to the correct vehicle wires so they can talk to each other. The basic wiring involves; 1) running a wire from the module to a component; 2) tying into a wire that also maintains its original connection; 3) or interrupting an existing wire to install a relay, which can act as a switch or to reverse polarity so the system fits your truck.
Right: Find a place in the engine bay to mount the siren.
For example, the alarm system may want to know if the doors are unlocked by reading a signal from the dome light wires. However, your vehicle’s dome light may not be energized when the doors are unlocked but when a door is opened. In addition the door pin, which tells the dome light when the door is open, may be completing a hot connection or it may be providing a ground.
The SPAL system also provides different options to make connections and to customize the system to your preferences. For example, there are several ways to disable the vehicle so it cannot be driven if the alarm goes off. Methods include a starter interrupt, an injector interrupt or fuel pump interrupt. If you choose the starter interrupt method, for example, the starter wire is cut and a relay is installed to connect both sides of the starter wire. When the relay is energized by the alarm system, it interrupts the connection between the two halves of the starter wire, rendering it inoperable.
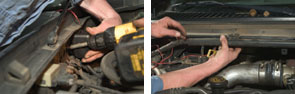
Right: Route the siren wire across the engine bay by following the wiring harness.
Sound Off
Find a good location under the hood to mount the siren. Make sure the opening faces down to keep it from filling with water. We mounted ours just under the hood on the passenger side and found there was plenty of wire to reach the module through the clutch grommet on our automatic Super Duty. You can attach the siren to the inner wall of the engine bay with sheet metal screws.
Route the siren-to-module and the siren power wires along the wiring harness at the back of the engine bay. Keep the wires tucked up behind the wiring harness and hold them in place with small zip ties.

Power Supply
We attached a clamp-on loop to the end of 10-gauge wire with an in-line fuse to supply power to both the siren and the main alarm module. A Y-connection on the downhill side of the fuse allows one battery connection and fuse to serve both the siren and the module.
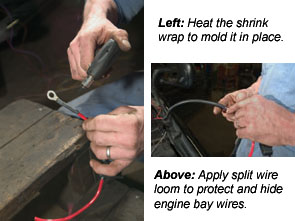
Any under-hood connections should be soldered and covered with shrink wrap. Remember to slide the shrink wrap on before you make any splices or add any connectors. In addition, any wires in the engine bay should be protected with split wire loom, which also helps to camouflage after-market add-ons from curious eyes.
Remote Locations
After the AS 80 has been installed and programmed, it’s an easy process to add up to 10 wireless sensor switches, which are sold separately. You can install the sensor switch and then program it to the truck’s central alarm system, but we recommend that you leave the switch components loose and program them first so you can test the exact locations before installing. Because this is a radio frequency device, metal frames and trailer contents may cause interference, which you may need to overcome by adding an extended range antenna.
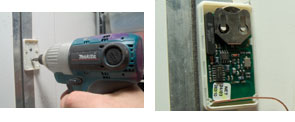
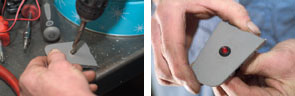
Right: Place the circuit board of the wireless sensor switch inside the case and snap on the lid.
You can use the remote sensor switches in any location where the two halves can be mounted and separation will cause them to activate the alarm. You can choose a black or white box for each component to help camouflage them. We secured the circuit board box inside on the trailer wall and put the magnet mount on the door to keep the electronic components out of the weather.
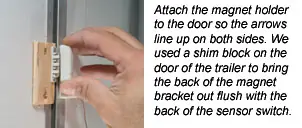
For our tonneau cover alarm, we attached the circuit board box to the side of the pickup bed and used adhesive to attach the magnet to the under side of the tonneau cover.
