

In automobiles, most plastic parts have finite lives. The distributor cap is a prime example of a component that eventually succumbs to heat and vibration. But even if its plastic housing hasn’t broken or cracked, carbon deposits and eroded metal terminals can cause distributor-cap failure.
Inspection
Consult your vehicle’s owner’s manual for recommended distributor-cap replacement intervals. In the interim, the engine might provide clues about a dying distributor. These include hard starting in cold weather, a “miss” throughout the powerband, stalling, backfiring, and pinging or knocking.
Visual inspection often verifies a distributor problem. Externally, look for cracks and breaks on the cap and terminal towers, as well as for gray carbon tracks. With the cap removed, look inside for carbon tracks and deposits as well as worn terminals and other signs of corrosion.
Replacement
Often, clearing a path to the distributor is the most time-consuming part of the job. The cap can be obscured by other components or even recessed under the cowl, trapped against the firewall. (A service manual will mention the specifics for your vehicle.)
If the ignition coil is mounted away from the distributor, cap replacement is straightforward: Release the old cap, transfer the plug wires one at a time to the new cap, then secure the new cap to the distributor. Caps that also house the ignition coil require a few extra steps. This style of distributor-cap replacement is shown in the accompanying images and captions.
The shocking truth is that average hands-on motorists can save money and probably even time by changing their distributor caps themselves. Their engines will run smoother and enjoy improved fuel economy as a result.
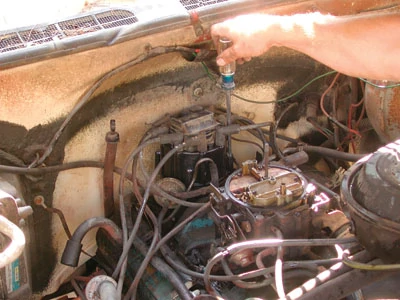
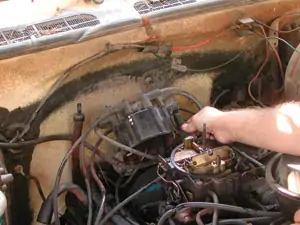
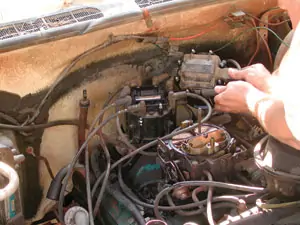
Step 1 – First, locate the distributor cap. Removing the air cleaner cleared a path on this older Chevy truck. Loosen the cap by freeing its mounting screws, hooks or clamps. This cap is held by four spring-loaded latches that release with half-turns.
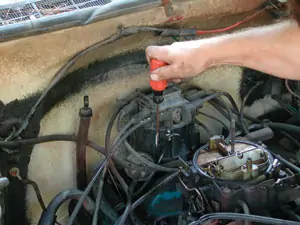
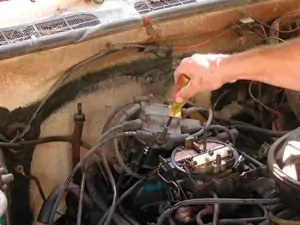
Step 2 – This cap requires a new carbon brush and spring to be inserted in the center. They’re included with the new cap. For ignition systems that have remote-mounted coils, skip to Step 8.
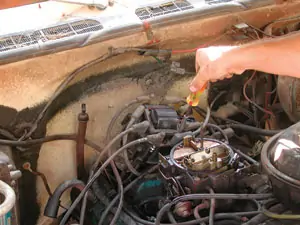
Step 3 – For caps that have integral coils, the replacement silicone washer installs on the coil-mounting surface. Silicone grease on both sides provides sealing.
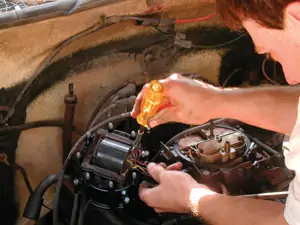
Step 4 – Unplug the coil from the wiring harness as necessary.
Step 5 – Unscrew and remove the coil cover.
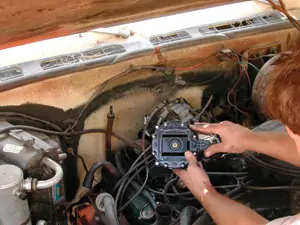
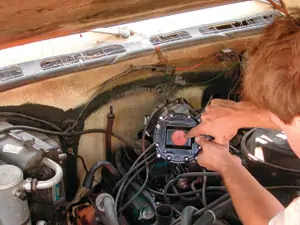
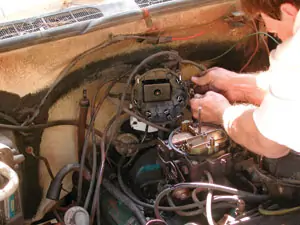
Step 6 – Unfasten the coil itself and use needle-nose pliers to remove its wires from the distributor cap. Note their placement.
Step 7 – Transplant the coil and its wires from the old cap to the new one. (Ignition coils rarely go bad.) Use the factory screws, and make sure that the wires are inserted into the correct slots.
Step 8 – One by one, transfer the spark-plug wires from the old cap to the corresponding terminal on the new one.
Step 9 – For distributor-mounted coils, reconnect the wiring plug.

Step 10 – Install the coil cover if equipped, and then reattach the new cap to the distributor.
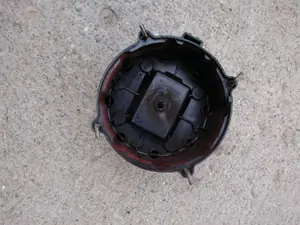
Step 11 – This high-mileage distributor cap wasn’t cracked, but it suffered from carbon deposits and corroded terminals.
