


Push-starting our ’74 Super Beetle wasn’t that big of a deal (unless you ask my lovely young bride, who once had to interrupt her workout to help push, and to get yelled at for how she dropped the clutch). But a battery problem now means that I’m not going anywhere with my diesel-powered automatic. Since I’m often in remote areas with this truck, I test the batteries periodically to make sure it will start. When one of my dual batteries couldn’t even move the needle of a voltage meter, it was time to install some new ones. Several friends recommended Optima (www.optimabatteries.com), and Optima recommended its YellowTop battery.
For most automotive applications a battery needs to supply a lot of current for a short period of time to turn over the engine and get the car started. With the engine running, the car’s alternator produces all the power the car needs. Thin plates inside a starting battery increase the surface area and produce this relative burst of energy. Optima’s RedTop fits into this category.
Thicker plates in a deep cycle battery provide a steady amount of current over a long period of time. Deep cycle batteries excel in reserve capacity (RC), which is measured in the number of minutes that the battery can deliver 25 amps while keeping its voltage above 10.5 volts. But deep cycle batteries don’t do as well in cold cranking amps (CCA), which is measured for 30 seconds at 32 degrees F.
Optima’s YellowTop is a dual purpose battery providing both starting and deep cycle characteristics, which is good for diesel vehicles, especially those with lots of accessories. It would take two of these YellowTops to equip our PowerStroke-equipped Ford F-250 Super Duty, which was designed for dual batteries wired in parallel.
In a parallel configuration, batteries are connected positive to positive, which makes them retain the same voltage. Be careful because batteries can also be connected in series (positive to negative), which adds the voltages together so two 12-volt batteries put out 24 volts—which would cook your 12-volt system.
Here’s how to make the battery upgrade:
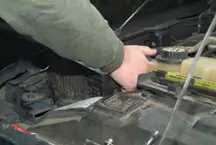
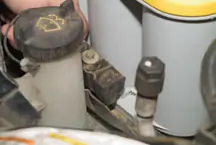
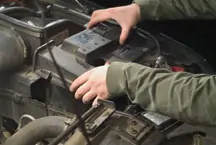
Step 1: Disconnect the battery beginning with the ground or negative connector. The ground side is labeled with a minus symbol and the connectors are usually black.

Step 2: On a dual battery system, you will need to disconnect the ground of the other battery as well because they are wired together.

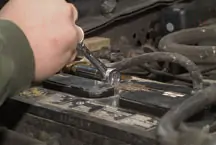
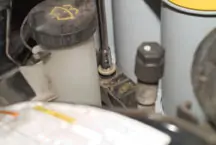
Step 3: Disconnect the positive side of the battery by loosening the nut of the post clamp.
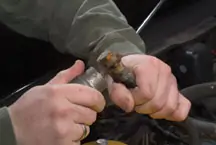
Step 4: Getting the clamp off the post is not always easy. Be careful not to pry too hard on the battery connection components. You can grab the wires and give it a twist or use a large standard screwdriver to spread the clamp sides further apart. Guys who do this all the time have specialty tools for this task.
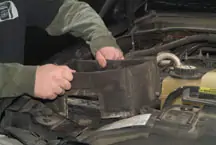
Step 5: Remove the insulating blanket from around the battery.
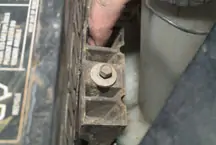
Step 6: Remove the wedge-shaped clamping block by backing out the bolt until it’s loose. Pull the block up.
Step 7: Slide the battery forward away from the rear tabs.
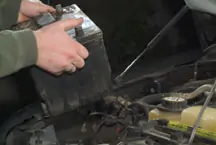
Step 8: Lift the battery out. You might want to use a step ladder and/or ask for help. These things are kinda heavy for that angle.
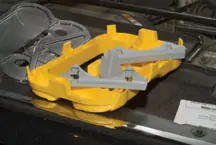
Step 9: Optima’s YellowTop battery comes with adapter plates and the snap-on parts for several applications.
Step 10: For this application we used the wing adapter, which snaps into place on the sides of the battery.

Step 11: Lift the battery into place using the provided carrying strap.
Step 12: Slide the battery toward the firewall to lock under the tabs and replace the clamp block used to retain the OEM battery.
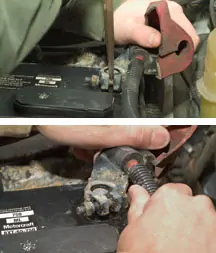
Step 13: Use a socket with extension to secure the clamping block into place
Step 14: Use a battery terminal brush to clean the cable clamps.
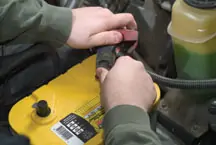
Step 15: Attach the positive cable clamp to the terminal post.
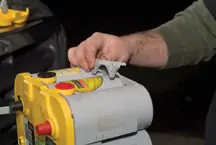
Step 16: To remove the driver-side battery, snap off the top of the box, which is part of the cold air intake that helps keep the ECU cooler.
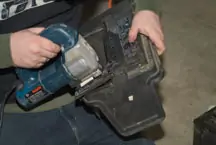
Step 17: We used a jig saw to modify the air box to fit the slightly taller Optima Yellow Top.
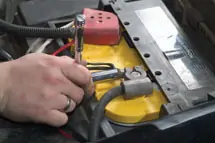
Step 18: The finishing touch is to re-connect all of the auxiliary wires with an extra nut on the clamp bolts.
