

By Matt Weber
Some of the most satisfying DIY home improvements are those that have posed a serious problem that the homeowner struggled to overcome. There’s a lot to be said for meeting a challenge and conquering those unexpected obstacles.
Here’s my idea of another satisfying project—one which doesn’t pose much of a challenge at all. There’s a lot to be said for simplicity and “quick fixes.” That’s why I like high-quality ceiling medallions; they provide big rewards for the interior decor but require little effort to install.
Some ceiling medallions come in two halves for simple application over an existing hanging light fixture. Others are single-piece products that require removal of the fixture. I installed each of the two-piece medallions shown in this article in less than an hour, and most of my time was spent situating the lighting for my photos. To install, all you need is a power drill/driver, a handful of trim-head drywall screws, wood filler and some construction adhesive.

To begin, test-fit the medallion and make note if it needs to be centered, in case the base of your light is slightly smaller than the medallion’s inside diameter. When you’re satisfied with its position, mark the ceiling around its perimeter for easy replacement after you add the adhesive.


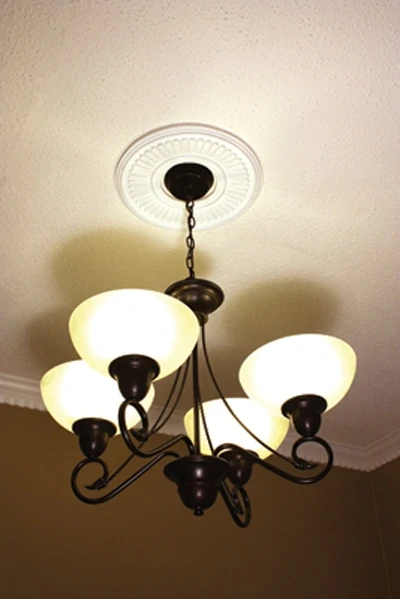
The two medallions shown in this article are manufactured by Fypon. The Fypon medallions are made of a thick, solid piece of rigid urethane, rather than the thin, hollow plastic medallions available at certain home stores. Take it from my experience, the thin plastic medallions don’t have the stiffness to stay in place. Two years ago I installed a plastic ceiling medallion on the chandelier above the split-level foyer of my home. The old medallion was mounted with double-sided tape, but the hollow, flimsy plastic lacked the necessary rigidity to stay flush to the wall, causing a noticeable sag along the seam.

The problem with the old cheap medallion was two-fold. First, the tape didn’t stick well to the ceiling. Second, the product was basically a hollow plastic sheet, and its weight combined with the thin material could not withstand the force of gravity, which means you’ll likely be re-installing it sooner than later. This isn’t an issue with Fypon’s solid urethane medallions or genuine wood medallions. Plus, the solid backing provides a flush surface to apply adhesive, which achieves a larger bonding surface. Once the solid medallions are in place, they are there to stay.

After test-fitting the medallion, liberally apply beads of adhesive to its back side. Fypon recommends using a polyurethane-based construction adhesive, which bonds well to the urethane. Replace the two halves around the base of the light. The halves interlock with a recessed joint that helps to conceal the seam.


Next, countersink a couple of trim-head drywall screws through the medallion and into the ceiling joists to hold the trim piece while the glue sets. I recommend trim-head screws because it’s easy to conceal the small screw heads with plastic wood filler. I use a white-tinted wood filler to blend with the white pre-primed medallion. Finally, paint and/or caulk the medallion to suit. That’s all it takes to complete the job—it’s fast and super simple.

 SIDE NOTE
Real Wood Medallions
For an upscale look with a classic woodgrain appearance, Osborne Wood Products offers genuine wood medallions in a variety of wood types and carving styles. These decorative trim pieces are available in 16-by-16 and 24-by-24-in. diameters. Choose from a traditional selection of wood (red oak or paint-grade rubberwood) as well as a premium selection (alder, cherry, hard maple). The medallions should be fastened securely into the ceiling framing, and each is sold unfinished, providing the homeowner the option to tint them with their choice of wood stain. Learn more at www.osbornewood.com.
