


Want more space in a room? Bump out a window!
One of the easiest ways to gain space in a home is to replace existing single or double hung windows with a bay window.
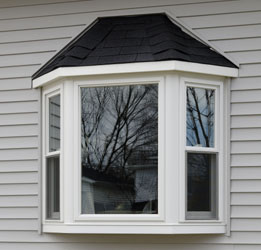
Contractor Steve Roth recently tackled the project to enhance the interior and exterior of a rental property he purchased. “From the interior, the bay window provides a cozy area for reading or a sunny spot for the family cat,” says Roth. “On the exterior, a bay creates more dimension and appeal to a home. This house originally had a flat, uninteresting exterior with three side-by-side double hung windows. Adding the bay with a roof overhang added a visual feature to the outside of the home.”
To start, Roth measured the rough opening of the existing window space and then ordered a low-maintenance, vinyl-framed Simonton window. “One of the major reasons I selected a Simonton window is because they have a unique cable support system for bay and bow windows that makes installation very fast and easy,” says Roth. “The system uses a hook that attaches to the 5/16-inch all-thread at the top of the window unit. This eliminates the need to use knee braces or corbels to support the bay unit.”
The cable system incorporates a zero-slip clamp with both coarse and fine adjustments to be made at the front of the unit during installation. The design provides more flexibility to the installation of the unit in various situations, including those with limited clearance.
“By selecting this glass package, we’re able to save on energy bills every day of the year and gain tax credit back at the end of the year. That’s a tremendous advantage for anyone replacing windows in the home. Just remember to save the labels from the windows and the actual receipts for the window purchase to use when preparing your taxes.”
Getting Started
When measuring the rough opening for the unit, Roth measured at three locations: top, middle and bottom of the opening. He did this both vertically and horizontally to have an accurate measurement for ordering. Additionally, he measured the wall thickness from the inside of the opening to the outside of the exterior siding.
Next, Roth decided on a bay window with operable side features to allow for ventilation. While some bay windows contain all fixed units, the customization opportunity is available to select casement or double hung windows to allow natural air flow into the house.

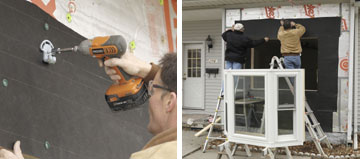
Once the Simonton bay window arrived, Roth gathered a few friends and a variety of tools together to tackle the easy installation project. For tools, he used a tape measure, 4-foot level, No. 2 Phillips Bit (4 inches long), No. 3 Phillips screwdriver (6 inches long), 1/2-inch wrench, cordless screw gun, 1/8-inch drill bit (4 inches long), 3/32-inch drill bit, caulk gun and color-matched silicone caulk.

Step 1: Remove the old windows and prepare the rough opening, leveling off the sill if necessary. Make sure the bay window fits into the opening plumb, level and square.
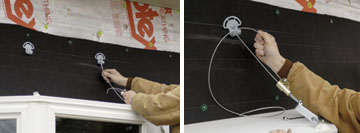
Step 2: Install both wall brackets 12 to 15 inches above the rough opening using one of the two 1/4-by-3-inch long lag screws provided in the Simonton kit. Use the hole in the center of the wall bracket for this lag screw. Keep in mind the roof structure height of the unit.

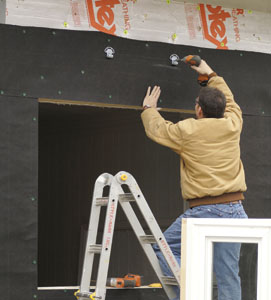
(Note: the cables can be installed at any degree between 15 and 90 degrees from horizontal measured between the cable and head board. Wall brackets can be placed as much as 45 degrees to either side of vertical measured from the window hook mounted to the top of the bay unit. This flexibility ensures the wall bracket can be anchored to a wall stud.)
Step 3: Remove all wooden stripping blocks from the underside of the bay window.
Step 4: Carefully remove the jamb veneers along the inside of the jambs and save for later use.
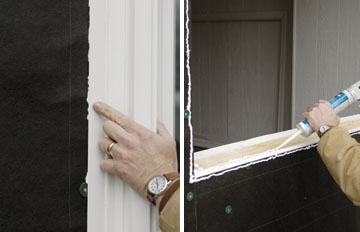
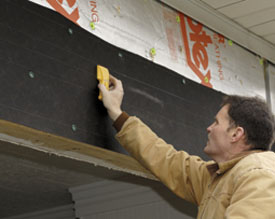
Step 5: Caulk along the edges of the rough opening and the sill plate, as well as the F-channels along the perimeter.
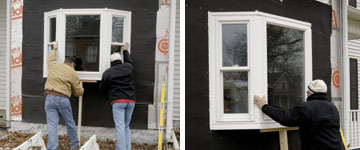
Place the bay unit in the opening and place a support underneath the nose of the bay unit, making sure the window is level.
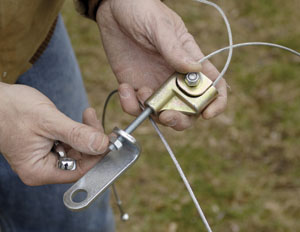
Step 6: Using the hardware from the cable support system pack that came with the Simonton unit, attach the angled hook bracket to the window hook that is already installed on the 5/16-inch all-thread at the top of the bay window. Make sure that the adjustment nut on the main cable support body is in the center of the adjustment tread.
Step 7: Attach the other end of the cable with the swaged ball to the wall bracket.
Step 8: Make certain that the clamping insert on the main support assembly is loose enough to allow the cable to be adjusted. Pull on the tag end of the cable to take out any slack in the cable between the window and the wall bracket.
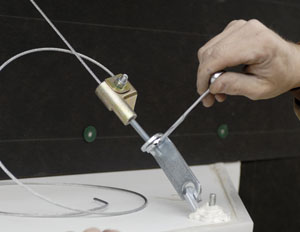
Step 9: Tighten the 1/2-inch nylon lock nut on the clamping insert to a torque rating of 15 foot/pounds.
Step 10: Rotate the wall bracket if necessary to maintain proper alignment with the cable and attach the second 1/2-by-3-inch lag screw in the appropriate slot directly above the center screw. This ensures the lag screw is installed in a wall stud or other solid mounting member.
Step 11: Repeat steps 6-10 for the second cable support.
Step 12: Once both cable supports have been installed, remove the support from under the nose of the bay unit so that the unit is now supported by the cables.
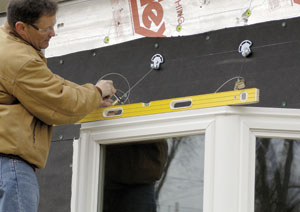
Step 13: To level the bay unit, use a wrench to rotate the adjustment nut on the adjustment thread. Rotate clockwise to raise the nose of the unit, or counter-clockwise to lower the nose of the unit. Adjust each cable support until the unit is level from side to side as well as from front to back. Once the unit is level, tighten the jam nut onto the hook bracket.

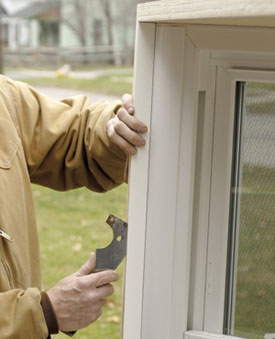
Step 14: Check for an even reveal between the sash and the frame to be certain the weatherstripping is sealing properly in all areas.
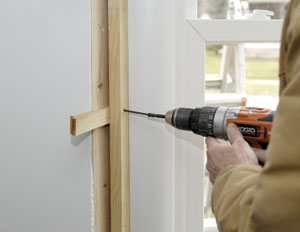
Step 15: Once the bay window is plumb, level and square, insert installation screws through the inside jambs. The screws should be placed 8 to 12 inches apart, starting 4 inches from the top and bottom. Offset screw locations for more support. Shims should be used to establish spacing at anchoring points and should be penetrated by the installation screw. Do NOT over tighten the screws, as this could cause the frame to bow. Do not place screws through the head or seat board. Recheck the sash for proper operation once the screws have been installed.
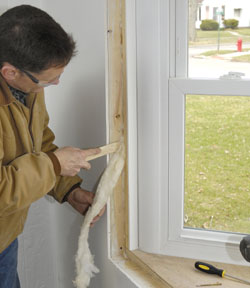
Step 16: After the installation screws are in place, glue the wood veneer back in place on the inside of the jambs and fill the gap between the jambs and rough opening with insulation.
Step 17: All projected units require a roofing system after installation since the top of the unit is not designed to prevent water penetration without a roof. For this project, a hip asphalt shingle roof was created projecting from the house.
Step 18: Finish off the interior of the bay unit and install knee braces as required.
Step 19: Inspect all exterior sealant joints in case any joints were pulled apart during installation. Reseal any broken seams with the sealant supplied with the unit.
