By Matt Weber
Kick Out the Jambs.. A triple-threat entryway upgrade gives a front door a fresh new look.
The first thing someone sees when walking into a home is its entryway. To leave a positive first impression, the front door is an ideal area to focus on curb appeal. The entryway of our project house had three problems: an outdated door design, a poor seal and an old screen door in disrepair. To address this issue, we gave the front door a triple-duty upgrade by installing a new front door, a new storm door and a decorative trim package.
Front Door Replacement
Not only was the style of the existing front door outdated, but someone had improperly trimmed the lower edge of the door so it would not make a good seal around the jamb. Furthermore, the construction of the old door didn’t offer near the insulation as today’s energy-efficient models. As such, anytime you walked past the door during the winter, there was an ever-present pocket of cold air on the interior of the entryway.
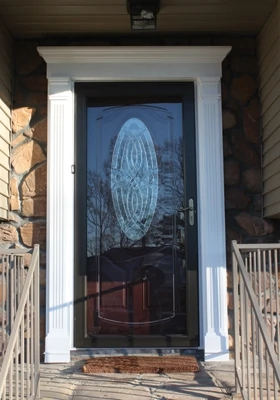
We replaced the door with one of Therma-Tru’s Benchmark series of pre-hung fiberglass doors, available at Lowe’s. Not only did the mahogany finish and oval window give the decor a much needed shot in the arm, but the home’s energy efficiency was greatly improved, completely eliminating that troublesome cold spot.
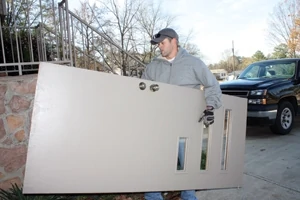
First step in door replacement is to pop the door off the hinges and set it aside to eliminate most of the weight from the jamb. If there’s a screen/storm door in place, get rid of it, too.
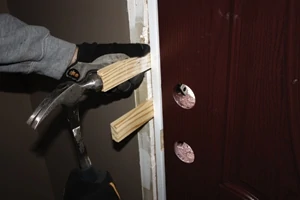
First step is to remove the old door from its hinges, so you only have to wrestle with the jamb.
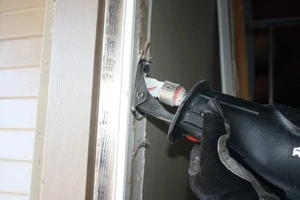
Cut loose any screws along the jamb with a recip saw.
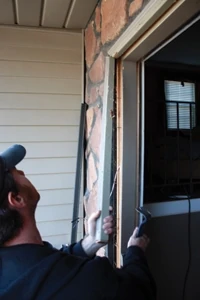
Pry away the old casing and run a recip saw between the jamb and wall framing on both sides to cut loose any fasteners. Then, pry away the brick moulding with a flat bar. Removal of the brick mould should eliminate most of the fasteners, allowing you to tilt out the old door jamb. You may have to pry up the sill if it’s been glued to the floor.
Have an assistant help you tilt the replacement door into the frame. Therma-tru includes step-by-step instructions to guide installation of the door, but some basic door-installation procedures will apply. Adjust the interior reveal of the door for consistency in and out of the wall cavity. Plumb the hinge side of the door to the framing and drive a couple of screws through the hinges, but leave them loose so you can adjust the door. Use shims as necessary to fasten the door securely within the frame, adjusting its placement until you’re satisfied with its weather-tight seal and its open/shut swinging action. Once it’s in position and properly operating, shim behind the striker location and each hinge, and drive the hinge screws solidly into the studs. Then, complete the installation by predrilling nail holes and driving finish nails through the brick mould into the surrounding wall frame.
Shim the new door jamb for a snug fit, while keeping a close eye on the interior reveal, the weather seal and the open/close action of the door.
Tilt in the new pre-hung door and plumb the hinge side against the wall framing.
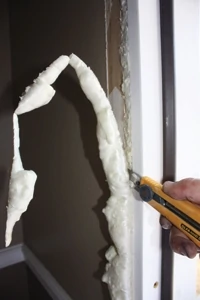
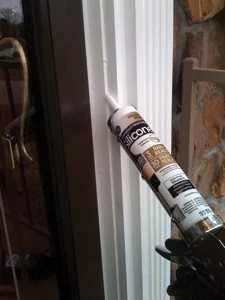
Chop away the shims and apply waterproof sealant around the door. For large gaps, you can insulate with expanding spray foam—but be careful. Keep an eye on the spray foam as it expands; if the expansion starts to bow out the door jamb, you’ll have problems opening and shutting it. If you see the jamb bowing, cinch down the jamb with screws before the insulation hardens. Once dry, cut away the excess insulation with a razor, then apply new trim and paint on the interior.
I used spray foam insulation to help weatherproof the door and cut away the excess with a razor. Conceal the gap with new interior casing trim.
Storm Door Installation
Storm door installation is a fairly simple task for the DIY homeowner, which requires little more than a screwdriver to fasten the frame flanges and header to the casing of the doorway.
I won’t bore our readers by writing a screw-by-screw account of the installation; manufacturers like Pella provide very thorough step-by-step instructions, so there’s no need to reinvent the wheel. Instead, I’ll focus on the innovative design system of the Pella storm doors currently available at Lowe’s.
Fasten the storm door frame with the screws provided.
Pella’s Select storm door system provides a wide range of design options. Fasten the storm door frame with the screws provided.
The Pella Select mix-and-match system allows you to create hundreds of customizable combinations among door color, latch finish and glass design. Along the aisles at Lowe’s you’ll find door frames, brass handles and glass inserts all sold separately, but they install interchangeably. This allows the homeowner a myriad of options for creating just the right look for their home. The Pella Select storm doors are available in eight stylish frame colors. Choose from a wide range of interchangeable decorative glass designs. Plus, the brass handles—for both inside and out—are also available in a variety of styles and finishes.
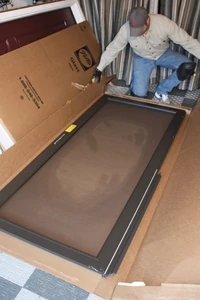
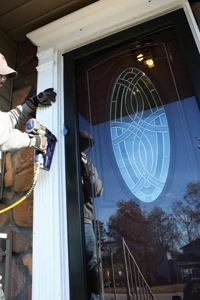
Installation is a simple three-phase process. First, if using a glass insert, pop out the screen, and screw the storm-door frame to the entry door casing with the provided screws. The doors can be configured for either left-hand or right-hand operation. Install the storm-door header per the manufacturer’s instructions.
The next step is to insert your glass option, which simply sits inside the door frame and snaps in with plastic bracket strips along the edges. Simple stuff.
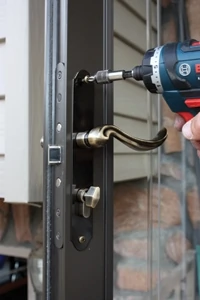
Then, assemble the handle and lockset according to the provided instructions. Requiring nothing more than a screwdriver, the handle set installs much the same way as any standard doorknob. Finally, install the door closers at the top and bottom of the door. The Pella One-Touch closer has a handy feature that holds the door open at the touch of a button. The entire storm door installation can be knocked out in about an hour.
Make the Transition
As is tradition with the projects I tackle, I encountered an unforeseen challenge. In this case, it was the cobblestone that surrounded the door. Rather than dealing with a flat—or at least uniform—wall on which to install the door trim, the stones had a random variety of projections. Some of the stones projected an inch past the door’s brick mould (which was recessed into the masonry). Other stones were set in the wall an inch behind the brick mould.
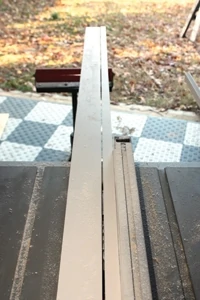
The cobblestone wall required me to rip PVC trim extensions to fit around the door.
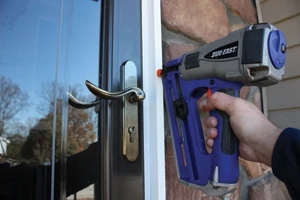
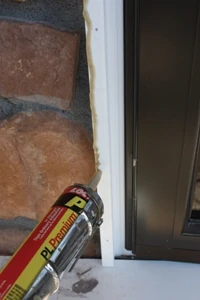
To accommodate the uneven stone wall, I installed 1-by-3/4-inch extension trim to the outer edge of the brick mould. These extensions were made from some of Fypon’s PVC stock, which I ripped to size on my table saw. Sticking with the weather-friendly synthetic material meant the extension trim would have the same waterproof durability as the rest of the urethane trim package that was to follow. To install the extensions, I ran a bead of polyurethane construction adhesive along the outer edge of the brick mould, then tacked on the strips with finish nails while the glue dried, making sure to keep a consistent reveal along the brick mould.
Attach the trim extensions (if necessary) with finish nails and polyurethane adhesive.
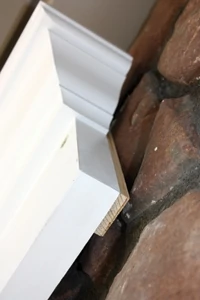
The extensions cleared the way for the trim package to be installed over the stones without obstruction. The other side of this coin meant that certain areas of the trim were mounted over recessed stones that didn’t offer a solid mounting surface. To overcome this lack of nailing surface, I had to rely on a lot of shims placed behind the trim to fill in the gaps.
Dress out with Door Trim
An easy way to dramatically enhance an entryway is with Fypon’s door trim kit. The 4-piece kit includes two moulded urethane fluted pilasters, a crosshead and a center keystone. Since the backing trim, fluted casing, crown moulding, ogee trim and plinth blocks are all extruded in the manufacturing process, you don’t have to install these trim pieces individually, saving a lot of time and hassle. And, because it’s not wood, it won’t rot.
Mark the center-point of the crosshead and the door frame for alignment.
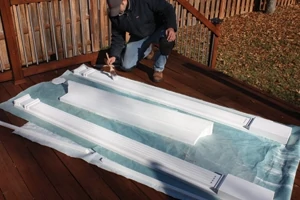
I recommend pre-painting the door trim.
I installed the trim package in a single day even though I was hindered by the uneven cobblestone walls. However, if this system were to be installed on siding, brick, stucco or any uniformly flat surface, then the trim package will install even faster and easier.
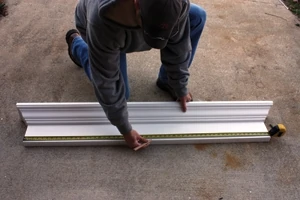
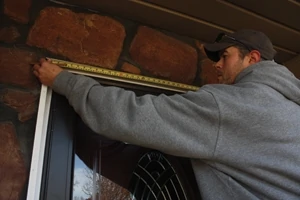
Before purchasing the trim, measure your doorway. Crossheads look best when their breastboard is the same width as the window or door, plus any trim. If your door is too narrow, you may have to trim the crosshead in the middle and reassemble the two halves with adhesive. If the door is too wide, you may have to combine two crossheads to bridge the distance. For my standard-size front entryway, the trim package fit exactly.
As a rule of thumb, I always pre-paint trim prior to installation so I only have to touch-up the finish after installation.
If using concrete screws, countersink the fastener holes with a spade bit. Then position the crosshead and use a hammer-drill to bore pilot holes for the concrete screws.
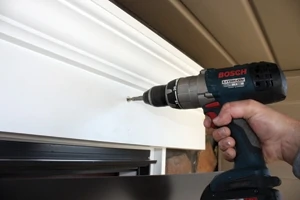
The first piece I installed was the crosshead over the doorway. I used a spade bit to countersink the screw holes in the crosshead. I then marked the center point of both the crosshead and the door casing with a pencil, and positioned the crosshead with the centers aligned. One nice thing about urethane trim is its manageable weight. Even with the relatively bulky size of the crosshead, I was able to single-handedly hold it in place while I ran a hammer-drill through my predrilled mounting holes to pilot the concrete screws. When aligning the crosshead and pilasters for installation, pay especially close attention to achieving a consistent reveal between the new trim pieces and the existing door casing.
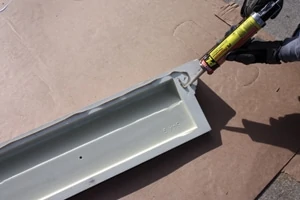
Apply poly adhesive to all edges of the crosshead that will contact the wall.
I then removed the crosshead, flipped it over and ran a bead of polyurethane adhesive over all the edges that would come into contact with the wall or existing door casing. I carefully repositioned the crosshead above the door, aligned the centers and the reveal, and then zipped it to the wall with concrete screws. As mentioned, I did have to shim some of the fasteners from the rear of the crosshead, but this step won’t always be necessary.
Drive concrete screws through the crosshead to fasten to the stone.
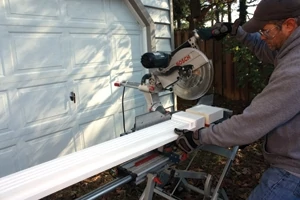
I then measured the distance from the crosshead downward and trimmed the two pilasters to fit. Each pilaster is manufactured with a plinth block at the bottom, where cuts can be made to accommodate different doorway heights. I chopped mine down on a miter saw, but a simple hand saw could also be used.
Cut the pilasters to length at the lower plinth block.
The pilasters install much in the same way as the crosshead, with a combination of polyurethane construction adhesive and concrete screws, shimming as necessary. I did find it helpful to tack down the inside edge of the pilasters with finish nails while the bead of adhesive set. Again, keep the reveal consistent to ensure a uniform-looking installation.
Attach the pilasters with a combination of poly adhesive, finish nails and concrete screws (if fastening into masonry).
The kit also comes with the option of a center keystone, which can come in handy to cover a crosshead seam in situations where you have to glue two pieces together. For the house I was working on, we didn’t have much overhead clearance above the door, so we left off the keystone because it made the trim look a little too cramped.
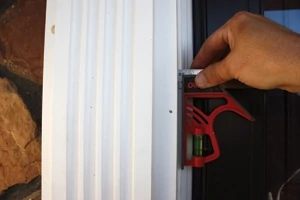
Keep a consistent reveal as you install the trim package.
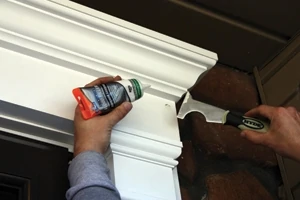
To wrap things up, I filled all fastener holes with color-matched plastic wood filler, sanded as necessary and caulked all the joints with a paintable silicone sealant. After a fresh coat of touch-up paint, the project was complete and looked really sharp. The curb appeal of the home definitely jumped up a few notches, and we heard some very nice compliments from the neighbors.
Fill all fastener holes with color-matched plastic wood filler and Fill all fastener holes with color-matched plastic wood filler.


