Replacing old single-pane glass windows with new double-insulated windows can provide one of the greatest energy savings for your home. Modern windows feature two or three panes of glass with an insulating air space between. The higher-quality windows also have an inert gas such as argon between the glass panes, offering an even greater insulating factor. Many modern windows go one step further and have a special coating called “low-E” applied to the glass. This coating contains metallic particles that slow heat loss in the winter and reduce heat gain in the summer. When purchasing windows, look for the National Fenestration Rating Council (NFRC) energy-efficiency label on the windows.
Windows are available in several different styles including single-hung, double-hung, gliding/horizontal, awning, hopper, casement, jalousie, fixed, bay or bow and garden. Most building warehouses carry standard-size, double-hung windows – the most common style. Most warehouses also carry a limited number of specialty windows such as circular, arch and bay or bow. Many other types of windows will have to be specially ordered. Unusual sizes of any window are special-order items. If at all possible, it’s best to replace existing windows with those of a similar size.
Windows are available made of vinyl, metal, wood and wood with vinyl- or metal-clad exteriors. Wood is more energy-efficient than either vinyl or metal. Cladding the outside of the wood window, however, eliminates the need to paint at the time of installation and requires less maintenance in the future. The clad wood windows are higher priced than any of the single-material windows.
Windows are available in two types: new-construction and replacement. New-construction windows are installed from the outside, with no interior or exterior trim in place at the time of the installation. Siding and window trim are installed after the windows are in place. Replacement (sash-only) windows are installed in the existing window frames, leaving both interior and exterior trim in place. The full-frame method is best if interior and exterior window trim is being replaced. Most single-pane windows also require outside storm windows. Storm windows are not necessary with the installation of double-insulated panes, and leaving the storm windows in place takes away from the beauty of the new windows.
Measuring for Windows
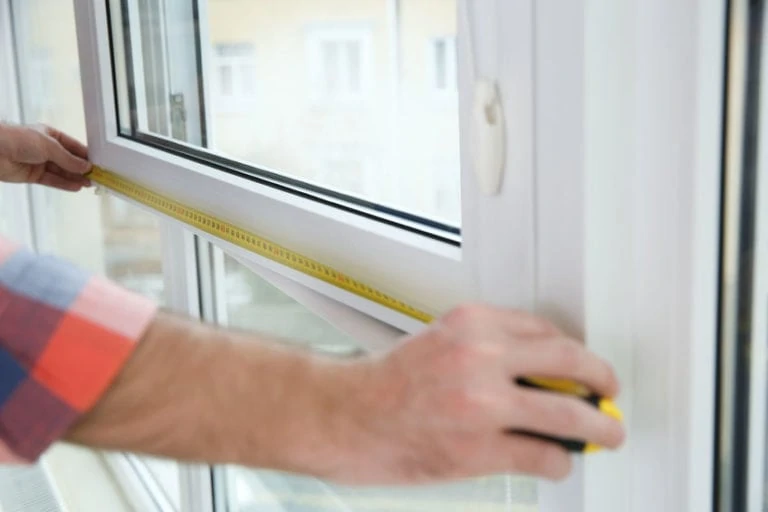
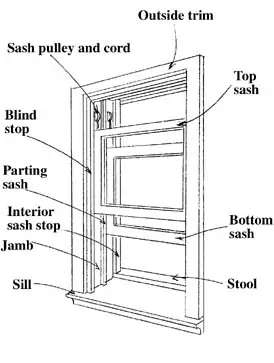
Proper measurement is extremely important. After determining the brand name and type of replacement windows desired, use the manufacturer’s measuring instructions for their particular windows. Shown is a diagram of an old-style, standard, double-hung window with counterweights or a sash weight system. In most instances it’s best to remove the old interior trim to ensure correct measurements. If you can’t get windows the exact same size, it’s easiest to install slightly smaller replacement windows, reframing the opening as needed. Installing larger windows requires cutting the existing framing – this can, however, result in larger, brighter windows. If making a window taller or wider, it may be necessary to make important structural changes to the existing wall. In many cases the wall will be load-bearing (supporting the roof or another floor above it). Plans to change the structure of these walls should be approved by a knowledgeable carpenter or engineer. You may also be required to have a city or county inspector approve the change. If you have old, pocket-weight style windows, you can easily enlarge the windows by using the pocket spaces on either or both sides of the existing windows. Normally this will require minimal structural changes.
In some instances more than one window may be installed in an opening. The three windows replaced in this article are typical of older homes with the windows requiring sash weights on both sides of each window. Modern windows, such as the Pella window units installed, can be mulled or joined together to fill almost any opening you can imagine. Windows can be mulled together side by side or top to bottom, and can be any combination of operable and fixed windows. Most manufacturers offer some factory-mulled windows, or you can purchase mull kits to join the windows to suit your needs.
If you are not doing major structural construction changes, replacing old windows is a fairly easy chore, even for first-timers. It may appear daunting at first, and it does take a bit of time and a few tools. You’ll need a pry bar, hammer, sharp utility knife, wood chisel, level, square, saw, tape measure, caulking gun, caulk and a screwdriver. A cordless drill/driver makes installation quicker and easier.
Removing Old Windows
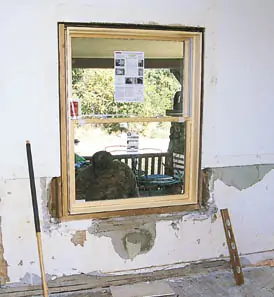
The installation shown is for new-construction, double-hung Pella ProLine windows when using the existing rough window openings. On the outside, remove the old storm window then remove the exterior trim or casing using a pry bar and block of wood to protect the siding. If reusing the old trim, pull out the nails from the back and remove the old sill.

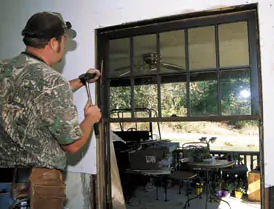
The next step is to determine if you will be using the old interior trim. If so, you must be very careful when removing it. Begin by removing the interior window stops. Use a wide wood chisel to start at the bottom. Use a utility knife to score old paint at the joint, and then use a small flat pry bar to remove both the jamb stops and head stop. Using the utility knife, cut the sash cords for the bottom sash and allow the weights to fall down into the weight chamber. Remove the lower sash. The bottom sashes are commonly movable, so they’re usually fairly easy to pull out. The upper sash quite often has a small wooden wedge at the bottom, next to the parting stop. Use a chisel to knock off the wedge. There may also be a block of wood nailed to the upper sashes to hold them in place. Remove it as well. The parting stop is in a rabbet of the interior frame. Use a sharp chisel to drive into the stop and pry it out, starting at the bottom. Remove both the sides and top parting stop. Pull down the upper sash. In many instances the upper sash may be painted in place and you’ll have to score around the exterior edges to get it loose. Then cut the sash weights for the upper sash and let them drop into the weight chamber. Take out the upper sash. Remove the balance cord pulleys. Some of these can be unscrewed. If they don’t remove easily, pound them back flush with the jamb face. Remove the interior window stool and all old interior trim, again using a pry bar and block of wood. If you intend to reuse any of the interior trim, pull the nails out from the backside with nipper pliers.
Many older-style windows used sash weights and open weight pockets, which allow cold air to come in around the windows. Even multiple windows had to be individually framed with open weight pockets between each window.
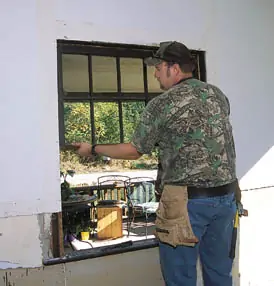
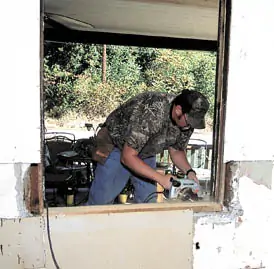
The rough opening must then be prepared. If the opening is square and the new window will fit within the rough opening with the space around as per the manufacturer’s instructions, you’re ready to install. If the opening must be made smaller, then block in the rough opening on both sides, on top and bottom, or as needed. Then recheck to make sure the rough opening is of the proper dimensions specified by the window manufacturer, and that the opening is both square and level.
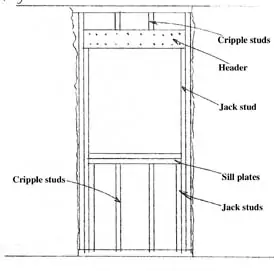
If enlarging the window, remove the old window as before. Cut away the interior wall surface creating an area larger than needed for the new window. Remove existing studs and the header to create the new opening. Note: Make sure you temporarily support the ceiling before removing the existing header. Install the new studs as needed. Build the new header. For moderate-size windows, a header of two 2-by-6’s nailed together with spacers between to match the new studs may be used. For larger windows 2-by-8’s, 2-by-10’s or even 2-by-12’s must be used. Attach one jack stud to a regular stud on one side of the window. Place one edge of the header on top of the jack stud. Then, with a helper, lift the header up into position and slip the other jack stud under the header. Attach the second jack stud to the regular stud and nail the header to the regular studs. If the top edge of the header doesn’t contact the ceiling, install 2-by-4-inch blocking or cripple studs every 16 inches. Then install the sill plates and lower the cripple studs. Again make sure the rough opening is of the correct size and both square and plumb.
Window Installation
The Pella ProLine windows shown in this installation have nailing fins on the exterior, making them quick and easy to install. Fold out the installation fins as per the manufacturer’s instructions. Apply a continuous bead of sealant caulk to the backside of the nailing fins and/or the exterior sheathing. From the outside, lift the window unit into place, positioning the nailing fins against the exterior house sheathing. Using a 2-inch galvanized roofing nail or self-starting exterior screw, temporarily secure the unit at one upper corner through the nailing fin. Using a carpenter’s level, plumb the window jambs from the inside, holding the level vertically. Shim under the sill at the jamb to level the sill and position the unit plumb. Then level the unit at the head or top and secure the window by nailing through the installation fin at the opposite upper corner. Shim out all sides from the inside, but make sure you don’t over-shim. Use a straight edge to make sure the sides of the frame are straight. Check to make sure the diagonal measurement from corner to corner is the same in both directions. This verifies that the window is installed without twisting, which is essential to the correct operation of the unit. Finally nail or use exterior self-starting wood screws around the exterior of the window through the nailing fins.
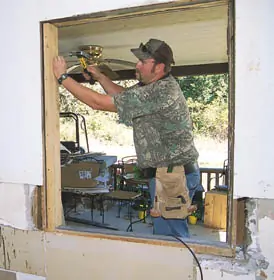
Reinstall the old trim, or create new trim for the exterior. Apply a bead of caulking to the outside edge of the nailing flange before installing each window trim piece. The trim pieces can be painted before installation, then a bit of paint added between the joints to finish the trim. If your home has vinyl siding or you plan to install vinyl, you might wish to add the vinyl trim over the new or older trim pieces.
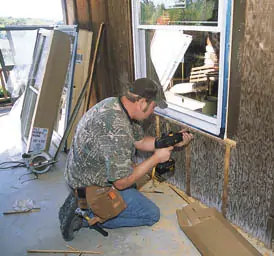
In most instances you will also be installing new screens with the new windows. The Pella tilt, double-hung screens are extremely easy to install and use. Lower the top sash approximately 6 inches and raise the lower sash. Carefully pass the screen through the lower sash opening and position it with the handle on the bottom and the screen clips facing the interior. Then hook the tabs on the screen at the top onto the vertical leg on the head cover. Ensure the screen is engaged at the top and, with the handle, pull the bottom of the screen into the frame. Secure with clips. Incidentally, the Pella screen does not need to be removed to clean the window sashes from inside the house.
Interior Window Trim
Even with a new double-insulated window, without properly insulating around the new window, you can still have lots of air infiltration. This is particularly so with old windows that have open weight pockets. These open pockets are cold air collectors. Even if a house has been insulated with pour-in, pump-in or foam insulation, the weight pockets are left open for the weights to operate. If you remove the inside jamb to expose the pockets and install a wider window, this isn’t a problem. If, however, the pockets are left intact, you may wish to cut the interior wall covering back along each edge of the pockets so these areas can be stuffed with insulation. Make sure the new window trim will cover the cut edge.
Regardless of the installation method, insulate all around the window. Fill all spaces around the window with insulation. Use either batt-type insulation, loosely pushed in place with a thin, flat wooden paddle, or use the nonexpanding foam type, following the manufacturer’s directions. When using foam, don’t apply too much. The window frame can be bowed and make it impossible to operate the window if too much foam is used. Places too small for insulation should be caulked to seal them off.
Before reinstalling old trim, or installing new trim, jamb extension molding may be needed if the wall thickness is more than 4 9/16 inches. Jamb extension molding for up to 6 9/16-inch walls can be ordered from some manufacturers. Or, if you have access to a planer to plane wood down to 1/2-inch thickness, you can create your own. Attach the extensions by either nailing or screwing them directly to the jamb, or by nailing through them sideways directly to the blocking of the rough opening. Apply caulk between the trim piece and the new window and the existing frame to ensure an airtight seal. Secure the trim pieces with finishing nails.
In some instances a window with a sill may be installed. First, be sure to caulk between the rough opening and the new window at the bottom. Apply caulk to the new sill, place it in position, making sure it is level, and attach it to the rough blocking through the face of the sill with 10-penny nails. Then install the trim pieces cut to fit around the sill. Most modern window styles are purchased without the interior window stool. You can, however, purchase a window stool, create your own or purchase windows designed specifically for window stool and trim.
Repair the interior wall if required. Replace lost plaster or interior wall finish to the edge of the new unit, sealing any cracks between the two.
Pella suggests finishing their wood interior units as soon as possible after installation. First, remove construction residue. Sand lightly with 180-grit or finer sandpaper. Do not use steel wool. Use three coats of quality medium- to high-gloss paint or polyurethane sealer. When painting, be sure to run the paint or polyurethane about 1/8-inch onto the glass to provide a good seal. Avoid scratching the glass with sandpaper. Do not paint the weatherstripping or other vinyl parts.
Vinyl and metal windows come with the window locks and tabs in place. Wood interior windows require the installation of window locks and sash lifts after finishing.
Shopping Guide
Keep these important points in mind when selecting a new window...
What’s your style? Replacing a window is a great opportunity to jazz up the look of your home. A classic, double-hung window may be just what you have in mind, but consider some alternatives. A bay or bow window opens up a room, inviting the outdoors in. Replace an ordinary window with a garden-style window to wash a room in sunlight. You may be surprised how creative choices enhance the appearance of your home.
How much work do you want to invest? After replacing the window, there’s the maintenance to contend with. Painting and repainting can grow tiresome, and wood that rots or succumbs to insects is another concern. A vinyl-framed window is one alternative that will not rust, pit or peel because the color is integrated throughout the material. And upkeep for vinyl is pretty simple – just wipe with a damp cloth for a like-new look.
What about energy efficiency? With heating and cooling costs a big concern among homeowners, consider the thermal dynamics of the windows you choose. Look for the Energy Star label, which indicates compliance with government mandates for energy conservation.
Quick Tips
- If you live near an airport, highway or busy neighborhood, consider using windows with laminated glass to help reduce noise transmission.
- Windows that often fog over on the inside can be a sign of excessive humidity in your home, which can lead to serious problems. Keep heating and cooling vents open and unobstructed to help reduce humidity levels.
- If you live in an area where high winds and storms are common, impact-resistant windows and doors may be a wise choice. These windows feature double-strength, tempered, laminated glass to better endure harsh climates.
- Simonton Windows’ new brochure, “What Every Homeowner Should Know about Window Replacement,” is now available to homeowners free of charge. The eight-page booklet offers tips for determining if windows need replacing, guidance on selecting replacement windows and information on types of glass used in windows. For a free copy call 1-800-SIMONTON.
About Simonton Windows
Simonton Windows produces ENERGY STAR® qualified replacement and new construction windows and doors, including a line of impact-resistant products. The company was ranked #1 in quality in the 2007 Brand Use Study sponsored by Builder magazine and has won two consecutive Best In Class Awards for being ranked “Overall Top Rated Vinyl Window Brand” in unaided industry studies.
Founded in 1946, Simonton’s hallmark has been to deliver its made-to-order products in seven days. Simonton is a founding sponsor of The Weather Museum and a corporate partner of Homes for Our Troops. For information, call (800) SIMONTON or visit www.simonton.com.


