Garages, woodshops and workshops are perennially starved for space and organization—and mine is one of them. It’s forever jam-packed with tools, materials and work surfaces that collect clutter. While having a mother lode of tools for woodworking, home improvement and contracting are key to getting the job done for me—or for running a profitable, efficient contracting business for that matter—you can’t work efficiently or peacefully if you’re drowning in stuff.
To combat the encroaching piles, tangles and trip-ups—and to be able to move heavy tools and items around my small shop quickly—I’ve designed and built some pretty effective storage solutions. Not only do they help my shop run better and create niche places for tools, materials and accessories, they actually help me use up some of those scraps I tend to collect for those just-in-case moments.
Roll With It
A good workbench is the plexus of any shop, whether for occasional DIY-action or full-on remodeling, and you can make a great one—suited exclusively to your shop and how you work. But, before planning the details of your workbench, think about all the things you want it for. Is it a basic surface for assembling small projects? Or, is your “workshop” a roommate of the mini-van? What if you want the bench to be a multi-functional surface? It can at once be a cart, storage space and work surface.
All that from one bench design? You bet.
Building the Bench
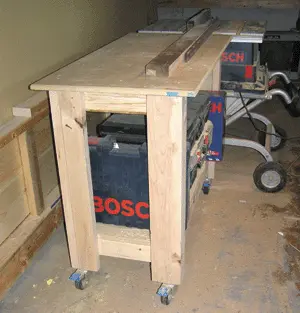
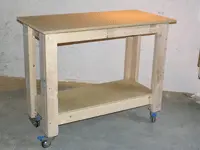
I built my bench from 2-by-4’s, screws, 3/4-inch subfloor and casters. I wanted it to be a stable work surface, store tools, roll out of the way and serve as outfeed support for my table saw. The frame’s outside dimensions are 44 by 20 inches. Its height (1/4-inch lower than my table saw deck) is 38 inches.
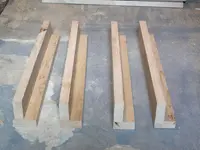
The parts: 4 corner brackets, 4 cross-pieces, 4 struts, 1 bottom shelf, 1 benchtop.
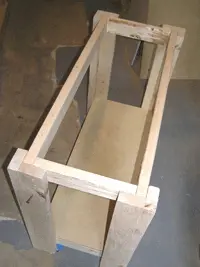
Make the corners first. Then install the cross-pieces between the corners (the “long” side of the corner is the side of the bench). Next, install the struts, screwing through the “wide” side of the corner.
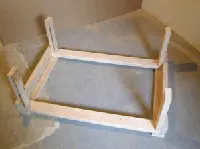
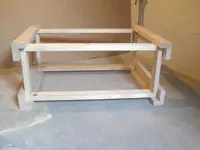
Pop the rear cross-pieces on the ends of the struts, creating a rectangle. Install the rear corners, mirror image of the front.
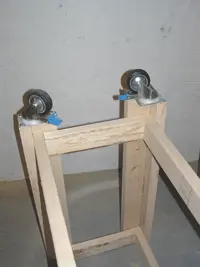
Flip the frame upside-down; pre-drill then install the casters.
Flip the frame right-side up; install the bottom shelf and bench top. Make sure the bench top cantilevers the frame equally on all sides. It’s a great lip for clamps.
You’re ready to roll. Use the bench to tote tools, work wood or show off to your friends how cool you are. It works either way.
Cart Construction
The Carpenter’s Cart is a no-nonsense vehicle that serves both as storage platform and back-saver. I have a couple of them.
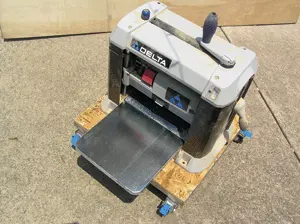
First, cut a sheet of 1/2-inch (or better) OSB or plywood 24 by 24 inches. Cut two pieces of 2-by-4 24 inches long. Then cut two pieces of 2-by-4 17 inches long.
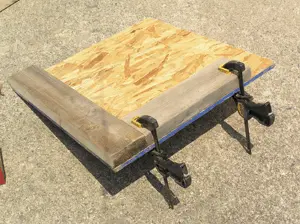
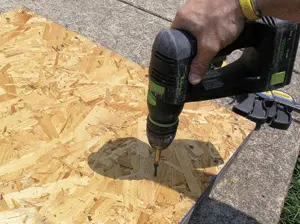
Clamp a 24-incher flat to the edge of the plywood. Make sure the 2-by-4 is flush with the plywood on all outside edges. It helps to use the factory-cut edge (not the one you cut) of the plywood. Fasten with 1-5/8-inch drywall screws.
Butt a 17-incher square to the 24-incher, creating an L-shape. Clamp and fasten. Repeat for the remaining two pieces.
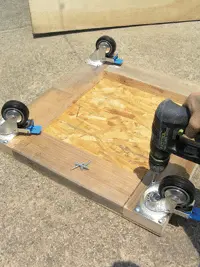
Install casters. Use high-quality casters that both swivel and lock. They cost a little more than cheap-o versions but work so much better. You’ll be happy you spent a few extra bucks.
Heavy shop tools can live right on their own carts—stuff like jointers and bandsaws. Others can swap in and out, like portable thickness planers.
You’ll start finding all kinds of uses for the carpenter’s cart: moving heavy material like 5-gallon paint, drywall buckets or bags of concrete. You can even team two of them up for moving furniture.
Workshop Storage—Toolbelt/Jacket hook
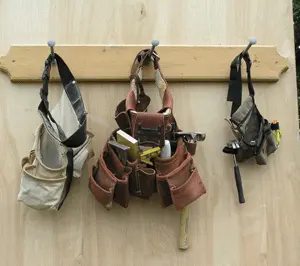
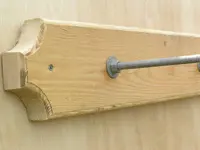
Show off your craftsmanship and ingenuity with this great tool-belt, shop apron, and jacket bolt-hook. The “hooks” are 1/2-inch carriage bolts and they look cool. All it takes is a piece of 2-by-6 or 2-by-8, a few carriage bolt assemblies (I consider “assemblies” to be nuts, bolts and washers) and some fasteners. You can make it as long or as short as you want, with as many hooks as you wish, but three hooks about 12 inches apart usually stows a good amount of gear nicely without taking up too much wall space.
Cut the 2-by to 44 inches long. For a little flare, cut inside radii or clip the corners. Then rout a nice edge all the way around.
Mark the bolt-hole locations. To evenly space them, come in 4 inches from each end along the center of the board and make a mark. Locate the middle hook right in the center of the board. Drill 1/8 pilot holes right on your marks straight through the board.
So that the 2-by sits flush to the wall, the back of it needs to be counter-bored for the washer and nut. Use a 1-1/2-inch boring bit, Forstner bit or paddle bit; drill a hole 3/4-inch deep for each hook.
Next, drill 5/8-inch holes for the shaft of each bolt through the 2-by. A drill press is ideal for this because it’ll drill dependable and straight holes, however, a cordless drill and some savvy works too. Use the pilot holes as guides.
Then, prep the bolts. Thread a nut onto each bolt so that 1-1/4 inches of thread are exposed. Put a washer on next. Insert into the hole.
From the back, install a washer then secure with a nut.
With all three bolt hooks set, install your belt, jacket, apron, catch-all hook by the door of your shop. And, if you think about it, you might be on to a great gift idea. This bolt-hook is great in a garden or tool shed, in the outside shower of a beach house, or for catching ski jackets in your mountain resort.
If you’re a sap like me, however, the carriage bolt hook is the place you hang your family’s tool belts.
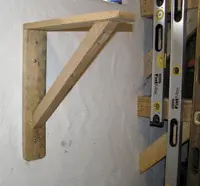
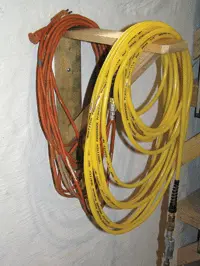
Another simple idea is to build a 2-by-4 wall bracket for holding hoses and cords.
Editor’s Note: Mark Clement is author of The Carpenter’s Notebook and Kid’s Carpenter’s Workbook, Fun Family Projects! Find out more at www.TheCarpentersNotebook.com.


