


Strut Like a Pro – This DIY Shock/Strut Installation Saves Owners Time and Money
It wasn’t to the point of needing a Dramamine patch behind the ear, but my 2002 Chevy TrailBlazer’s ride and handling seemed to have become a lot more “boaty” over the past year. It wasn’t unexpected: 67,000 miles, mostly over country roads and pot-hole-ridden city streets tends to hasten the wear and tear of any vehicle’s suspension.
Shocks wear out about the same time as tires and at the same time-warping miniscule rate, so their demise lulls you into not even noticing they are shot until one day you suddenly realize something is not right and needs to be fixed. Now.
Most standard shocks lose their effectiveness around 15,000 miles. The higher-end gas-filled versions, like the Bilsteins under the four corners of my TrailBlazer, are good for around 50K. After that you might as well say they are just along for the ride—as were mine. They no longer control the vehicle when a big dip in the road swallows it up, nor do they quickly steady the wobbles, bounces, and shakes after crossing the railroad tracks, or help stabilize the movement added by that trailer hooked to the hitch.
Replacing shocks on a pickup or SUV is easy. A bolt on bottom and top are all that keep them in place. But replacing struts is another story; they normally require a trip to the repair shop or dealer where special tools and trained mechanics handle what becomes an expensive half-day task.
But we are going to take you step-by-step to show how you can R&R both the rear shocks and front struts (online) in half the time allowed in the flat-rate book, saving you the $50-$60/hour shop labor rate, paying a premium for OEM shocks, and the cost of a front-end alignment. All you need are the right tools and room to work.
When the job is done your GM SUV’s ride and handling will be better than it was the day it came off the showroom floor.
A word of note about shocks/struts: OEM/factory shocks and struts do not always provide the best ride and handling. They can also be more expensive than “aftermarket” replacements. We know Bilstein changed the shock setup on their non-OEM struts and shocks for this application to provide what they think is a better suspension package, and we concur.
Editor’s Note: This replacement procedure is applicable to all 2002-2006 Chevy TrailBlazer, GMC Envoy, Olds Bravada, and Buick Rainer mid-size SUVs. The procedure may differ for other makes and models of vehicle. Refer to the manufacturer’s recommendations.
Step-By-Step
(REAR SHOCKS)

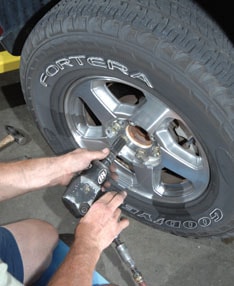
Lift the vehicle and safely secure it. We used a hoist for easiest access, but a floor jack and good jackstands can also be employed. Remove the rear wheels.
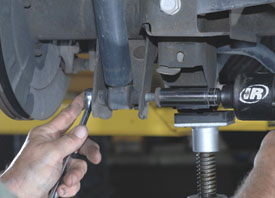
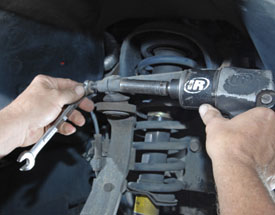
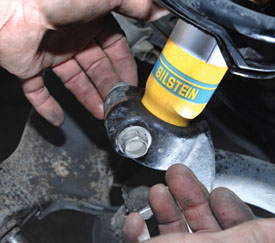
We placed an OTC 2018A 2-Ton Tripod Stand under the axle housing to support the side each shock is being R&R’d. (A floor jack will work the same way for those using jackstands instead of a hoist). Use an 18mm socket and box-end wrench to remove both the upper and lower shock mounting bolts.
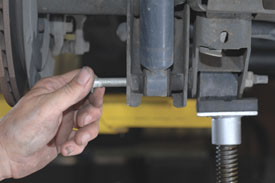
Apply just enough lift on the tripod stand (or floor jack) to allow both the upper and lower shock bolts to slide out freely. The bottom mount might require a little nudge from a long screwdriver or small pry bar to slide out of the mounting bracket.
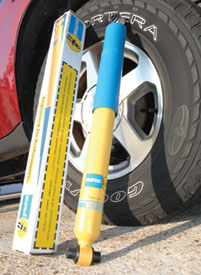
Bilstein is a big shock supplier to GM, including those found on the mid-size SUV’s such as the TrailBlazer, Envoy and Bravada. But Bilstein’s own replacement shocks have different valving and better overall ride control than the factory-spec shocks. So we used Bilstein’s shocks instead of the GM replacement versions.
Before installing the new Bilsteins, note that the top mounting bracket utilizes a special “J”-clip/nut on the inward side. This clip can and may slip down just a fraction when you remove the shock. When the new shock is installed you will have to use your finger or thumb to hold the clip up so it aligns with the mounting bolt.
Install both the upper and lower bolts (supplied with the new shocks) and tighten.
Back off the pressure on the floorjack or tripod stand. Reposition the stand or floor jack to the opposite side and repeat the same steps.

After the new shocks are in place, dab a little Anti-Seize on each wheel stud. This ensures the lug nuts will be easy to remove the next go ‘round.
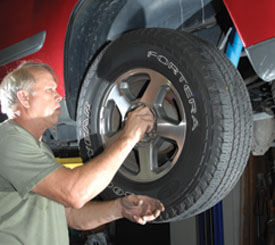
Bolt the wheels back on, torque the lugnuts to the specs found in the owner’s manual, and check the tire air pressure to make sure they are at the pressure indicated on the vehicle’s door placard. That’s it. Total time from start to finish: 30 minutes-tops.
Step-By-Step
(FRONT STRUTS)
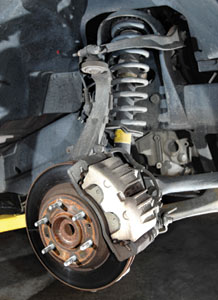
Struts are located inside and attached to the front coils, so they are far more involved to replace than shocks. GM’s repair book allows five hours to R&R the front struts. But following our shortcuts that time can be cut in half—and without having to go to the front-end shop for realignment.

We selected aftermarket Bilstein struts for the front, again because they provide a better ride and handling than the GM/Bilstein OEM struts that came on the SUV.
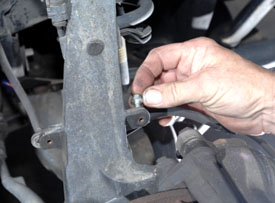
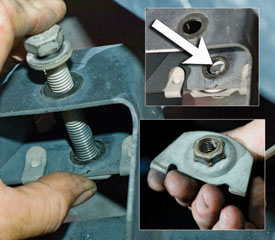
Use a 10mm socket or box-end wrench to remove the brake hose mounting bracket from the back of the control arm.
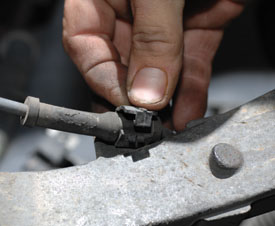
Unsnap the clip that holds the ABS sensor wire to the control arm.
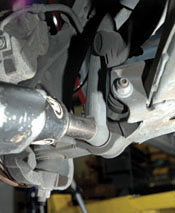
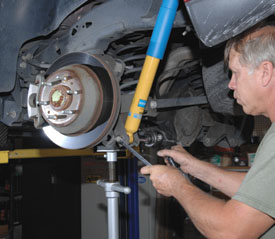
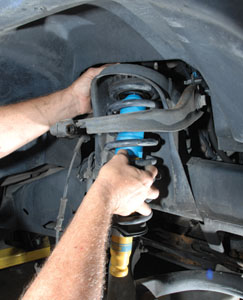
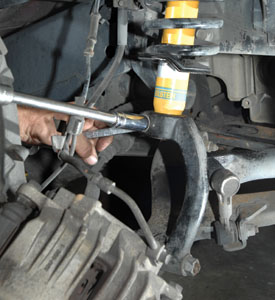
Use 24mm socket to remove the nut securing the lower control arm, and use a 15mm socket to remove the nut/bolt that secures the steering knuckle assembly to the upper control arm.
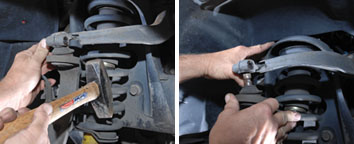
Use a hammer to gently tap upward on the upper control arm until the steering knuckle assembly slips free from the bracket. Use light taps. Lean the hub assembly toward the rear to have easy access to the strut assembly.

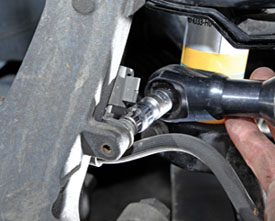
An 18mm socket on a 10” extension makes quick work of the bolt that holds the strut tight to the strut mounting bracket.
The same socket and extension is used to remove one of the two nuts that secure the strut to the tower bracket. Loosen the second nut—but don’t remove yet.
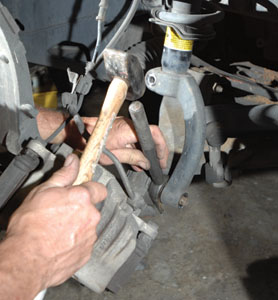
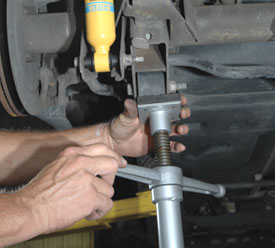
Use the wedge-shaped tie-rod removing tool to separate the strut mount from the lower control arm. Tap gently. It will pop free without a lot of drama.
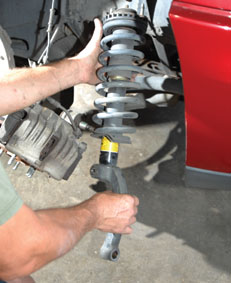
While one hand holds the now loose strut assembly, use the other hand to reach between the fender and upper strut tower to remove that loose nut. This allows the strut assembly to be easily pulled forward and out of the vehicle, just clearing the front sway bar. (The normal procedure calls for dropping the front way bar and lower control arm assembly—both a big pain in time and effort.)
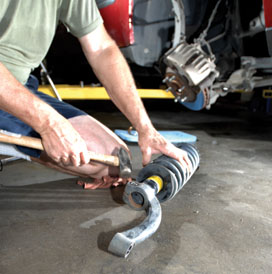
Tap the strut mount off the end of the shock absorber/strut.

Use a dab of whiteout or a felt marker to indicate “out” on the top of the strut assembly just in case there’s some difference in the stud mounting locations.
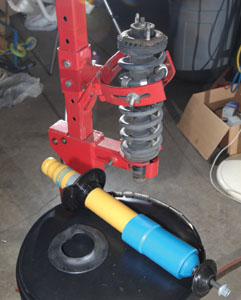
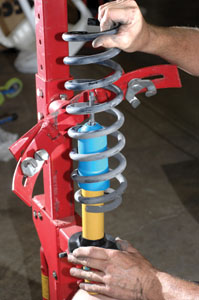
Take your strut assembly to a shop that has a special press designed just for the purpose of disassembling/assembling struts, or rent a good one from your local rental place. Our shop used a Hydraulic Spring Compressor (#45860) from Central Hydraulics. Beware: This is the dangerous part of the job—so use only the tools designed for this task. The spring is under almost 3,000 pounds of downforce while you are taking off the top nut.
Use an impact wrench and 18mm socket to remove the retaining nut. You may need to use a big screwdriver to keep the assembly from turning as the nut is removed. Do not stand directly over the strut assembly as you remove the retaining nut!

Slowly release the pressure from the spring compressor. Remove the spring and old strut.
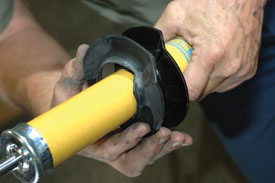
Position the bottom isolation rubber in the mounting plate that is part of the new strut. Then place the strut into the spring compressor stand and place the spring over it. Set up the stand and compress the spring so the top mounting plate can be put in place.
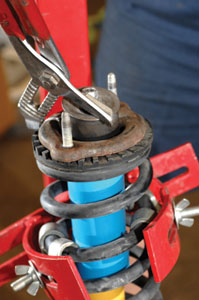
It might be necessary to use a little force to get the mounting plate and rubber damper in place in the coil spring. We used a big pair of adjustable pliers for this job.

With the bracket and rubber seated, use the impact wrench to retighten the nut that holds the strut in place.
Reinstall the strut assembly in reverse order, starting with the top bolts. Do not tighten them until after the assembly is back together.
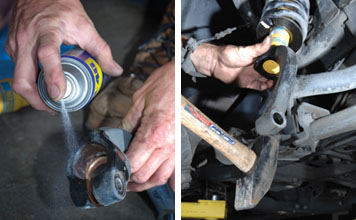
Squirt a little WD-40 lubricant on the strut mount that encircles the strut. Push the strut mount onto the strut and use the hammer to tap it upward, ensuring it is on all the way.
Install the locking bolt but leave it loose so the bracket can be rotated to fit on the lower control arm.

Bolt the strut mount to the lower control arm and tighten. Now tighten the upper mounting bolt.

Rotate the steering knuckle assembly upright and slide it back into the upper control arm. Use the hammer to gently tap the control arm down onto the pivot shaft. Make absolutely sure the steering knuckle pivot is far enough up in the control arm bracket to allow the mounting bolt to lock it in place. If the bolt doesn’t fit in the groove the first big bump will result in the entire steering knuckle falling out.
Recheck to make sure all the bolts and nuts are tight on the lower suspension. Reattach the ABS sensor wire and the brake line mounting bracket. Now tighten the two upper mounting bolts.
Dab Anti-Seize on the wheel studs and remount the wheels just as done on the front. Now you are ready to hit the road.
Special Thanks
Karl Hagar Hagar’s Auto Repair 228-868-7187
GearWrench gearwrench.com 800-688-8949
Bilstein USA www.bilstein.com 858-386-5900
