

Tips and Tricks to Build a Treated Wood Fence
By Matt Weber
Privacy fences not only limit how much of your property other people can see, they also limit how much you can see outside your property.
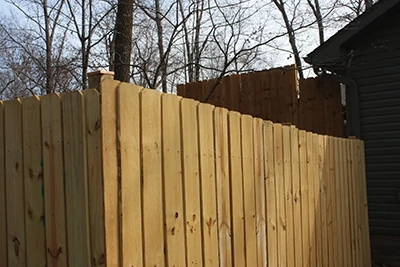
These were both important features to Jay and Jennifer, who moved into their new home only to learn their dogs didn’t get along with the next-door neighbor’s dogs. The neighbor’s solution was to drape a bright blue tarp over a chain-link fence that separated both the dogs and the property. This presented a brand new problem for Jay and Jennifer: The tarp was an eyesore. They decided on a superior solution and built a wood privacy fence to enclose their backyard, and to conceal that big ugly tarp from view.
Here’s how they did it.
Planning
When planning a fence, you have to consider its size, height, style, material and how all that ties into affordability. Fence materials are usually made from wood, metal or vinyl. Treated lumber is the most common and economical choice for wood fencing, although certain wood species like cedar and cypress have natural oils that protect against rot, insect infestation and chemical corrosion.
Jay and Jennifer decided to build a treated wood fence with a “double picket” design.
For a 6-ft. privacy fence, the support posts can be made from 8-ft. 4×4s, and the horizontal stringers (also called fence rails) can be made from 8-ft. 2×4 boards. The treated posts should be approved for ground contact.
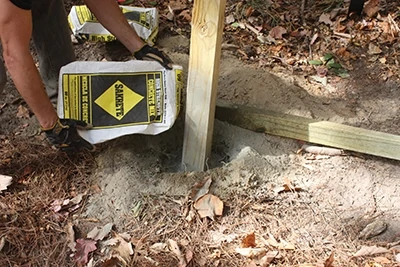
DIY’ers can use concrete sold in ready-mix bags to set the posts. You can even pour in the mix dry, straight out of the bag into the post hole. Once the post base is buried, pour about a gallon of water per bag over the dry mix. We recommend using at least sixty pounds of concrete per fence post.
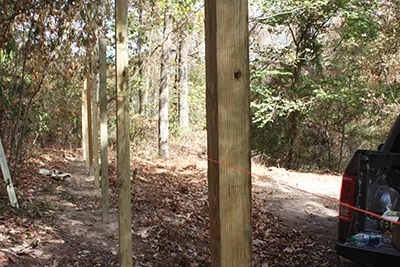
The first phase of building a fence is to lay out the fence with stakes and string and set the corner posts. A good rule of thumb is to dig a hole 1/3 the depth of the overall post height. A 6′ tall post requires a 2′ hole and an 8′ 4×4.
Down in Alabama we sink fence posts a minimum of 2 feet, but the deeper the post is, the sturdier it will be. Loose or unstable soils need more depth in order to support the fence. A good rule of thumb is the “One-Third Rule”, which says to bury at least one-third of the post height for a wooden fence, so the minimum depth for a 6-ft. tall post is 2 feet. Taller fences need deeper posts.
However, different areas may require even deeper post depths. For building in cold climates, you should consider the frost line. Frost below a fence post will push up on it, causing it to move, tilt or possibly fall over. The colder the climate, the deeper the frost line will be. You should dig holes for fence posts at least 6 inches deeper than the frost line. For this reason, many building departments have codes for minimum post depth. They may also require permits and specify construction methods. Check with your building department for guidelines. Some neighborhoods may also have certain architectural guidelines or “covenants” that restrict design.
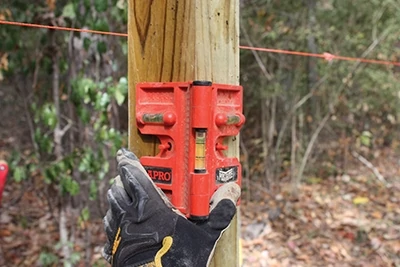
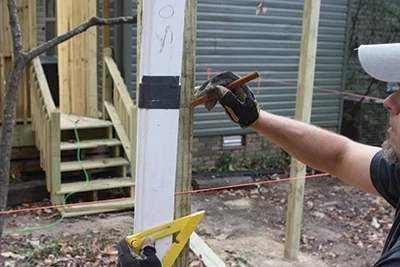
Posts levels are handy because they feature level vials on two adjacent faces of the post, plus they strap onto the post and free your hands.
When spacing the posts, be sure not to spread them wider than the length of your fence rails (usually 6 to 8 ft. on center). The shorter the distance between posts, the stronger your fence will be. When measuring, keep in mind that the ends of the rails can be toe-nailed between the two opposing inside faces of the posts, or they can be face-nailed to the outside of the posts, with the rail-ends butting together in the middle (like we did with the fence shown in this article).
Once, you’ve determined the course of your fence and you know the planned location for your posts, make sure there are no underground obstructions. Before digging, you can dial 811 nationally to get underground utility lines, cables and pipes marked for free. Also, double-check that the location of your fence won’t cross onto a neighbor’s property.
Posts
Pinpoint the location of each corner post first. Drive stakes into the corner-post locations and connect them along the fence route with string. Walk the perimeter and spray-paint a large “X” to mark placement of each fence post.
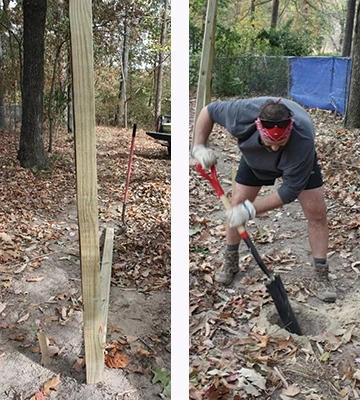
Be prepared for a lot of digging to set the posts. A shovel, a trench spade and a clamshell digger will get the job done, but if you have a lot of holes to dig, save time and labor by recruiting a helper and renting a two-man powered auger.
Before inserting the posts, drop a bed of gravel into the very bottom of each hole to provide drainage for standing water beneath the wood post.
Set all the corner posts first. Have a helper hold the post upright while you use a hand level to make sure it is plumb on top of the gravel bed. A post level is also helpful, because it frees your hands by strapping around the post while placing level vials on two adjacent sides.
Once you’ve established that the post is plumb left to right and back to front, brace the post in place. If you have a helper, they can hold
it in position while you add the premixed concrete. Otherwise, you’ll need to nail boards that extend from the post to the ground to act as moveable braces, with the nails attaching them to the posts serving as their pivot points for adjustment. Plumb and square the post, adjust the braces to hold it plumb, and then add the concrete. Use a hand tamper to compact the ground around the bottom once they’re surrounded by concrete, then recheck for plumb and adjust if necessary. Leave the braces in place while the concrete sets.
Once the corner posts are set, fasten a new string line between them to line-up the other posts. Keep the line on the outside face of the posts and secure it tightly. This string will guide placement for each post between the corners. Set the remaining posts in the same manner, making sure the outside faces of the posts are plumb and line up exactly with the string to keep the fence straight.
Allow all the posts to set for 24 hours. Once the concrete is hardened, cover the base of the posts with dirt and slope the earth away to divert water.
Framing
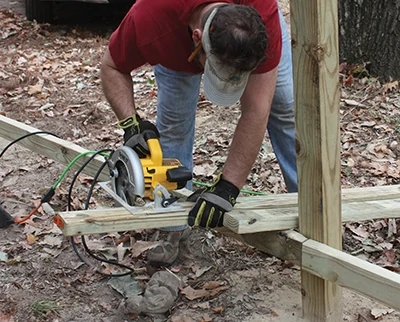
For a standard 6-ft. tall fence, we usually position the bottom rail 10 inches up from the ground. Space the other two rails evenly apart. You may need to alter placement, depending on the height of your fence. The spacing between posts usually varies somewhat, requiring each rail section to be cut to length individually to fit onto the posts.

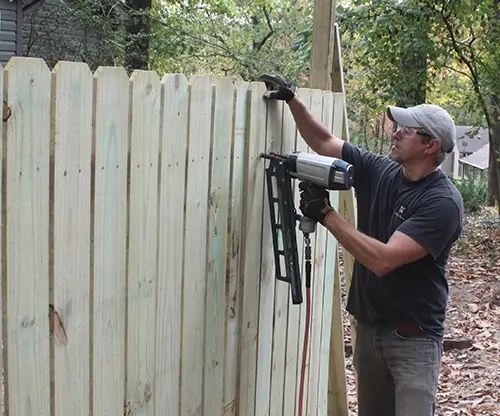
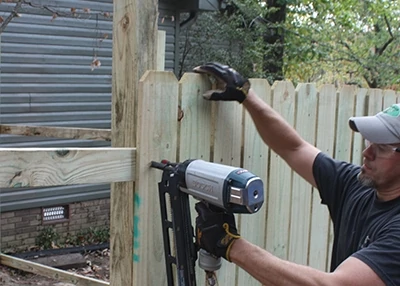
We recommend using a framing nail gun for attaching the rails. Fasten all connections with hot-dipped galvanized nails (3- to 3-1/2 inches long) with ringed shanks for extra holding power. Make sure your fasteners are approved for exterior use in chemically treated lumber.
If you plan to conceal your posts behind the fence boards, then use a reciprocating saw to cut off the tops all at the same height prior to installing the fence boards. If you plan to leave them exposed above the fence, you can cut the posts later.
Installing Fence Boards
Attach the fence boards securely against the rails. The spacing between the boards will be determined by your fence style of choice. On this fence, we decided to use the edge of a fence board to keep the gaps consistent.
Place the first board along the corner post and use a 4- or 6-ft. level to find plumb. Nail it home, using two nails per rail location. Place the spacing block next to the first board and position the second board against it. Drive in one nail at the top rail. Use that nail as a pivot while you find plumb, then nail that board home as well. Follow suit down the rail, spacing each fence board with the block.
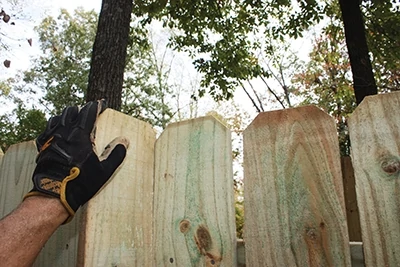
To make sure the tops of the fence boards lined up consistently, we leveled the ground between each pair of posts and laid a temporary 2×4 flat along the ground. By sitting the fence boards on the 2×4, the board tops install in a straight line, and the 1-1/2-in. gap beneath them (once the 2×4 was removed) keeps the fence boards off the ground to reduce water leeching into the end grain.

During installation we sat the fence boards on a flat 2×4 to provide a gap beneath the end grain and to keep the tops of each section in a straight line.
On this particular fence, we covered the first layer of fence boards with a second layer, using the same spacing pattern but staggering the seams to close all gaps in the fence. The second layer of boards adds strength and rigidity to the fence.
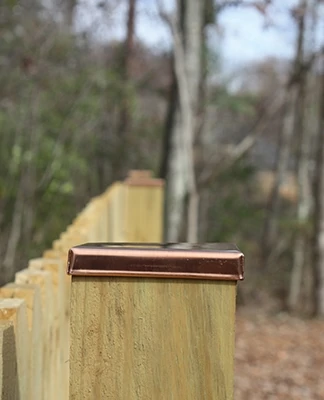
If you haven’t chopped off the post tops, do so after completing the board installation. Jay and Jennifer opted to use copper post caps from SheetMetalCaps.com to decorate and protect the end grain of the posts. Post caps require at least an inch of available post material above the fence boards, so keep that in mind when making the cuts. If you’re not using post caps, you can cut the tops at an angle to help shed rainwater. Otherwise, use a pencil to mark a level line at the cut height, and then use a speed-square to transfer that level line to all four sides of the post. Use the pencil lines as a guide to make the cut with a reciprocating saw.
The caps then fit snugly over the post tops and attach with exterior-grade wood screws.
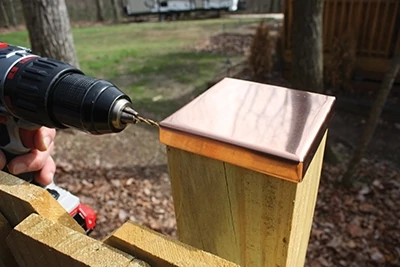
The copper post caps shown were provided by SheetMetalCaps.com. The friction-fit snugly over the post ends. You can also attach them with exterior-grade screws in a matching color.
The new wood fence should be protected with a waterproof stain/sealer. This step also provides the opportunity to apply your color tone of choice. Use a product from a reputable manufacturer to protect against damage from water, rot and UV rays.
Side Note One
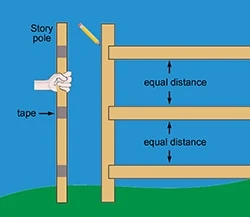
Make a Story Pole
To prevent repetitive measurements, make a story pole from a scrap piece of wood. Mark the height of each fence rail on the pole with masking tape. Place the pole alongside each post and use the tape to determine each stringer location, marking it with a pencil.
Side Note Two
Fence Board Alignment
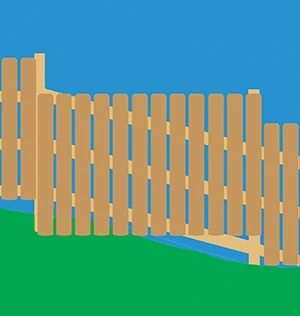
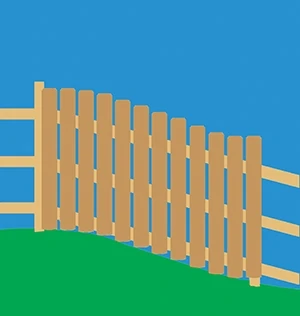
For an easy-to-build fence on a flat yard, DIY’ers might consider using pre-assembled panels that install between posts. The panels are a system of rails and pre-attached fence boards. However, if your yard is sloped, then to keep the panel tops level you’ll have to stagger the panel heights where they fasten to the posts. If the yard has a significant grade, the staggered panels will create gaps at the bottom of the fence, through which a family dog can escape (and unwanted critters can enter).
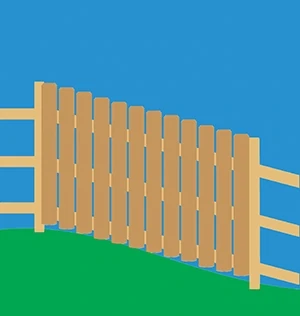
One alternative is to keep each set of fence boards in a straight line between two posts. To do this, attach a string line at the tops of the corresponding posts and use it as an installation guide for the height of the fence boards. Or, use a temporary 2×4 beneath the boards, resting the lower ends on it as you fasten them in place. Removing the 2×4 then provides a gap at the bottom of the fence to keep the wood out of standing water.
Another option is a privacy fence built to closely follow the grade of the yard, adjusting each individually for height as you install it. If doing this, it’s still a good idea to install the boards an inch or two above the ground to avoid water leeching into the end grain.
