Mark Clement
Too much window and not enough wall is a big problem when upgrading some kitchens. Here’s how to solve it.
I’m certain many carpenters and designers will disagree, but in my book a primary focal point in any kitchen is not the tricked-out fridge, the luscious cabinets or the 87-burner stove, but the humble sink drain.
Most sink drains are centered under a window on the exterior wall. And come hell or high water they try to stay there no matter how poorly the fridge fits, or how far away you have to stick the dishwasher so the door opens. This tiny plumbing fixture serves as the control point from which everything on that wall—and by extension, all walls—is laid out.
So, what if the fridge doesn’t fit?
Solution: Make the window smaller. This enables you to change the centerline of the window, which enables you to “re-center” that sink drain. And, this trick works even if the window isn’t dead-centered in the wall span.
The technique works best turning a double window into a single unit. Installation requires building a 1-by box (or sleeve) to fit through the existing window’s rough-opening; the new window is installed inside the sleeve. Note: This is also a good trick for replacing windows in a basement.
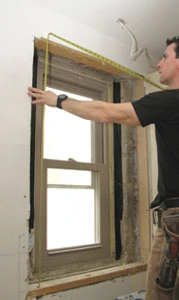
Layout—Measuring the Total Opening
I started by explaining to our cabinet designer at American Woodmark that we could shrink the window. She stitched different cabinets together to compile a good design, which further refined the window area’s size for me. Once she determined which cabinets fit the newly defined wall space, I knew what I had to work with. Next, I refined the exact sizes of things, including the rough opening in the framing, paint strip (if any,) trim size and actual window size.
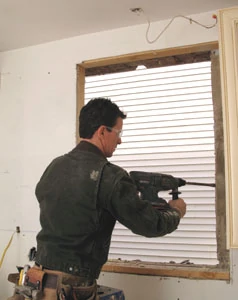
Start with Demo. Strip the window casing and sill so you can see the framing and/or drywall. You really don’t want to alter the framing if you don’t have to, so your absolute left and right in this procedure—and your designer should have these measurements—are the jack studs.
Measuring: Total Opening Width. With the plan in-hand, I mark the wall beneath the existing window for cabinet locations. The upper cabinets to the left and right define the opening’s total width (the actual window unit will be several inches smaller than the opening). I also reconcile this against the planned base cabinet’s centerline below.
I draw plumb lines on the wall to show the upper cabinets and mark my overall opening’s centerline on the window framing. This should be the same centerline as the new window itself—this is an important measurement.
Measuring: Total Opening Height. Height is determined, by and large, by the existing framing. Although you can alter it, the existing sill height and head height are usually fine in my experience.
Determining Actual Window Size
There’s a lot to think about here at the same time. Grab a pencil and a notebook. Detailed sketches help. I start figuring out my exact window size by considering how the trim will look once everything is done.
For example, if I have room with an opening of 40 inches, I’ll need about 2 inches for paint, 3-1/2 inches for trim, and 1/4-inch for reveal between casing and jamb on each side of the window. That’s 5-3/4 inches left and 5-3/4 inches right, which is 40 minus 11-1/2 inches. This leaves 28-1/2 inches for actual window.
For a smaller opening, terminating my casing right into the cabinets is the best play, leaving no room for paint.
While this approach may seem persnickety, it’s the best. Windows with trim that’s too skinny or too wide simply don’t look right. Trim always tells the story of the carpenter who built the project, so gloss over this at your own peril.
And, I don’t order the window the actual size of the opening—I leave 1/4 inch all the way around the window, so now I know I need a window 28 inches wide. Confused yet?
I then repeat the same process to determine height.
Ordering the Window
When I shrink a window opening I want to maximize the remaining space. I also want an easily operable window so a casement unit is the go-to style. It cranks out so you can operate it without climbing on the counter, and you can get a lot of fresh air in or kitchen odors out (or plumes of smoke, if I’m cooking). Also, there are new regional Energy Star guidelines, so check on that before ordering.
Laying Out the Sleeve
Once I take delivery of the window I start building. First, I double-check that the window is the right size. I’ve never had a problem with my supplier, Simonton Windows.
I then measure my wall thickness and exterior trim reveals to determine the width of the sleeve; usually a 1-by-12 ripped to width works fine. I want the sleeve dead-flush with the interior drywall and consistent with the other window assemblies on the exterior. (Note: For basement build-outs with concrete or stone foundation walls plus 2-by framing, walls can be as much as 24 inches thick, so I’ll either use 3/4-inch birch plywood or edge-joined PVC to cover that distance.)
I then build the sleeve using PVC 1-by material from Fypon. I go with PVC because there’s about an 800-percent chance this material will get wet inside and out, and I don’t want it to rot.
Assembling the Sleeve
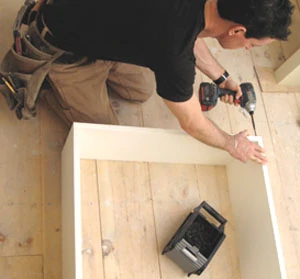
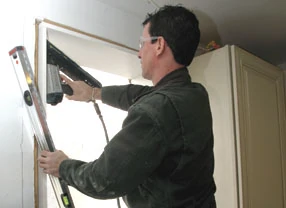
Assembly requires a miter saw, framing square and a drill/driver. Screw the tops to the sides with 2-inch screws. To get the length of the top and bottom pieces, add 2 inches to the window’s width.
The sides are the window height plus 1/2 inch. I cut everything on my slide compound miter saw.
On a flat surface I screw the tops into the sides, squaring them up first with a framing square. Another good thing about PVC is that I don’t have to pre-drill and countersink as with wood. I then tip the sleeve up and test the window fit (easier now than later).
Remove the Existing Window
Strip the existing window back to the framing. Pack in the framing as necessary. Remember not to frame to exact dimensions. I like to place studs at least a 1/2 inch “fat” for my rough opening. You usually need some wiggle room. Shims make up the difference.
Install the Sleeve
The crucial control point for setting the sleeve through the wall is getting it flush—all the way around—with the interior drywall.
To do so, mark the center of the bottom piece. Install the sleeve through the hole. Align the centerline on the jamb with the centerline on the framing or drywall.
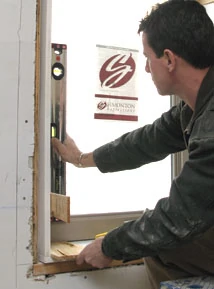
Register the interior edge of the sleeve with the plane of the drywall. I do this with a level held across each corner. Adjust carefully and double-check everything.
Tack it with finish nails. Re-check square and plumb. If the nails deformed the sleeve, pry it back to straight. Shim, and then nail it off.
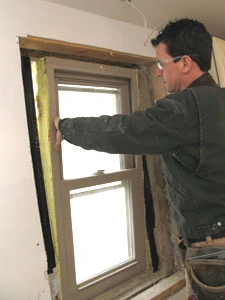
Then, install the window. Each window is different, so follow the manufacturer’s instructions.
Caulk and Insulate
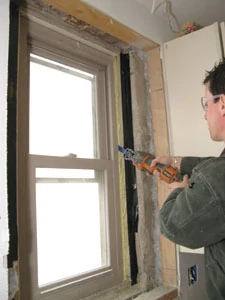
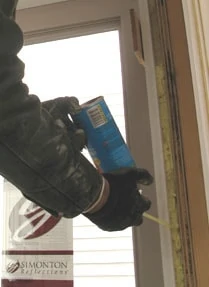
Whether summer or winter, I try to seal the job before wrapping up for the day. In summer, bugs see light through cracks and buzz in. In winter, it’s cold. I caulk the window to the jamb and fill the gap between sleeve and framing with low-expanding foam insulation.
As quickly as possible after sealing the window, I re-frame filler studs for the old window and re-apply sheeting, paper and cladding.
Finally, we finish where we started: interior trim details. I apply the interior trim, caulk, fill nail holes and paint.
And, the trick is complete. No one knows there was a big old honkin’ double window there. The new window looks like it was always part of the house.
Editor’s Note: Mark Clement is co-host of MyFixItUpLife, a licensed contractor, and author of The Carpenter’s Notebook.


