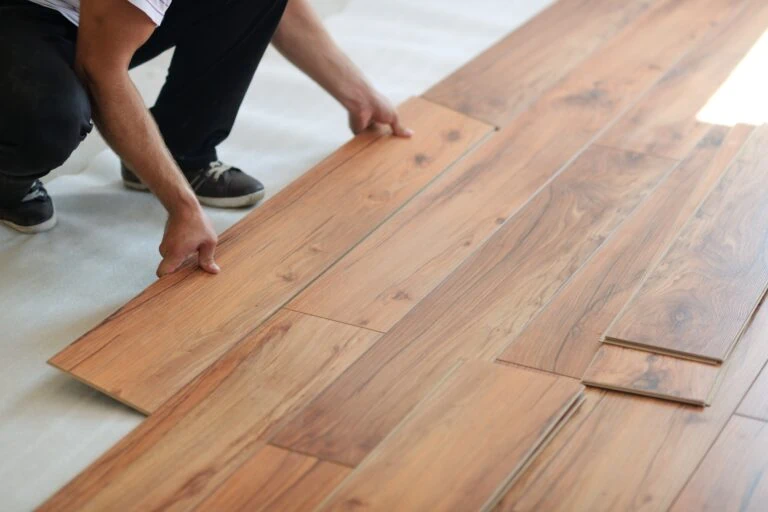
A friend of ours here at the EHT headquarters decided he wanted a new hardwood floor, but wasn’t excited about the hassle of installation or the high-price of contracting the labor. The solution was laminate hardwoods. Laminate flooring offers the classic look of solid hardwoods, but it fastens together seamlessly, without the mess of glue. The floorboards simply snap together using a tongue-and-groove system. The interlocking planks create a strong, tight joint that secures the flooring from wall to wall. The result is a beautiful new upgrade to the room. And the quick installation makes adding a new laminate floor ideal for the weekend warrior.
Laminate flooring is manufactured from high-density fiberboard planks covered with decorative laminate sheeting and a clear plastic wear layer. Choose from a wide variety of wood appearances, such as oak, cherry, walnut, beech and many other options. And many new laminate flooring lines show remarkable attention to detail with the textures of the top surface. You’ll find a wide range of ultra-realistic textures that look and feel like real wood, including worn, rustic looks and high-gloss finishes.
Durability is another key feature. Many laminate flooring products are impervious to most stains and very resistant to scratches. The boards are prefinished at the factory and often feature a built-in edge sealant that protects against moisture absorption. Some laminate flooring manufacturers even offer a lifetime wall-to-wall warranty against wear-through, stains, fading and water damage from everyday spills and damp mopping.
It turned out that laminate flooring was just what this homeowner was looking for, and he chose the Pergo Select brand of flooring in a “Smoked Oak” style. Here’s how we installed it.
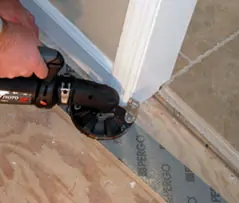
To cut the door jambs to allow clearance for the floor, we used a Rotozip equipped with a flush-cutting attachment.
Stick with a Plan
Your first step is to lay out a floor plan. Sketch the room on paper and mark the dimensions. Calculate the square footage you’ll need, and then order extra to account for unusable cut planks, as well as providing some extra material if damaged planks need to be replaced in the future. Also make note of the different transitions in the room where the laminate will meet other types of flooring or exterior doors. The home store where you purchase the flooring will usually have transition moldings for these areas.
Once the flooring is on site, allow the unopened cartons of planks to remain in the room where they are to be installed at least 48 hours prior to installation. This allows the flooring to shrink or swell slightly, according to the climate of its new home.
After prepping the floor, we installed the foam underlayment. If installing over concrete, a moisture barrier would be required between the subfloor and underlayment.
Laminate can be installed over most flooring surfaces, but always remove carpeting and remove any wood flooring that is installed over concrete. In this case, we dealt with carpet removal, which meant pulling up about 10 billion staples that held down the pad—no fun at all.
Next, make sure the subfloor is clean, dry and level. We got off easy, because this floor was going in the second-story entertainment room, which had a nice, flat plywood subfloor. The laminate planks must fit together correctly to ensure an even finished surface and a seamless appearance, so a flat subfloor is critical. Check for level with an 8-foot straightedge laid across the subfloor. Most manufacturers recommend no more than a 3/16-inch difference in height between any two points in a circle with a 20-foot diameter. If the floor isn’t this level, you’ll need to fill low spots or grind down high spots before installing the flooring. Building paper can be used to fill low spots less than 1/4-inch deep, but you’ll need a Portland cement-based leveling compound to fill deeper depressions.
Cut the registers out of the underlayment so nobody accidentally steps into the concealed hole.
Damp floors present another problem for installation. In the project shown, we installed above a finished basement, so we had no moisture problems to worry about. This might not be the case with a concrete slab, so make sure the subsurface is dry. Check the moisture content of concrete floors by taping the edges of a 2-foot polyethylene square over the concrete. After 24 hours, if no signs of moisture buildup or discoloration appear beneath the plastic, the floor is probably dry enough. Otherwise, seal it.
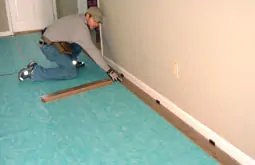
Also, remove any existing base trim along the walls. Because the flooring will expand and contract due to changes in humidity, the planks aren’t installed tightly against the walls of any room. You’ll need to leave a 1/4-inch gap against the wall around the edges of the flooring to allow for the expansion. The spacing must be maintained at every wall in the room. Once the flooring is completely installed, base moulding and/or quarter-round can be reinstalled over the edges to conceal the gap. We used Pergo’s Installation Spacers lined against the wall to ensure consistent spacing. You can also use wood strips.
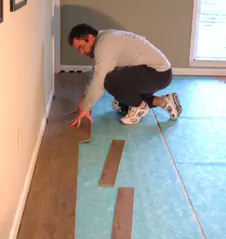
We placed a “dry run” of loose planks to make sure we didn’t have final planks that were too small at the opposite wall.
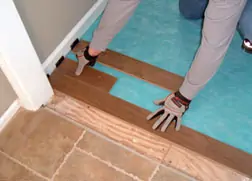
Next step: Undercut the doorjambs and casing to allow room for the thickness of the new flooring. A pull saw works for this job, enabling you to get close to the floor to make the cuts. You can also rent an electric jamb saw. For this project we used a RotoZip equipped with its new flush-cutting attachment, which worked like a charm. Determine the required depth of undercut by stacking a scrap of flooring on top of a piece of foam-cushion underlayment and using it as a saw guide, representing a small, workable sample of the final installed floor. Leave an additional 1/4-inch of space concealed beneath the doorframe to allow expansion.
Laying the Laminate
On concrete subfloors, use 6-millimeter polyethylene film as a moisture barrier. Create an 8-inch overlap to join sheets of film when covering the subfloor. The film is needed over all subfloors that contain concrete, even if the concrete is covered with vinyl, linoleum tile or other type of flooring. Again, we were on second-story plywood, so we skipped the moisture barrier and went straight to the underlayment.
When it’s time to install the floor, cut the tongues off the first row of planks.
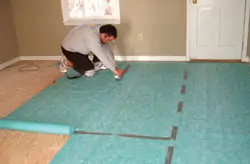
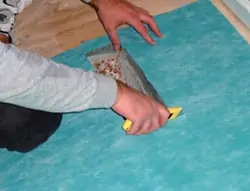
All laminate floors require a foam underlayment to provide extra comfort and noise reduction. Some brands of flooring even have underlayment attached to the underside of each plank. For this job, it came in a roll. Cover the subfloor with underlayment to the edge of the wall, butting the edges and securing the seams with duct tape.
Before beginning the planks, measure the width of the room to make sure the last row of flooring will be at least 2 inches wide. Divide the width of the room by the width of the exposed face of the flooring. The remaining number will be the width of the last row. If the last row is less than 2 inches, cut the first row of boards narrower to allow more room for the last.
To stagger the joints from row to row, we began the second row with a plank cut to 12 inches long.
We also laid out a “dry run” of planks to make sure we didn’t have a tiny sliver of flooring at either end of the room. According to Pergo’s instructions, the flooring planks should have joints staggered by 12 inches, so calculate the first three rows to make sure the staggered joints won’t result in a plank shorter than 6 inches at either wall. If necessary, adjust your layout so this is not the case.
We then assembled the first row of planks with the tongue side toward the starting wall. However, the tongues weren’t actually there anymore—we cut the tongues off the first row with a circular saw. But these planks have two tongues, one on the side and one on the end. To install the first row, begin with full length planks. Insert the end tongue into the groove of the first plank’s end joint and rotate the plank downward. Continue this with each plank until Row 1 is complete. You’ll probably have to cut the last plank to length.
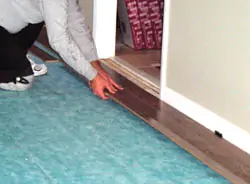
Maintain a consistent expansion gap around the flooring by using spacers between the walls and the planks.
I should point out that you should follow the directions of your particular product, because laminate flooring doesn’t always install exactly the same. But for this project, we then cut the first plank of Row 2 to 12 inches. Start Row 3 with a cut length of 24 inches. On Row 4, start with a full-length plank again. Repeat this process throughout the room to keep the joints consistently staggered.
To join the planks of Row 2 to Row 3, insert the long tongue of Row 2’s first plank into the groove of Row 1 until the laminate edges meet, and then press downward until the joint locks. There should be no gaps at the joints.
To install the planks, insert the long tongue into the groove of the preceding row. Tilt downward to lock the joint together. Then slide the plank, pushing its short tongue into the preceding short groove.
After completing Row 1, installation gets a little trickier because you have to join both tongues—on the side and at the ends. To do so, first insert the long tongue of Row 2’s second plank into the Row 1 groove and rotate downward. Then, kneel on the first plank of Row 2 while you push together the end joint of the second plank into the first.
Once Row 2 is complete, install Row 3 in the same manner, but cut the first board to keep the joints staggered. Repeat the installation from row to row throughout the room, always keeping the joints staggered. Unless you’re really lucky, you’ll probably have to rip the last row of planks to width, and using a table saw is your best bet for that operation. You can also use a jigsaw to notch planks to fit around various corners or other obstructions in the floor.
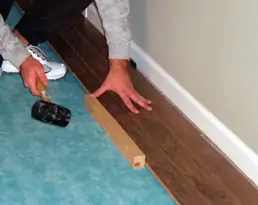
You can encourage stubborn T&G joints to lock by using a hammer and a wooden block.
Occasionally you’ll end up with a stubborn plank that doesn’t want to “click” together easily at the tongue-and-groove joint. You can join these with a wood block and a hammer. Align the tongues into the grooves of the short and long sides. Place the block no closer than 8 inches from either end of the plank and tap along the side until the joint is closed tightly.
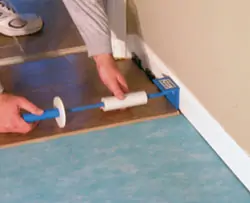
Another tough spot is installing the last plank on each wall. These planks present a problem because the wall obstructs where you need to be in order to push the end joint together. This means you need a pull bar to pull the last plank into the joint. We used a tool called the Lam-Hammer, a specialty tool designed explicitly for this purpose. It hooks the end of the plank and allows you to jerk it into the joint with its sliding handle. The Lam-Hammer made quick work of these tricky planks.
For tricky end planks, we pulled them into place with a special tool called a Lam-hammer.
After the floor was complete, the result was really striking—a beautiful new floor that took only a weekend to install—and we did it ourselves. You can, too.


