Discover small problems before they get big.
The purpose of a home inspection is to examine the inside and outside of a home, including the grounds, the structure and mechanical systems. The inspector looks for defects, broken or obsolete components, and damage due to weather, rot, or wear and tear. A qualified professional inspector then provides the customer with an itemized and detailed summary of the findings.
While a do-it-yourself inspection won’t be nearly as thorough as hiring a pro, a yearly examination of your house is a good way to analyze your property and determine any necessary repairs you can make to prevent bigger problems in the future. Plus, you can take some cues from the pros regarding how to organize your inspection and how to look for red flags that can lead to more trouble down the line.
Site Analysis
According to Robb Graham, president of Professional Home Inspection Institute, a home inspection boils down to three major considerations: Water, Safety and HVAC. “For example, one area of a home inspection is site, grounds and grading, and the primary concern is proper grading to ensure water is running away from the house,” says Graham. “Another area of inspection is sidewalks, and ensuring cracks will not create a tripping hazard, which is a safety concern.”
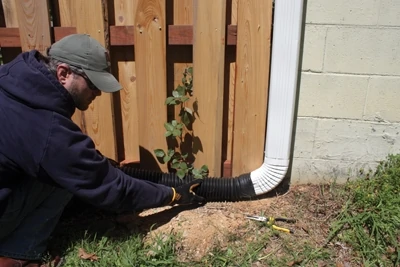
The home inspection typically begins with a site analysis, examining in particular the drainage and grading of the property. Proper grading ensures that surface water is directed away from the foundation. Poor drainage can lead to accumulated hydrostatic pressure against the home’s walls, which can cause basement walls to buckle, or lead to water erosion, which can weaken the home’s foundation. The grading should be sloped away from the house, dropping 6 inches for every 6 feet.
You’ll need a flashlight to inspect crawlspaces and unlighted basements for any signs of water penetration or cracks through foundation walls. A 4-ft. level will help determine if foundation walls or exterior retaining walls are listing or bowing from external pressure—problems that can eventually lead to collapse. Use a pick, screwdriver or awl to check areas for wood rot or decay in the framing. Wood rot is caused by a fungus and is as damaging as termites.
Check framing members near the ground for signs of termite infestation. Termite-damaged wood shows mud tubes that are lined with dirt. Termites’ wings also fall off easily, so a pile of wings is another clue to their presence.
Cracks in a floor slab or evidence that it is heaving upward probably indicates a high water table. Installation of footing drain tiles can counteract problems associated with a high water table.
If a home has a sump-pump, then drainage is probably an issue. Check the foundation perimeter for ruts on the ground or bare spots where the grass has eroded. This may indicate more water flow than the ground can absorb, which leads to erosion and could eventually weaken the foundation. Installation of drainage conduit can provide a solution.
Inspect trees and landscaping as well. Tree overgrowth can lead to too much shade, which can contribute to mildew and rot on the house. Overgrown trees and shrubs that contact the house can lead to pest infestation and should be trimmed back.
Inspect all walkways, driveways, patios and stairways for any disrepair or damage that can cause a safety issue. All stairways must have a concrete footing and foundation. Make sure the steps don’t tilt, heave or sink to one side. Generally any platform above grade must have a sturdy handrail system. Current building codes stipulate that handrail balusters are spaced no more than 4 inches apart so children can’t get their heads stuck between them.
Check all decks, porches and balconies for structural integrity. For decks attached to the house, pay close attention to the ledger board connection, which is prone to rot and water damage if improperly installed and is a common cause of deck collapse.
House Exterior
Inspection of the home’s exterior begins with the foundation and footings, looking for cracks, bulges or excessive settlement. Hairline cracks in the foundation may be only cosmetic shrinkage cracks that occur as the foundation cures, but they should be monitored. Cracks that are V-shaped (wide at top, narrow at bottom) are likely caused by uneven settlement of the footing and usually worsen over time. A crack that runs from the wall and continues to the floor may also indicate a significant settlement problem. If this is the case, excavation below the existing foundation may be necessary to build a support foundation.
You can check for floor framing problems in the basement. Look for twisted, damaged or rotted joists that can cause a weakness in the floor area. A sagging floor may be caused by a sagging main bearing beam, which can be caused by support columns spaced too far apart. There should be double floor joists under all wall partitions to prevent sagging from the wall’s weight.
Any evidence of bulging or bowing exterior walls could indicate a problem with the studs. Studs can warp if water has penetrated the wall and contacted the wood.
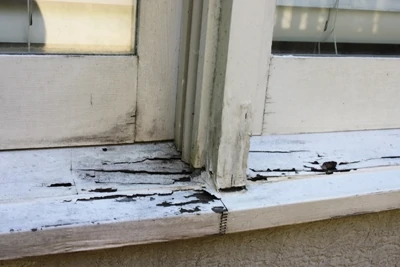
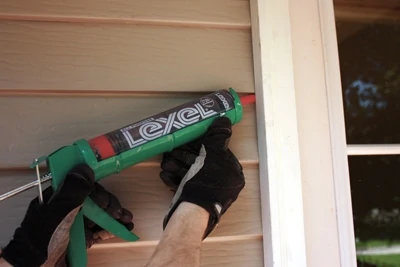
Inspect the home’s windows for proper and safe operation and check the casings for rot—a common problem with wood windows. Use an awl to test the integrity of the wood. Look for flashing above and around the window. Instead of flashing, the window may have wood molding to divert water, but the molding is subject to rot and can allow water to penetrate the building. Make sure that caulking is in good condition, which prevents water penetration as well as air intrusion that can lead to cold spots in the home.
At the doors, check the thresholds for normal wear and tear and wood rot. Make sure they operate properly and that the hinges are firmly attached.
Wood trim is susceptible to rot and moisture damage. Check for warping, splitting, peeling paint and missing caulking.
“Another area of home inspection is the roof system,” explains Graham, “which is ensuring rain, snow, and moisture do not enter the house.”
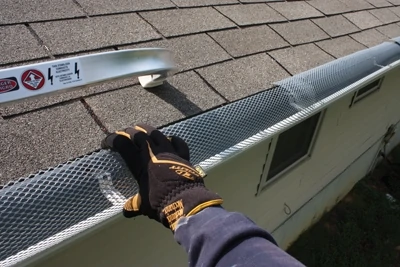
Use a ladder to inspect the exterior of the roof for loose or missing shingles. Look for shingles that are blistered, cracked, buckled or curled at the edges, or gutters filled with large amounts of granules, which could indicate the shingles are nearing the end of their useable life. Check for worn or missing roof flashings, and look for any signs of roof deck bowing, expansion or waviness, which indicate a problem with the framing.
Chimneys should extend 3 feet above the highest point where it passes through the roof and at least 2 feet higher than any portion of the building within 10 feet. Check for structural cracks to the exterior or evidence of smoke escaping through mortar joints. Look for a distorted or discolored rain cap. Look for creosote flakes on the roof and ground, or damaged roofing material from hot creosote that could indicate a dangerous accumulation.
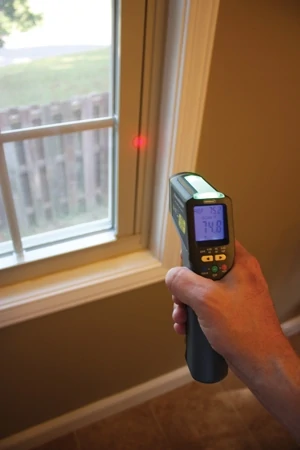
Inspect all skylights, vent stacks and similar roof penetrations for proper flashing and signs of leakage. Inspect the gutters and downspouts for any leaks or cracks. Make sure they’re free of leaves, dirt or other debris that might impede drainage. A leaky gutter can lead to water accumulation at the foundation, and clogged gutters can lead to poor drainage and even ice dams at the roof line.
At the mouth of the downspouts, pull out your tape measure. Today’s building codes generally recommend that water should be diverted 10 feet away from the house foundation. The further away the water flows, the safer the home. This can be accomplished with downspout extensions, splash blocks or downspout drains.
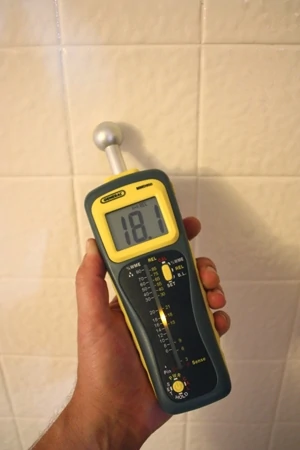
Check your exterior cladding for structural integrity, secure attachment and any signs of rot or water penetration. Always check for functional weep-holes in brick and brick veneer. In stucco, check for cracks due to the expansion of the plywood sheathing beneath it. Any size crack in stucco will allow moisture to penetrate. When inspecting EIFS (Exterior Insulating Finish System), professional home inspectors use a special wall moisture meter to detect unseen areas that contain moisture behind the wall surface.
Don’t forget to inspect the garage. “The garage can have a lot of safety hazards,” says Graham, “from the firewall to fire-rated doors, to garage doors that are not calibrated correctly. A garage door with incorrect settings (for the downward force on the door) can damage a car, or worse, can come down upon a small child. A garage door must also have a sensor that triggers it to return up if there is an item blocking the door.”
House Interior
Your interior inspection should proceed in an orderly fashion to make sure nothing gets missed. Professional home inspectors often use an itemized checklist to keep track of the many similar components found in each room. By virtue of living in the home, you’re probably aware of most of your home’s problems, but it’s a good idea to pay close attention to the rooms you rarely occupy. Examine the walls, ceilings, floors, doors, window, stairways, counters and cabinets. The attic, fireplace, basement and/or garage are also included in the inspection. Some inspectors start at the attic and work down; others start at the basement and work upward. The most important inspection criteria should be the safety of the occupants, followed by the functionality of the house components.
“For the interior, look for signs that there may be water issues,” suggests Graham, “Interior doors that are shifting can be a sign the foundation is shifting due to water pressure.”
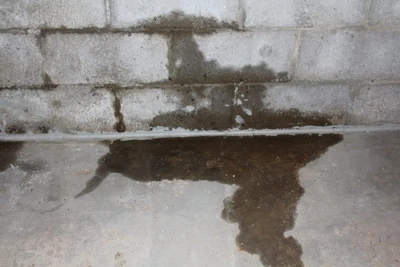
A wall or ceiling may sag if it has been exposed to water. You should determine the source of any water penetration and address it immediately. Also, check for popping nails that may indicate inadequacies in the wall framing.
When plaster walls are exposed to water and then dry, the plaster can turn into a powdery substance with no structural integrity. Over time, plaster can crack and loosen due to temperature changes and natural shrinkage. Hairline cracks are not a major concern, but plaster that detaches from the wall could pose a safety hazard.
On walls with wood paneling, make sure the panels are not bowing or warping, which could indicate moisture behind the wall. “Look for humidity issues or problems in all areas, but especially the attic,” says Graham. “The attic area can have serious problems with humidity, and must have proper ventilation. Humidity problems can originate from a bathroom vent that terminates in the attic, as well as roof leaks.”
When inspecting bathrooms, make sure that shower pans aren’t leaking by checking the ceiling beneath them for signs of moisture or stains. A moisture meter is a good tool to test for moisture hidden behind bathroom tiles.
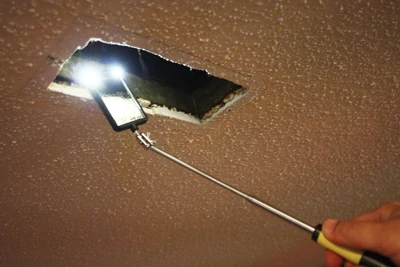
Check the ceilings for nail pops, cracks or sags that could indicate underlying structural problems. If the ceiling joists are causing the ceiling to sag, this not only stresses the ceiling but the adjacent walls as well.
Make sure suspended ceilings are securely fastened. Pro inspectors check behind the panels to make sure the grid wasn’t constructed to hide a problem that may or may not have been addressed.
Make sure all doors and windows operate properly in case of fire. All stair railings should be tightly secured and have no loose treads or risers.
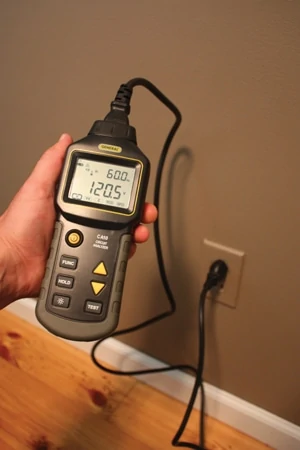
“The electrical system can have safety concerns with anything that is wired incorrectly,” says Graham. “Faulty wiring can cause major safety issues, as well as shock hazards, and inspectors also note the use of GFCI circuit breakers, which provide safety in case of a ground fault.” Professionals inspect the electrical service drop, the breaker box as well as the condition of any exposed wiring. They often use a three-pronged circuit analyzer to make sure wall receptacles are operating in the appropriate 120-volt range. Low voltage may be caused by a wire that is too small for the electrical load, a circuit that is too long, or conductors that have a higher resistance when operating at high temperatures.
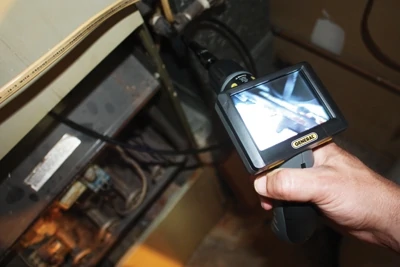
Inspect your chimney interior for signs of creosote buildup, deterioration of mortar or other damaged components that could pose a fire hazard.
Your DIY inspection is also a great time to check the functionality of the smoke detectors in your home.
Plumbing and HVAC
“The plumbing system is dealing with water and ensuring the water is flowing correctly,” says Graham. Check pipes for leakage, corrosion and adequate insulation.
The most efficient way to inspect the plumbing system is to proceed room by room. Check all plumbing fixtures for proper drainage as well as the functionality of shutoff valves.
In older homes, make sure the home isn’t still using lead pipes, which is a health hazard. Apply a magnet to metal pipes. If the magnet adheres, the pipe is made of galvanized steel; if not then it’s likely a lead pipe.
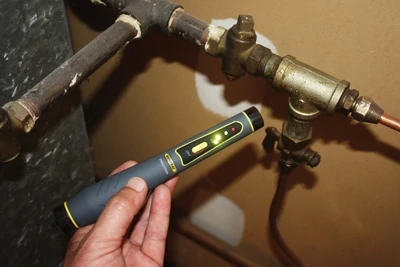
If the home uses well water, visually inspect the storage tank and other components and test the well pump.
One way to verify that your house has adequate water pressure is to turn on all the faucets. There should still be a steady stream of water coming from each of the faucets. If not, the pipe diameter could be too narrow.
“The HVAC system is not related to safety or water, but instead to performance,” notes Graham. “With older systems, an inspector would open the furnace and inspect the flames and other parts. Newer furnaces cannot be inspected in that manner.”
HVAC is a very broad category encompassing a wide range of systems, from the popular hybrid systems that couple a furnace with an air-conditioner to geothermal systems that extract heat stored in the earth. HVAC systems can be powered by electricity, gas or oil. They can be configured as forced air-systems, boilers, steam or radiant systems. If you aren’t well-versed in the technology of your system, then it’s good idea to have your home’s HVAC system inspected annually by a certified technician.
Wrapping up
In a buying situation, a professional home inspection takes the pressure off the realtor and seller of the home, and it helps assure the purchaser. “If a home has a problem, and it’s not inspected,” explains Graham, “then the buyer might not know about an issue that is expensive to fix.” And surprise repairs generally don’t make new homeowners happy.
The same holds true for existing homeowners. By carefully analyzing your home for signs of wear, rot, damage or malfunction, you can address problems before they worsen and head off issues before they require a more costly, stressful and disruptive repair.
Editor’s Note: The Professional Home Inspection Institute (PHII) provides training for home inspectors nationwide. The training is online and easy to follow. Each lesson has learning material in pictures, text, video and audio, and there are practice quizzes and flash cards to help learn the material. Learn more about PHII at www.homeinspectioninstitute.com.
Side Note 1
Home Inspection as a Professional Career
More than 75 percent of people purchasing a home will call on the services of a home inspector to give the property a so-called checkup. With so much demand, home inspection can be a very promising, rewarding, fun but challenging career choice. A home inspector has to constantly keep up on education, be aware of new technologies and constantly market their business. A professional inspector follows specific Standards of Practice, either from a home inspection association such as ASHI or NAHI, or they may live in a state that regulates home inspectors through specific state standards. Some states can have rigorous requirements. Education is very important, because home inspectors have to know about the major systems in the house. By going through a professional training school such as American Home Inspectors Training Institute (AHIT), inspectors in training can learn how to properly inspect a home, fill out the inspection report and how to successfully market their business, regardless of their background. Learn more about pursuing a career in professional home inspection at the AHIT website, www.ahit.com.
Side Note 2
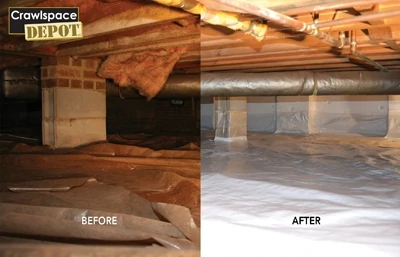
Closing crawl spaces saves energy costs, prevents the fallout from built-up moisture and improves air quality throughout the home. It also eliminates conditions conducive for termites and mold, and improves equipment performance in the crawl space. Vented spaces worked before air conditioning, but now when a family cools their home to 72 degrees and the air outside is 85 degrees with 80-percent relative humidity, it creates condensation on the floor joists, insulation, pipes and ducts. Ventilation won’t solve the problem anymore. This constant condensation during the summer causes wood rot, mold and musty odors, and attracts all types of insects, including termites. The professionals at Crawlspace Depot make it possible for both homeowners and professionals to acquire the right products and support to close crawl spaces in any home using materials available through a single online source. Closing a crawl space, which includes sealing the vents, insulating the walls, creating a vapor barrier and conditioning the air in the crawl space, is now considered the best practice standard. Research funded by the U.S. Department of Energy and conducted by Advanced Energy (Raleigh, NC) shows that closing the crawl space creates up to an 18-percent energy savings on heating and cooling costs. Learn more at www.crawlspacedepot.com.


