

Step-by-Step Instructions and Professional Tips For 5 Home Exterior Updates that Will Make a Big Impact
Nick Slavik, Professional Painter and Purdy Ambassador guides you through these high-impact DIY painting projects that elevate curb appeal.
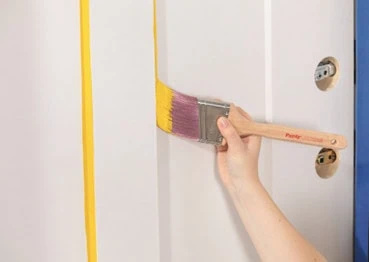
Front Door Makeover: Repaint your front door for a welcoming statement. Use high-quality applicators for a super smooth finish like the Purdy Nylox brush for detailed work around panels and edges, and the Purdy White Dove Jumbo Mini Roller Cover for flat sections.
Supplies:
- Mild soap, water, sponge or cloth
- Sandpaper (120- to 220-grit)
- Painter’s tape
- Drop cloth
- Primer (if needed)
- Exterior paint (latex or oil-based)
- Purdy Nylox Brush (for edges and panels)
- Purdy White Dove Jumbo Mini Roller Cover (for flat areas)
- Screwdriver (to remove hardware)
Steps:
- Remove Hardware: Use a screwdriver to take off handles, locks and decorative plates.
- Clean Surface: Wipe down the door with a mixture of mild soap and water to remove dust, grime and grease.
- Sand Lightly: Use fine sandpaper to smooth the surface and help paint adhere. Wipe off dust with a damp cloth.
- Tape Off Areas: Apply painter’s tape around hinges, windows, and any areas not being painted.
- Prime (If Needed): If changing from a dark to a light color or if the surface is bare wood or metal, apply a coat of primer and let dry.
- Paint Panels and Edges: Start by using the Purdy Nylox brush to cut-in around edges, recessed areas and door panels.
- Roll Flat Surfaces: Use the Purdy White Dove Jumbo Mini Roller for the main body of the door to achieve a smooth, lint-free finish.
- Reattach Hardware: Once fully dry, reinstall hardware.
Nick Slavik Pro Tip: “Work top to bottom, panel by panel keeping a wet edge. This will give you that even, pro-like finish! If you’re going for a drastic color change (think tan to deep regal red), prime first with a tinted primer, then apply two topcoats.”
Window Trim Refresh: Update the trim around windows to brighten the home’s exterior. Opt for an angled brush, like the Purdy Nylox Dale, which is perfect for a smooth finish and fewer brush marks on trim.
Supplies:
- Mild soap and water
- Sandpaper
- Painter’s tape
- Drop cloth
- Primer (optional)
- Exterior trim paint
- Purdy Nylox Dale Angled Brush
Steps:
- Clean Trim: Wash the trim to remove dust, cobwebs and mildew.
- Sand: Smooth down the surface, especially if old paint is chipped or peeling.
- Tape Edges: Use painter’s tape to protect adjacent surfaces like siding or window glass.
- Prime if Necessary: For bare wood or stained areas, a primer will ensure proper paint adhesion.
- Paint: Use the Purdy Nylox Dale angled brush to apply paint to the trim with few brush marks. The angled bristles help with precision around trim.
- Second Coat: After drying, add a second coat if needed.
Consider small upgrades for personality, like shutters in a bold color, or place elegant personalized doormats beneath each freshly painted window to add charm and cohesiveness to your exterior design.
Nick Slavik Pro Tip: “Before painting, be sure to seal out water and bugs by caulking joints between the siding and trim and the windows and trim.”
Shutter Revitalization: Paint shutters with a new color that complements the home’s exterior. Remove shutters from the windows and lay flat on a drop cloth to prevent drips and ensure full coverage. Use a Purdy XL Brush for a smooth finish that is designed for latex and oil-based paints.
- Screwdriver
- Soap and water
- Scrub brush or sponge
- Drop cloth
- Sandpaper
- Exterior paint
- Purdy XL Brush
Steps:
- Remove Shutters: Unscrew shutters from the house to paint on a flat surface.
- Clean Thoroughly: Use soap and water to remove dirt and mildew. Let dry.
- Sand: Lightly sand to remove old flaking paint and create a surface for new paint to adhere.
- Paint with Purdy XL Brush: Lay the shutters flat on a drop cloth to prevent drips. Use the Purdy XL brush, designed for latex and oil-based paints, to apply paint evenly. Start with slats and finish with the frame for even coverage.
- Reinstall Shutters: Once dry, screw the shutters back into place.
Nick Slavik Pro Tip: “I recommend reinstalling shutters with coated deck screws to prevent rusting. Also, don’t forget to touch up screw heads with the paint to make them blend in seamlessly with your updated shutters.”
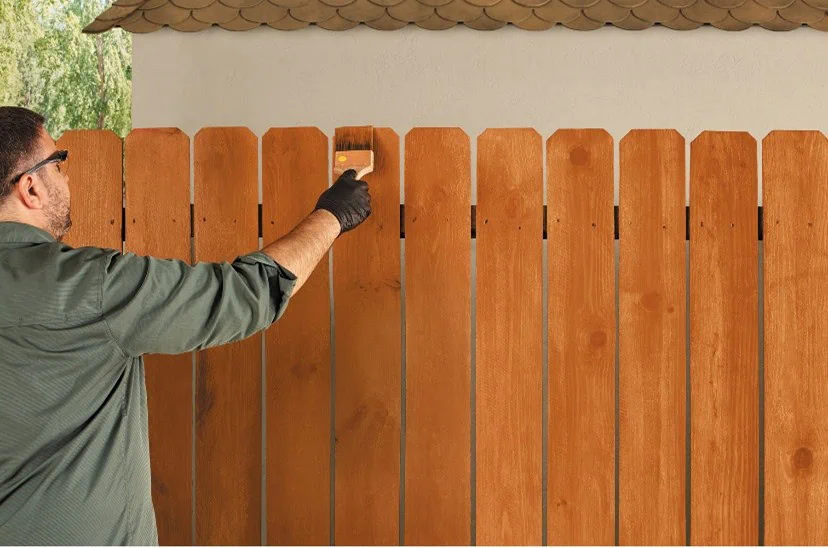
Fence Facelift: Apply a fresh coat of stain to a wooden fence. Clean and prep the fence thoroughly before staining. Use Purdy’s Pro-Extra Brush for an even application on rough surfaces. Remember to apply with the grain of the wood for best results.
Supplies:
- Power washer or hose
- Sandpaper or sanding sponge
- Exterior wood stain
- Purdy Pro-Extra Brush (for rough surfaces)
Steps:
- Clean the Fence: Use a hose or power washer to remove debris, mold and mildew. Let dry thoroughly.
- Sand as Needed: Sand down any rough or splintered areas and remove old paint or stain.
- Protect Nearby Areas: Don’t forget to use drop cloths if painting around flower beds or concrete surfaces.
- Apply Stain: Use the Purdy Pro-Extra brush for efficient coverage on rough wood. Be sure to work with the grain and apply in long, even strokes for uniformity.
Nick Slavik Pro Tip: “Use stain, not paint on a wooden fence. If you want a ‘painted’ look, try a solid color acrylic stain. It gives you an opaque finish like paint but penetrates so that peeling will not occur down the road.”
Garage Door Update: Garage looking dingy? A quick paint refresh can make a world of a difference. Wash the door first to remove dirt and debris. Tape off any handles or decorative hardware and use a Purdy XL Brush to paint recessed areas and a 9” White Dove roller on flat surfaces.
Supplies:
- Mild detergent or degreaser
- Hose or power washer
- Sandpaper or sanding sponge
- Painter’s tape
- Drop cloth
- Exterior paint
- Primer (if needed)
- Purdy XL Brush (for recessed areas)
- 9” Purdy White Dove Roller
Steps:
- Wash the Door: Clean thoroughly to remove dirt, cobwebs and grime. Let dry.
- Sand Lightly: Scuff the surface of the garage door to prep the surface for adhesion.
- Tape and Mask: Cover handles, windows and trim with painter’s tape and lay drop cloths to protect your driveway.
- Prime (If Necessary): For bare metal or if changing from a dark to a light color, apply a primer.
- Brush Recessed Panels: Use the Purdy XL Brush for any recessed or detailed areas.
- Roll Flat Panels: Use a 9” Purdy White Dove roller to cover larger flat surfaces quickly and smoothly.
- Second Coat: Reapply as needed after drying.
Nick Slavik Pro Tip: “Move the door up and down between coats and after you have finished painting. This will help prevent the door from sticking shut!”
For more information on these projects plus painting tools and supplies, go to purdy.com
