

By Clint C. Thomas, Esq., Photographs By Zoe Thomas
My wife and I decided to replace our existing bathroom floor with ceramic tile in order to have an updated appearance plus something more child proof. Let’s face it; kids can be rough on a house. The overall process of installing a ceramic tile floor is time-consuming at worst case, but there is not really anything difficult about it.
Begin by demolishing or removing the old flooring and any trim work that touches the floor, such as baseboards and door casing.
After the subflooring has been removed, get on your hands and knees and examine the entire floor looking for any nails that are protruding. Either remove them or pound them back into the plywood.

Removal of the old flooring and baseboards is the first phase of the project. Complete any painting in the room prior to installation to avoid getting paint on the new tile. Replace any damaged subflooring as necessary.
Suitable Subfloor
Ceramic tile can be applied directly to the plywood subfloor, but that is not recommended because moisture can get into the plywood from several sources and eventually rot it. Therefore, it is very important to install a cement backer-board over the plywood.
For this project, I used a product called Hardie-Board. It comes in different thicknesses, and I chose the 1/4-inch version so I wouldn’t increase the thickness of the floor more than necessary. Hardie-Board is a mixture of cement and a fiber product. Actual cement board is also available, but is typically only used in showers. It costs more, is heavier and normally is found in 1/2-inch thick sheets.

I used a product called Hardie-Board over the subfloor. I chose the 1/4-inch version to avoid increasing the thickness of the floor more than necessary. Snap chalk lines on the Hardi-board to help guide a square installation.
Backer-board can be installed with either screws specially designed for this purpose or with roofing nails. If nails are chosen, make sure that they are not the type that has the plastic cap on the head of the nail. The old fashioned, all metal roofing nails are required.
Prep and Layout
Now that the rough carpentry work has been completed, it is time to start working with the tile. However, before you dive right into the installation process, allow me to give a couple of suggestions. First, do all of the painting that you are thinking of doing. It doesn’t make any difference if you get paint on the cement board, but you don’t want it on your new tile. Also, if you spill any paint make sure that you smooth out the spill. Otherwise, it will cause an uneven spot on the subflooring which will make the tile uneven.

Dry-fit every single piece of tile for the entire room making sure that you use tile spacers while doing this.
With the backer-board down and all of the painting finished, it’s time to start laying out the tile. I use the words “laying out” because you should position, cut and dry-fit every single piece of tile for the entire room, making sure to use tile spacers while doing this. Do not use any mortar at this point. The cutting and positioning of the tile is a very time-consuming process, and you don’t want your mortar to dry while trying to fit a stubborn piece of tile.
Now, there are two choices as to how you get started. One is to select a corner that you believe is square and work out from there. This has the advantage of eliminating having to cut so many tiles because the tile will lay right along two of the room’s four walls causing you to have to cut the tile only for the remaining two walls. The down side is that you may do all of that work and then find out that the corner that you thought was square is not.
The second method is to use a chalk line and tape measure to determine the center of each wall followed by the center of the room. Snap the chalk line on the floor from point to point and you’ll end up with a giant “plus” sign on the floor. The intersection of the two lines in the middle of the room will be the starting point from which you lay out the tile.
The second method is the most effective because it centers the floor in the room and keeps the grout lines square to the room. The only two down sides to this method are that it takes longer and it usually involves cutting tile around all four walls.
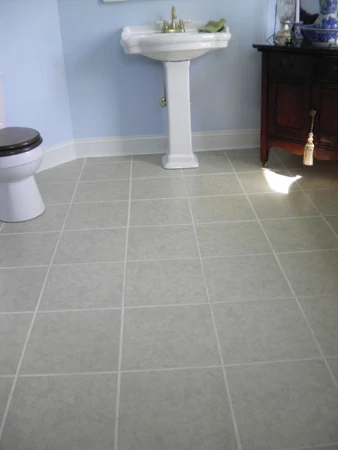
Another factor to consider is the spacing of the pieces of tile at key points in the room. By key points I am referring to doorways, areas in front of sinks and any other heavily used locations. I prefer to have full pieces, or as many full pieces of tile as possible in high traffic areas instead of cut pieces. This helps to resist wear and also helps to better protect the subfloor from water.
Overcoming Obstructions
When dry-fitting the floor, it will become necessary to cut around at least the toilet drain, but you may end up cutting around several plumbing pipes. I had to bore holes for the plumbing for an antique ball-and-claw bathtub. The old adage of “measure twice, cut once” couldn’t apply more to this situation.

When cutting a tile for a pipe, I lay out the tile next to the space where it will go and draw off lines marking the location of the pipes. Next, I move the tile 90 degrees and mark a second set of lines. Where the two sets of lines intersect, I put a mark to indicate where the pipe will pass through the tile.

For the bathtub drain, I simply inscribe an outline of the drain hole on the tile and then use a wet saw with a diamond blade to cut from the outer edge of the tile up to that line. I then snap those pieces off with my tile snips.
I like to lay out a piece of tile that I am going to cut down next to the space where it will go and draw off lines marking the location of the pipes. Next, I move the tile ninety degrees and mark a second set of lines. Where the two sets intersect, that is, the North–South line and the East-West line, I put a mark to indicate where that pipe will pass through the tile. I follow up this template method with using a tape measure to double check the location of that mark with the actual location of the pipe. As a final precaution, I like to hold the scribed piece of tile up and then eyeball my markings to see if they look right.

A carbide tip drill bit is the best thing to use for small holes, and a 1-3/8 inch carbide tip drill bit is good for supply lines. Large holes, such as the toilet drain, often fall at an intersection of tiles which makes cutting the tile much easier. I simply inscribe an outline of the drain hole on the tile in the correct location, and then use my wet saw to cut from the outer edge of the tile up to that line. I then snap those pieces off with my tile snips. If, however, the toilet drain does occupy only one tile, the best way to do this is to mark off a circle equal to the size of the drain hole and then hold that piece of tile under the blade of your tile saw and lift it up into the blade to cut through the tile, staying within the radius of the circle that you have outlined. Repeat this step until you have perforated the entire radius of the circle and then carefully hit the center of that circle with your tile snips. This will break those pieces in the middle thereby opening up the center of the circle, allowing you to then maneuver around the interior circumference with the tile snips to remove the remaining pieces.

A carbide tip bit is the best way to drill small holes in tile, and a 1-3/8″ carbide tip drill bit is good for larger holes for supply lines.
After all of the tiles have been dry fit into place, stand back and look down the empty grout lines to make sure they look straight and even. The next step is to take up the pieces of tile in some order that you have predetermined, remembering to work your way out of the room and not into a corner. I like to have my pieces stacked so that I can start with the pieces of tile on the top of the stacks and then work down the stack. This means that the first piece that you picked up is on the bottom of the stack and the last piece that you picked up is on the top.

After all of the tiles have been dry-fit into place, stand back and look down the empty grout lines to make sure they look straight and even.
Application, Installation
Ceramic tile can be applied with old fashioned mortar or more modern pre-mixed mortars. I prefer the new pre-mixed version because it remains workable for a longer period of time before drying out. Regardless of whichever kind you choose, the mortar is applied with a notched trowel. Spread the mortar out with the smooth side first and then run the notched edge over it to make ridges and valleys in the wet mud. This greatly increases the bonding capabilities of the mortar. Do not apply it to large sections at one time. Instead, work in three or four foot sections depending on how long your arms are and how acrobatic you might be.

I prefer the new pre-mixed mortar because it remains workable for a longer period of time before drying out.
As the tile is laid, make sure to use plastic grout spacers to keep them even. These are a must. They come in two different sizes, 1/4 inch and 1/2 inch. It is personal preference which one you use.
Once the tile has been mudded into place, stay off of it for at least three days and let the mortar completely harden. When the mortar is dry you will need to remove the plastic grout spacers. I normally use a small, flat blade screwdriver for this job. Be sure to save the spacers to reuse on another tile project.

Use a rubber mallet to set the tiles into the mortar bed.
Grout the Joints
The final step is to grout the floor. Be careful to purchase a grout that is designed for use on ceramic tile, and keep it moist and mixed during the application process. I like to use a paint mixer attachment for my cordless drill to keep it mixed up. You will find that it is necessary to add a little bit of water as you go along to keep it moist.

Apply the grout in 3′ or 4′ foot square sections at a time, pushing it into the grout lines with a rubber float.
As with the mortar, apply the grout in three- or four-foot square sections at a time, pushing it into the grout lines with a rubber float. Then scrape the excess off the face of the tile. Before moving on to the next section, take a large, wet sponge and wipe the face of each tile, being careful not to run over the grout lines too much. One or two passes over the lines is good to help smooth them out and make them look even, but any more will just smear unwanted grout onto the face of the tile.
Once the entire floor has been grouted I always wipe down the face of all of the tiles with a wet sponge one or two more times, making sure to constantly ring out the sponge. It is also important to make regular changes of water. Otherwise, the water in your rinse bucket will become so polluted with grout held in suspension that you will end up putting some back onto the tile with each rinse of the sponge.

Before moving on to the next section, use a large, wet sponge to wipe the face of each tile, removing the excess mortar before it dries.
The final step is to apply some type of silicone sealant to the grout lines after the grout has been allowed to dry for two or three days. This is to help protect it from getting stained or discolored.
With the floor complete, all that is left is to re-install the trim work that was originally removed during demolition. There is a good chance that the door casings will have to be trimmed off slightly because of the additional height that is caused by the addition of the backer-board, mortar and tile.
