

By Matt Weber
Using Soap and Water to Locate Leaks in your Tire; The Bubbles Never Lie.
There’s no such thing as a good time for a flat tire, but thankfully simple punctures can be repaired without much hassle. Tire repair kits are available at almost any gas station for a modest price and include the basic tools and materials to get the job done.
For a tire to be repairable, the damage must be in the form of a puncture, not a tear. Plus, the puncture must be located on the tread of the tire rather than the sidewall, which is too thin to hold the rubber plug. Beyond those few requirements, plugging a tire is simple job, but locating the source of the leak can be tricky.
When a small puncture falls within the tread of the tire, it can hide in the grooves and ridges the tire uses to grip the road. A slow leak probably indicates a tiny hole, which can easily hide in the shadows of the tread. First step in repair is to find the leak, and here’s a tip on how to do it.
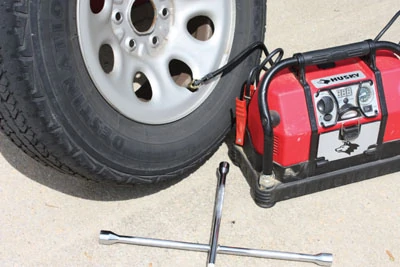
To locate the puncture, use an air compressor to fill the tire with air. Once the tire is pressurized, remove it from the vehicle, securing the vehicle on a jack or jack stands with the parking brake on. Mix up some dish detergent and water to create a sudsy liquid. Use a soft-bristle brush to mop the suds over the surface of the tire tread. The pressurized air within the tire should escape from the puncture. As it does, the air will create bubbles in the soapy liquid. Look for a blossom of bubbles on the tire surface to pinpoint your leak.
If the offending object—a broken nail, etc.—is still stuck in the tire, pull it out with needle-nose pliers.
The best tire-plug kits come with a T-handle reaming tool, similar to a small rat-tail file.
Use it to ream the edges of the leaking hole, which promotes better adhesion of the rubber tire plug. If the kit doesn’t include a reamer, use the tip of the plug-insertion tool to ream the hole.
Pull a rubber plug halfway through the eye of the insertion tool and coat it with rubber cement to lubricate the plug. With a twisting motion, push the insertion tool into the puncture, so most of the plug is inside the tire, with a solid mass of rubber material on the outside to seal the hole from both sides. Quickly pull the insertion tool out of the tire to finish installing the plug.
Refill the tire with air and check the repair with the soapy water to make sure the tire is no longer leaking. If the repair leaks, repeat the process with another plug.
STEP-BY-STEP


