We love pergolas. We love designing them. We love building them. We love how they make the backyard not just a place you go to grill or hang out, but a place you want to share with friends and family, whether it’s a backyard bash or a quiet evening.
Design—How it feels
It all starts with design. One thing about this simple structure of posts, girders, rafters and purlins is that the look and feel of the design possibilities are nearly limitless. But you still need to do it “right” or you can be left with a puny little thing nobody uses, or a colossus that darkens the door to the backyard.
Start with questions. How will it be used most of the time? How many people will it need to accommodate? Is it a place to cook out or hang out? Or both? And how far into the backyard should it live? You can make an outpost at the end of the back forty, say, near a creek or other landscape feature. Or, like this one, it can be an extension of the patio nestled near the house.
The pergola’s width and depth affect its height. Location in the yard affects entry points, and all those things affect the size of the materials needed to make it all work. And if you’re dealing with a landscape that slopes, that’s another consideration.
The key is to make the pergola’s height, width and depth balance with each other and the materials you select to build it.
As a rule of thumb we consider the bottom of the girder our control point for height layout. Anything lower than 80 inches (the height of a typical doorway) will make people feel they have to duck their heads to get in. Sounds weird, but it’s true. We often end up with heights around 9 feet to the bottom of the girder, which makes the space accommodating and cozy—but also grand and soaring without looking stupidly tall.
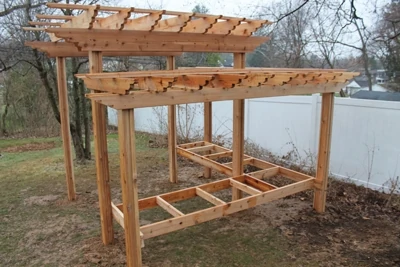
On this one, my wife decided to add a second, lower level to create a seating space that can also double as a table for plates, dishes, cups and food. And this space snuck in right under 80-inches at its lowest point, which works because it’s not a passage.
Materials. The point of going outside, for us anyway, is to be in nature and be surrounded by plants, birds, the dog, etc. so we chose to build this pergola with wood—Western Red Cedar. It’s great for ground-contact applications, it’s easy to maintain, and has the non-manufactured texture and patterns we enjoy. We can also add our own custom details, which we did on the one-of-a-kind rafter tails.
And we selected cedar big enough to carry the look and load of the structure. There’s no building code for pergolas, so it’s usually up to you what to use. I will say this, 12 feet is much too long a span—both for the boards and the eye—for a 2×6. I’ve seen them sag over the years. When you’re talking this much span, 2×8 and 2×10 need to be on your list. Or, bump up to 4x stock to get the muscle you need.
Setbacks. If you’re building near a property line, which we did here, pull a permit. Check into the setbacks your jurisdiction requires. Not only will a pergola jammed against a fence look ridiculous in most cases, but if it bothers Mr. Nasty Neighbor, he can make you take it down. So be a good neighbor, and a smart one, and get the documentation in order. You can’t enjoy a cookout under the pergola you just threw into a dumpster.
Footings & Posts
Pergola’s can be pesky to lay out because you’re building them in open space. There’s usually no nearby reference point, such as a house, to measure from. Still, they have to be pretty dead-on square, or you’ll encounter a lot of problems when you install the rafters.
Some contractors use strings to mark the layout of their projects. For me, using strings for anything other than snapping lines can lead to disaster. Strings require a lot of work and easily get in the way when building.
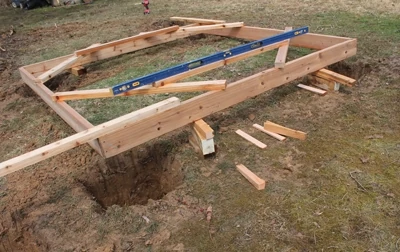
Instead of using strings, we build a box. It’s not just easier, it’s vastly easier. Carpenter-jargon for this method is “using a full-size template”. We build the inside dimensions of the box to the outside dimensions of the post locations. In other words, the posts fit inside the box.
Quick note for those who’ve never built a pergola before: The girders and rafters cantilever past the posts. A number of factors go into figuring out what the best cantilever is, but we usually start with 16 inches. So, the over-all dimensions of the pergola are where the rafters end, but you build the box to where the posts go.
Framing lumber is best for constructing the box, 2×6 or 2×8. We usually make it out of the material we’re building with because we may need it later. If not, you can put together a planter or raised garden bed with it. We use 1x stock for diagonals across each corner. Then we install a cross-piece (the diagonals + the crosspiece look like an A). The cross-piece gives you something to grab when you move the box.
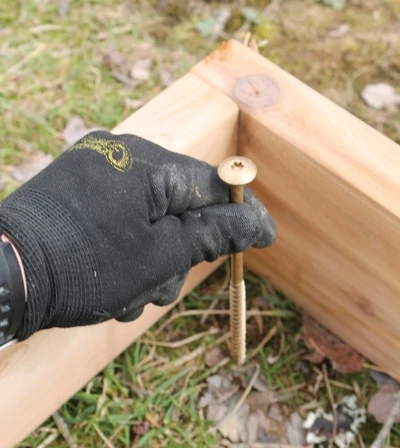
We fine-tune the template’s position as much as possible by making sure it’s parallel to any-thing straight within 10 feet or so, like a fence, deck or patio. We mark the centers of the holes—twice. First, we stick a screw through a piece of tape and stick the screw in the ground for each post. Then, we remove the template and spray-paint a 3-ft. wide X through the center of each post location, which helps keep us on target as we dig.
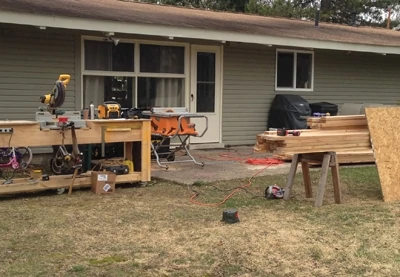
Digging is probably the least fun and the most work on any pergola project. We set our posts 36 inches below grade. Even in warmer climates, I don’t recommend setting them less than 24 inches so the ground holds them in place and resists everything from wicked wind to climbing kids.
A square posthole about 16×16 inches is easiest to dig and set the post into. I use a garden spade to score the outline of the hole and to cut the sod. A long-handled shovel is best to dig and remove the dirt. If you want this process to take longer and to destroy your shoulders and trapezius muscles, use a posthole digger. A digging bar is a brutal necessity. It’s killer for cutting roots, shaving the edges of the hole straight, and breaking up tough soil.
For this pergola, built next to a mature tree, I found two other tools immeasurably helpful: my reciprocating saw and Diablo carbide-tipped recip saw blades. Several roots were 8 or more inches thick and ran right through the center of the posthole. So once we dug around them a bit, we cut through them.
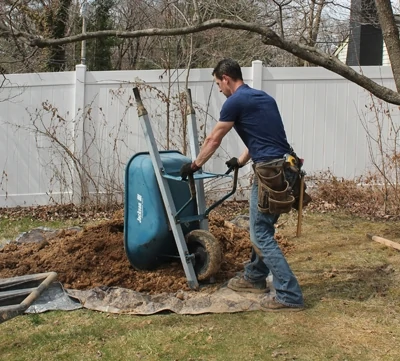
Also, plan how to handle the dirt. Digging postholes generate a lot of the stuff. Seven postholes, as we had here, creates a mini-mountain. We hauled ours a few feet away and placed it on a big tarp to relocate later.
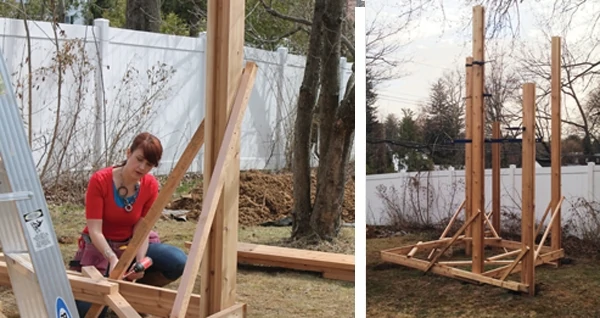
Posts. Whenever I can add a custom detail to a pergola I jump at the chance. For this one, I customized the typical 6×6 post by making my own. I made an ‘I’ with two 2x6s sandwiching a 2×4. I screwed it all together so that there was always a 2×6 with no fasteners showing.
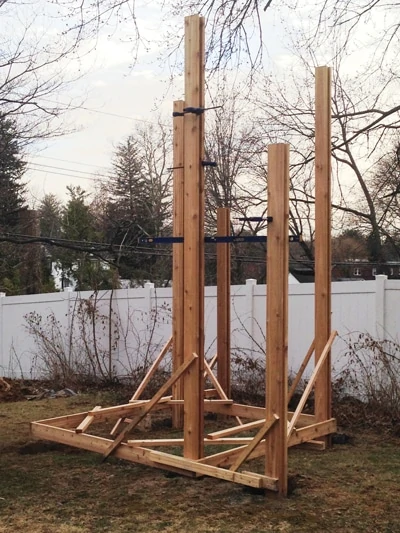
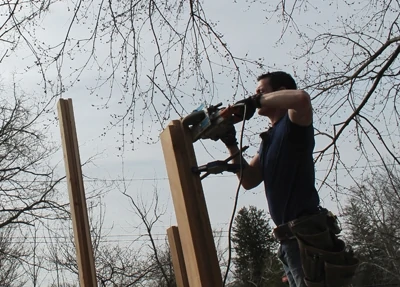
So, after I secure the posts and mark my level lines, I cut them in place, about 3/4-inch lower than the top of the girder. If you’re not comfortable with a circular saw on a ladder, you can measure off the template to your desired post height, then cut your post to length on the ground, then adjust its height by adding pea gravel to the bottom of the hole to raise your post into position. It’s a lot of work but eliminates the saw and ladder combo.
Each post requires two diagonal braces to hold it. Anything 5-feet long or so works.
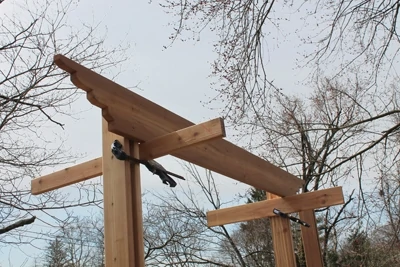
Setting posts. Put the template back on layout. If you have a slope, block it up level. Set a post in the corner of the template (be careful not to move the template; this can be tricky) then pivot it plumb using the template as a kind of fulcrum. Plumb the post on both sides, then bomb a few screws in the template to hold it still. Check again for plumb, then run diagonals down to the template. Repeat for all posts. Set the post face with no fasteners showing where you want it. I usually face it outward.

Concrete. I don’t care what they show on TV or even print on the bag, dumping dry concrete mix into a hole and waiting for groundwater to activate it is ridiculous. I use fast-setting concrete and mix it in a wheelbarrow to the consistency of peanut butter. I plop that in the hole around the base of the post. The next day it’s boulder-hard and ready for backfill. As I backfill my posts, I use a sledgehammer or digging bar to tamp the dirt down every 6 inches or so. Tamp it; don’t smash it. You can break the concrete or move the posts (easier to do than you might think), but I do want to push the air out of the dirt so it holds the posts and fills the hole.
Girders, Rafters, Purlins
This is where the action is and the groundwork comes to life.

I cut one girder and screw it on layout. Bar clamps work well for holding the girder in place while fastening. I then stand back and take a look. More often than not, I tweak it up or down a few inches for the best balance. Once I love where it lives, I remove it to cut the posts level with the top.
Safety note: This is a tricky cut. If you try it, use a ladder that’s tall enough and obey the “this is not a step” rule. It takes two or more cuts to get through the post. Make sure you can handle the piece falling when you go through it. It’s best to have a helper.
Patterns and marking. I use the first girder as a pattern for cutting all the others. Same with the rafters. There’s a lot of cutting involved. I’ve seen dudes hunched over their worm-drives all day, but not me. I set up sawhorses or a table to keep the work, and me, out of the mud.
Next, I mark the backs and bottoms of all my pieces so I can put them on layout and fasten quickly during installation.
For girders, simple 16-in. on-center layout rarely works. I usually do what I call ‘halving layout.’ I start by locating the center of the girder, then I cut the spaces left and right of center in half, then cut that space in half again, marking rafter locations accordingly.
Assembly. Girders are first. I set screws top-left and bottom-right about 2 inches from the edge of the board. Structural screws like the RSS screws from GRK Fasteners are awesome for this.
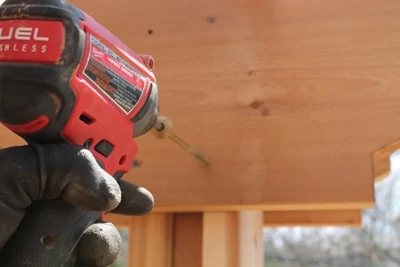
We’ve also had excellent, long-term success with using structural screws connecting pergola rafters to post.
The rafters go on top of the girders. Some people, for reasons I can’t comprehend, notch the rafters over the girder. If you were building on a dead-level slab and cutting all the pieces in a woodworking shop, sure. Maybe. But for real life, posts are always out of plumb a bit. It’s imperceptible until you’re trying to snug a notch over it and it doesn’t fit.
I toe-nail rafters instead. Gun nails work well in cedar. To use screws (which also work great) pre-drill and countersink pilot holes before fastening.
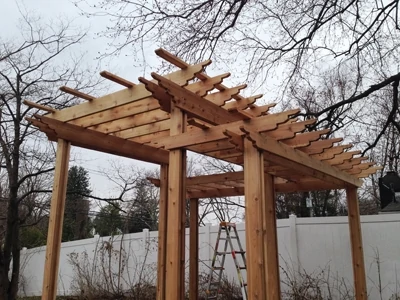
The final layer is the purlins. Set perpendicular to the rafters, they lock everything in place while adding shadow lines and depth to the structure.
The Floor and more
Grass is perfectly suitable for a pergola floor. It’s cool and comfortable. You could just as easily build a platform deck (using the template as your band joists) for a floor. You can do that now or add it later. Either way, both approaches blend with life outside where cooking out and hanging out is what it’s all about.
Thirsty?
Editor’s Note: Mark & Theresa Clement co-host the MyFixitUpLife show and are the design/build team for Food Network’s Save My Bakery.


